In this project, I am trying to do something that has never been done
before in a Lexus LS400. This page is being constantly updated
perhaps daily. This page is my documentation of Project LS400T
progress diary.
I will try to give as much details as possible so you can duplicate this
project in your shop or at home. This project will be homemade with
very few things are being send out. If you are interested making
your Lexus SC400/Soarer or Lexus LS400/Celsior go fast, stay tuned.
I hope you can join me with this daring journey. Wish me luck and
please feel free to contact our generous sponsors. Without them,
this project would not be possible. I thank you all. If
you are interested being a sponsor of this project, please
contact me.
Full Sponsors:
Turbo Performance Systems – Garrett GT40 Turbo &
Flanges
Anderson Audio & Performance
– 40 mm Tial Wastegate
High Temperature Silicone – Complete High
Temperature Hoses and T-Bolt Clamps
Spark Racing – Oil lines and
Fittings
Partial Sponsors:
Custom Coach of America –
Custom Intercooler
Split Second – FTC1 Piggyback ECU-Development,
Installation & Tuning.
B & E Customs – LM-1 Wide Band
Sensor/Reader
Private Donation:
1. Jason Elcan for
donating his LS400 exhaust manifolds – www.lextreme.com Member
2. Sniper for donating his spare 1UZFE engine- www.lextreme.com Member
Parts Still Need: Looking for Donation
1. Tial Wastegate Flanges and accompany pipes
2. Now just pretty much labor and towling.
General Overview:
Turbo: Garrett GT40 With Precision .68
Turbine Housing
Wastegate: 40 mm Tial
Wastegate
Blow Off Valve:
Tial 50mm Blow Off Valve (BOV)
Intercooler: Bar & Plate Custom Front Mount 36" x 11" x
3.5" with 3" in and outlet
Injectors: 390cc from Mitsubishi Eclipse 1990 Turbo Automatic high
impedance stock injectors-Ebay but
Cleaned & Balanced
Fuel: Walbro 255 L/H with
Aeromotive Adjustable Fuel
Pressure regulator
ECU: Split Second FTC1-Fuel
and Timing Control with laptop
Engine: Stock with
Cometic MLS Gaskets with 8.5:1 Compression Ratio and ARP
Studs
Drivetrain: Stock with modified
Lextreme Torque Converter
with stall speed at 2800 rpm
Manifold: Flanges are stock with custom log style with ceramic
coating both inside & outside.
Goal: 15 psi with 500-525 rwhp in mind.
Discussion:
Single Turbo Discussion Thread
Engine & Drivetrain:
+ Custom Ross 8.5:1 forged Pistons with Chrome Moly Rings
+ Custom forged steel rods
+ Federal Mongol Mains and rods bearings
+ ARP Rods Bolts
+ ARP Main Studs and Bolts
+ ARP Head Studs
+ Cometics Multi-Layer-Steel Gaskets
+ Supra Twin Turbo Valve Springs, Retainers and Locks
+ Custom Ported heads with complete 3 angle valve job
+ EGR Delete Kit
+ 175 amps Alternator
+ 1000 Cranking Amps Battery
+ Lextreme Performance Torque Converter
+ Blue Print and Balanced
Forced Induction:
+ Custom Single Turbo header with Hot Jet Coasting
+ 40 mm Tial External Wastegate with1 bar spring setting
+ Tial 50mm Blow Off Valve
+ Garrett GT40 with Precision .68 T04E Housing
+ Custom Made 3.5" x 11" x 27" intercooler
+ Custom Inlet pipes with T-Bolts Clamps
+ 3" Down pipe to two 2.25" exhaust pipe
Fuel & Ignition
+ 8-550 Mazda Rx7 Injectors
+ 255 High Volume Walbor Fuel Pump
+ Aeromotive Adjustable Fuel Pressure Regulator
+ Custom Return Fuel Line
+ Dual 6al MSD ignition units
+ NGK Iridium Spark Plugs
+ Nology Hotwires ignition wires
+ Split Second FTC1 Fuel and Timing Control
Brake and Suspension:
+ Supra Twin Turbo (MKIV) braking system conversion
+ Slotted and Drill Rotors
+ Strutmaster Air Suspension Conversion with 1.5" drop
+ Daizen front brushings
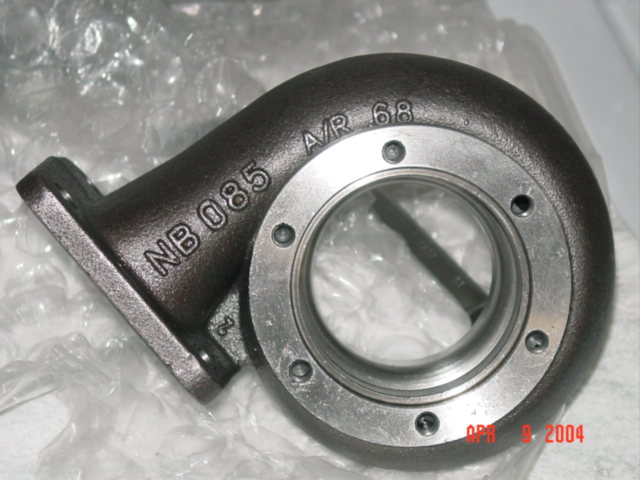
Garrett Turbo:
This is the best bang for the bucks turbo out there. Its free
spinning wheels and great prices are the attracting features. The
bearing spins between standard turbo bearing and ball bearing. I
show this turbo to my friend who owns a motorsports shop and he initially
thought it was a ball bearing. I told him its not ball bearing but
it spins like a ball bearing. I highly recommend this turbo to
anyone. With the money you save, you can use the money for something
else. Contact TPS for
pricings.
03-25-2004
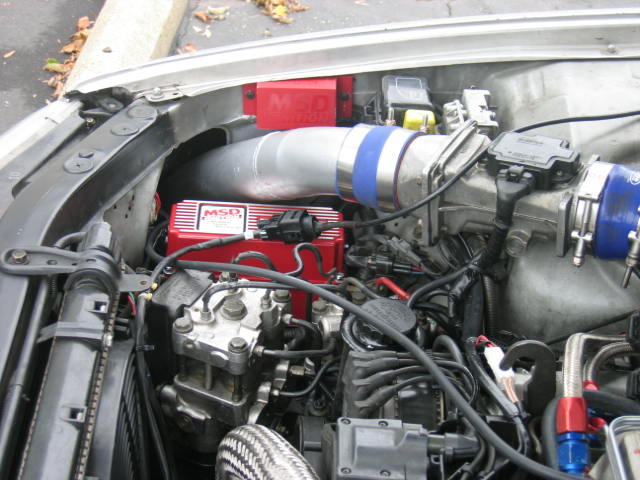
The first step is to replace the ugly intake to a one piece intake by
relocating the MAF to the fender area. This project will buildup in
the reverse process. Therefore to reduce down time. I took my
car to a local muffler shop and did some mandrel bend 3" aluminized steel
pipes. I also made a 3/8" female NPT for the ISC along with a
bracket for stability . Right now it looks very raw. However
with little grinding and coating will make this pipe stands out.
This intake pipe will be powder coated (silver) for stock look. Chrome is not
my taste. This is a completely one piece intake from the passenger
side fender/light housing to
the throttle body. With coating, this pipe will be very attractive. Here are some pictures of the intake pipe.
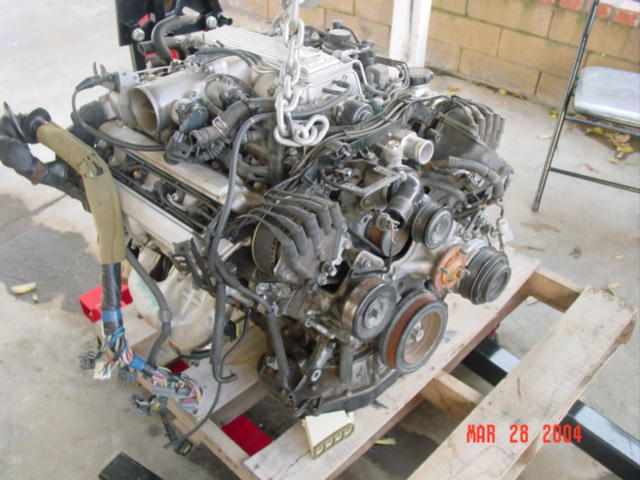
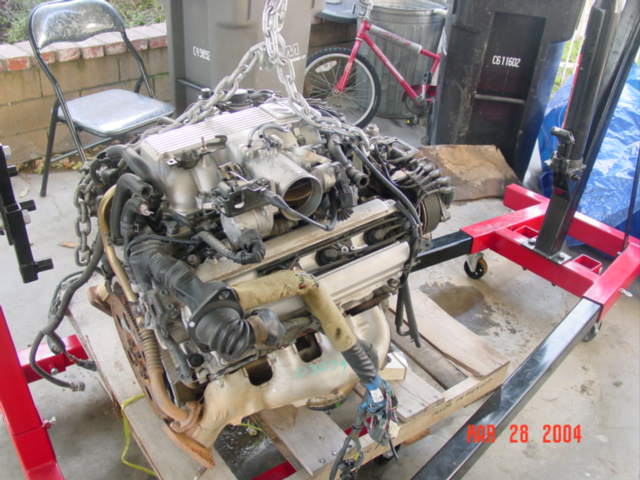
03-28-2004
Finally made a 1.5 hours drive to pick up Sniper’s spare engine.
This sucker is heavy too, it takes three strong young men to handle this baby
into
my SUV. Yes, another 1.5 hours drive back and luckily its was 8 am
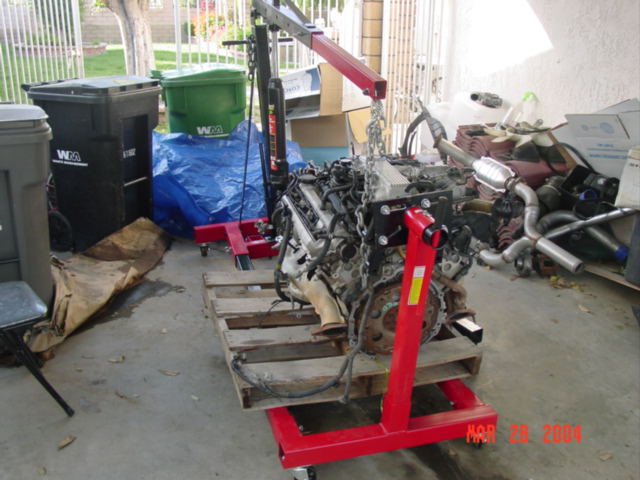
in morning. Now my engine is in my SUV and how am I going to take it
down? Friends? Well I went to a local auto part store and
they carry engine crane for $169. However, its not worth buying one
if I hardly use it. I called few equipment rentals and some do not
have it and some local rental sites are closed (Sunday). Luck would have it.
I drove around my neighborhood and look for garages with engine crane.
A street above my house had their garage opened and an engine crane was
calling for me. They are total strangers. I was dispread and I
knocked at their door to talked them into letting me borrow it for a day
or so. Man, today is my lucky day. What is the probability
this would happen? The below engine is from a1992 Lexus LS400 with
about 204,000 miles. Perfect for prototyping my single turbo
manifold. Thanks Sniper!
”
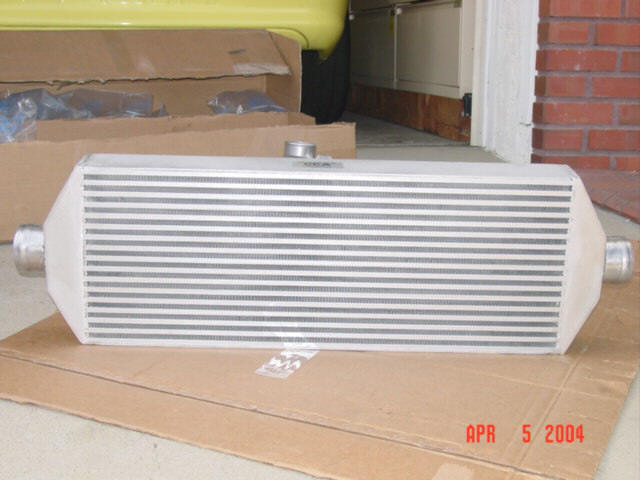
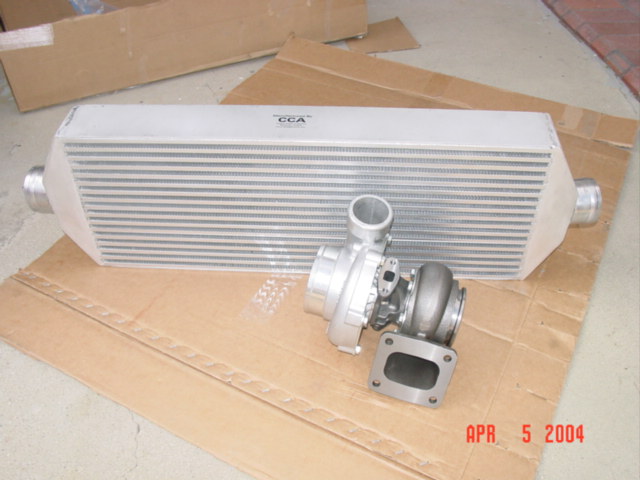
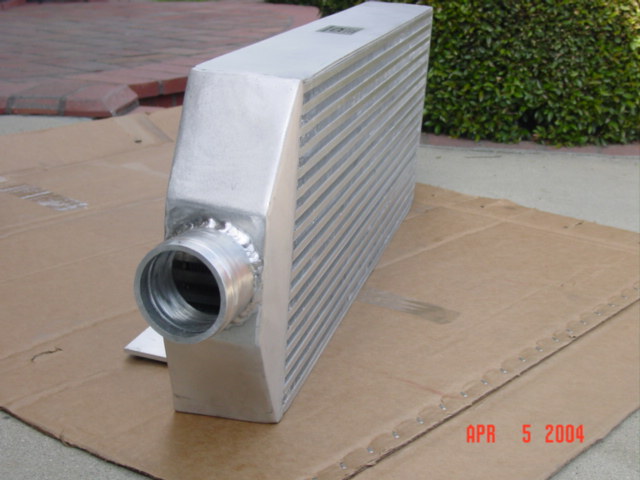
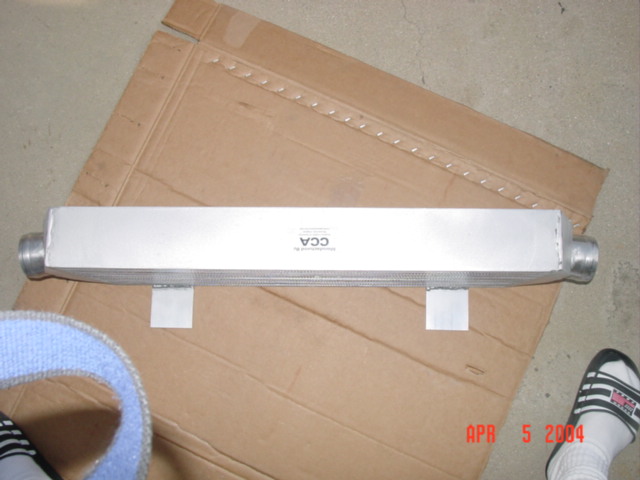
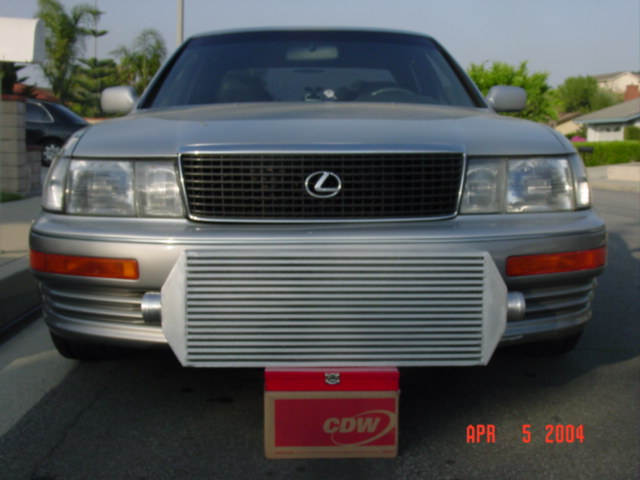
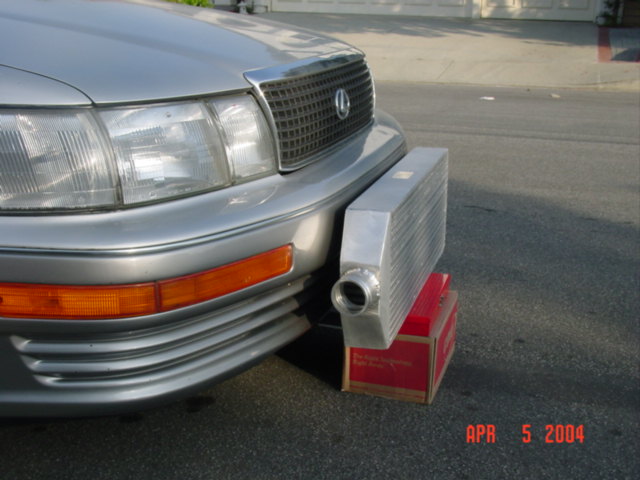
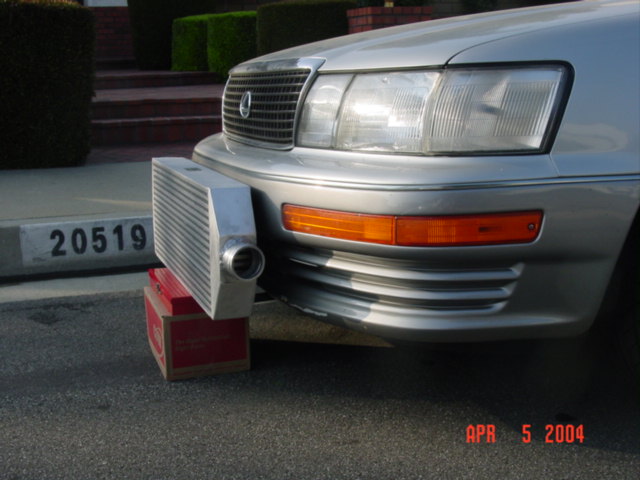
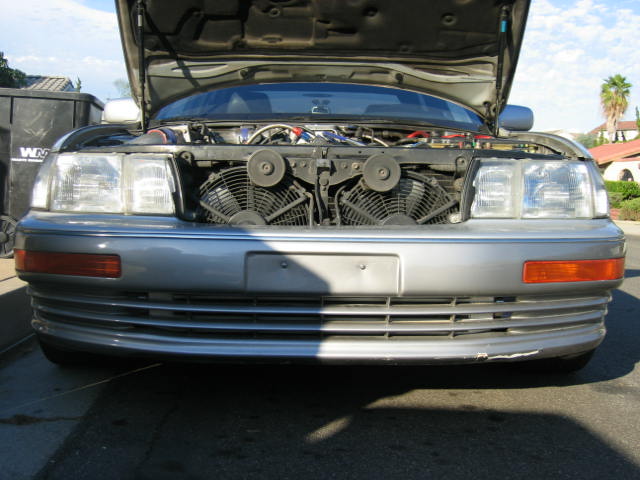
04-05-2004
While I was away for a business trip, my custom intercooler arrived.
When I got back from my trip, there were at least 10 box of parts from the
UPS. I was so excited. The first box I opened was the
intercooler. Like I stated its 11" x 36" x 3.5" with 3" in and
outlet along with few custom specs. Below are pictures of the
intercooler out of the car, mock fit in front of the car and after
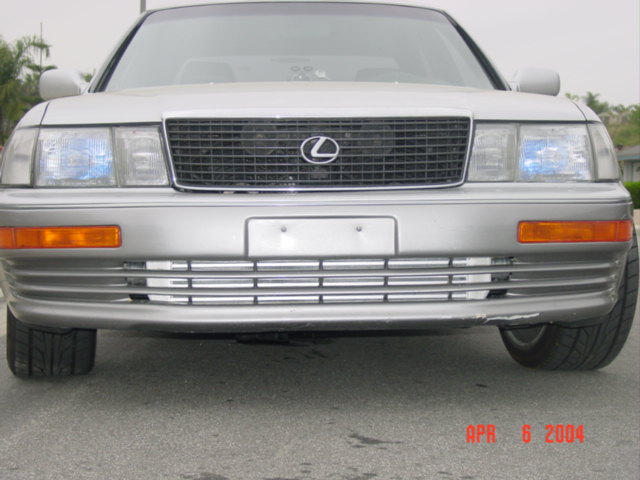
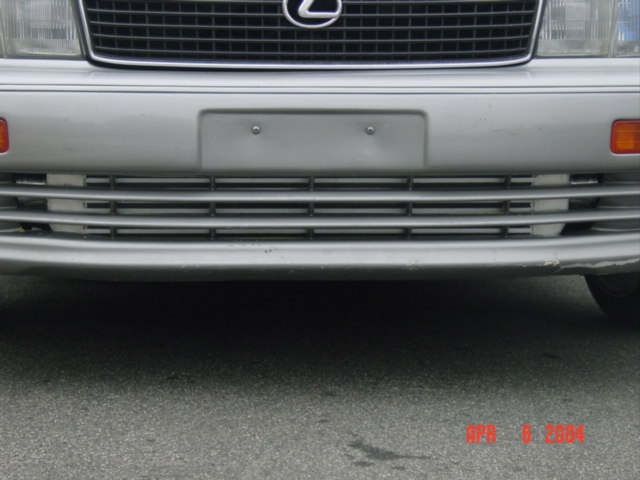
installation. I must say, its a perfect fit. About 50% of the
intercooler is hiding in the bumper cover. The intercooler looks
smaller, but actually, you are only seeing about 50% of it. Its
definitely a sleeper look with plenty of surface area for cooling the hot
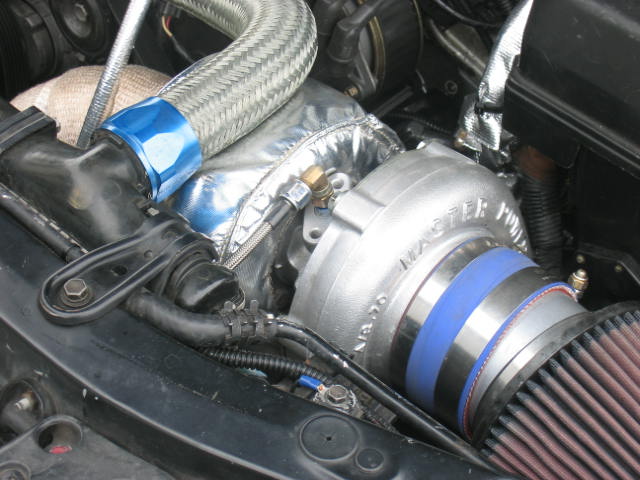
air from the T70. Speaking of the turbo. I met up with TPS in
Atlanta Georgia and pickup the turbo myself. Its beautiful. I
highly recommend this beauty. It has the same quality as Garrett and
half of the price. I mock fitted the turbo in my battery location.
Looking good already.

04-06-2004
Thanks to Tony N. (ACleanSC4) and his cousin Dr.. Mike. Finally
the Split Second ECU is in with N/A setting. This unit has lots of
potential and tunability. Thanks to Mark and the rest of the crew at
www.splitsec.com for a wonderful
job. This is an ecu worth of investing. Trust me! If you
are thinking about putting in a Apexi, don’t waste your money. Once
I get my turbo in and wide band oxygen sensor, then we can tune it for 15
psi. I just love the PC capability and control. Thanks Mark.
Read more about FTC1. With the new ecu,
my car runs very well in N/A form. I just can not image with boost.
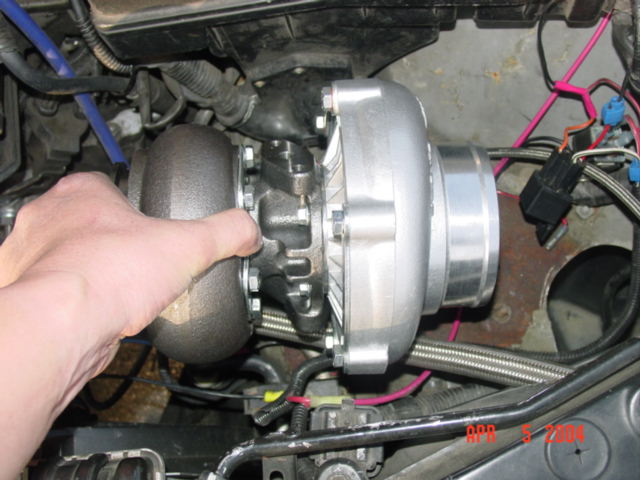
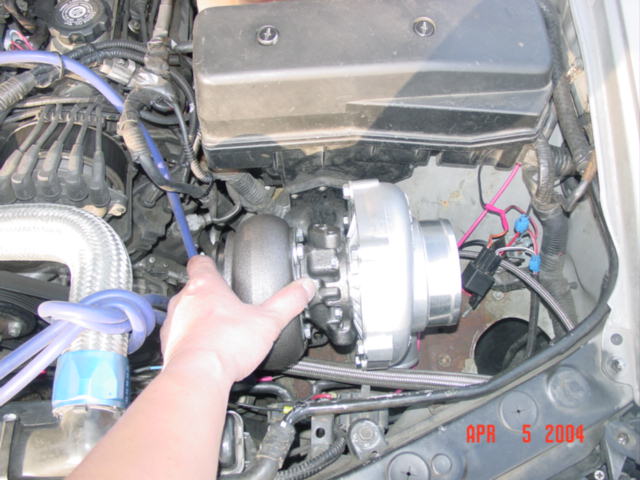
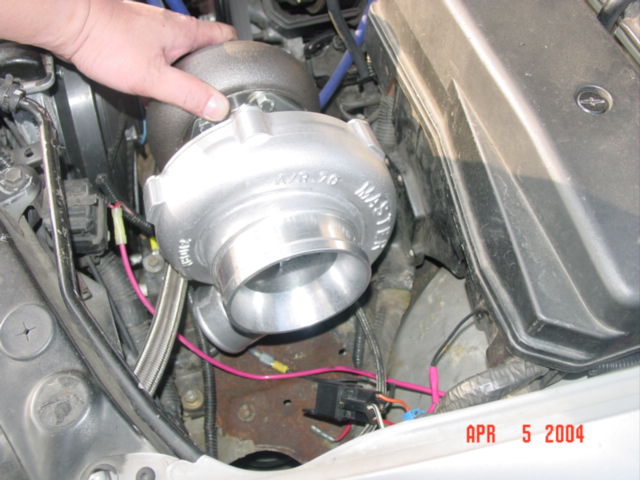
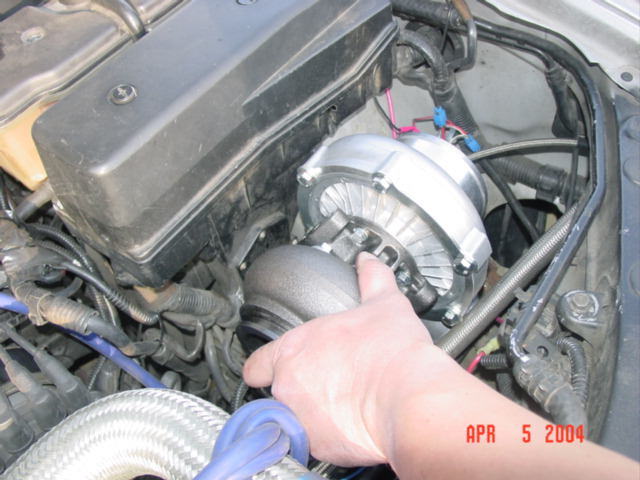
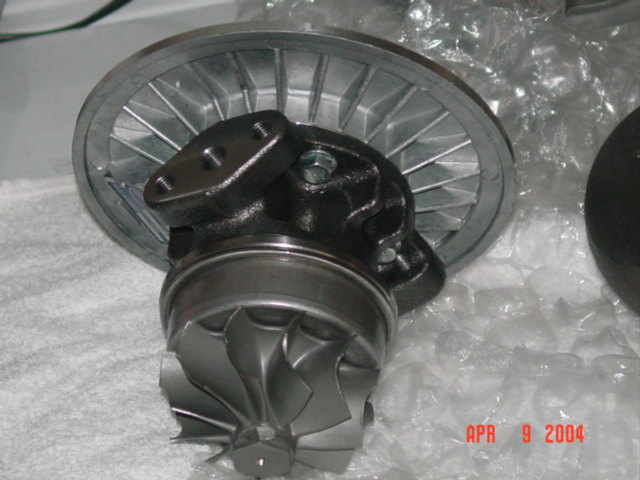
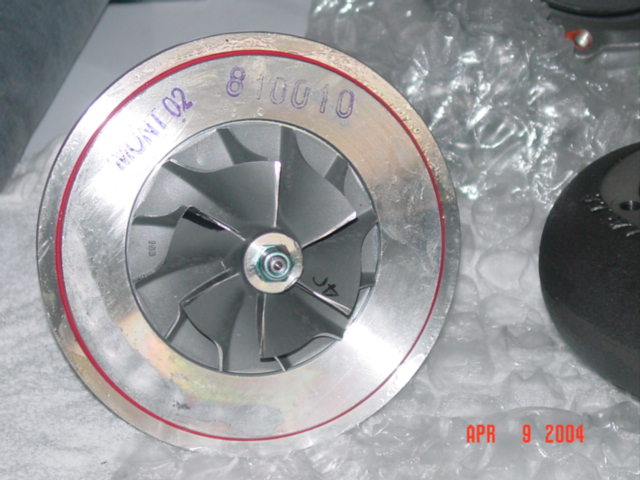
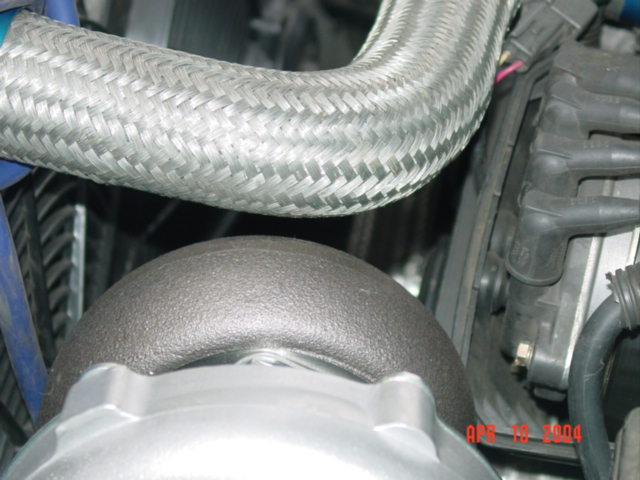
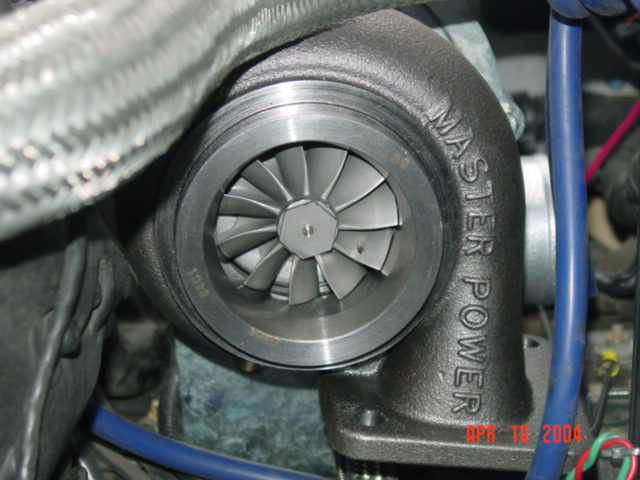
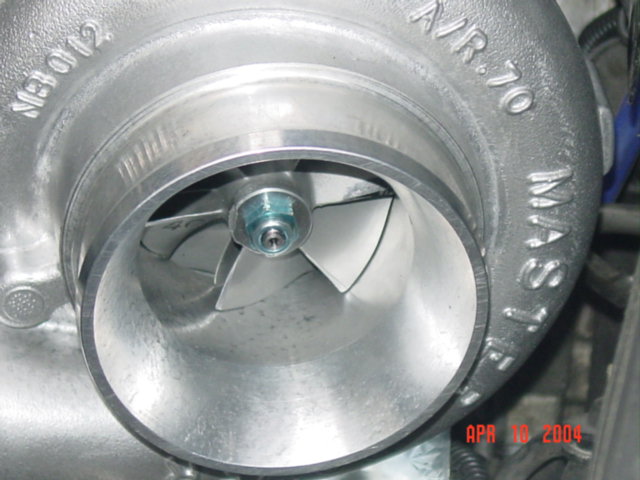
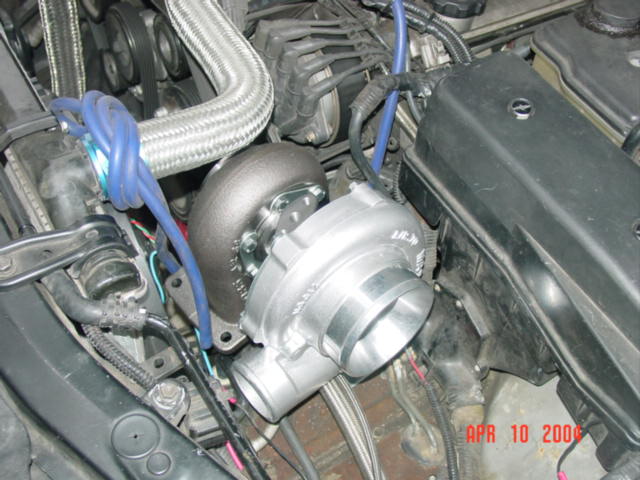
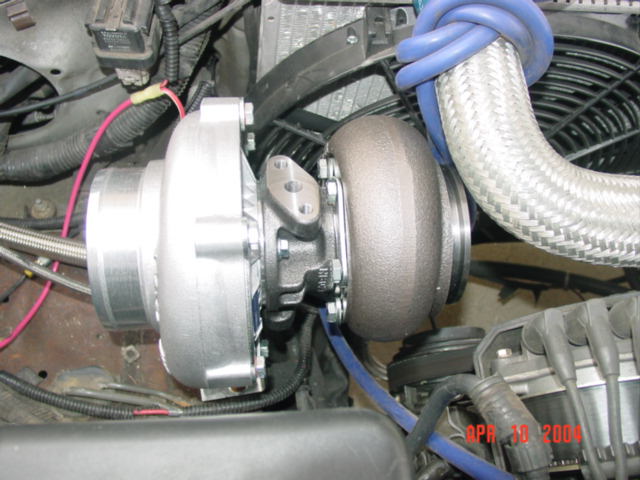
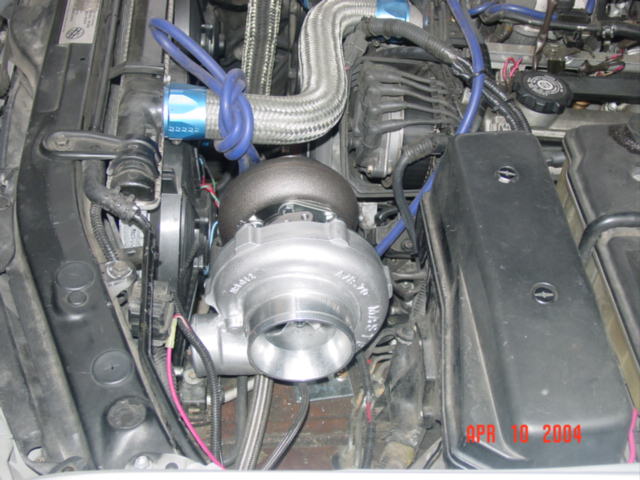
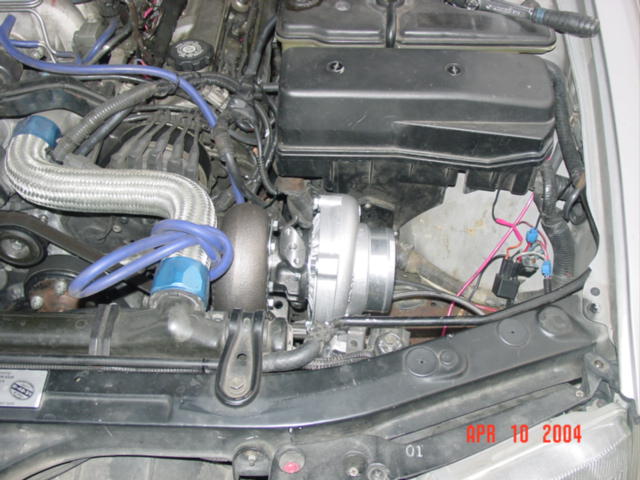
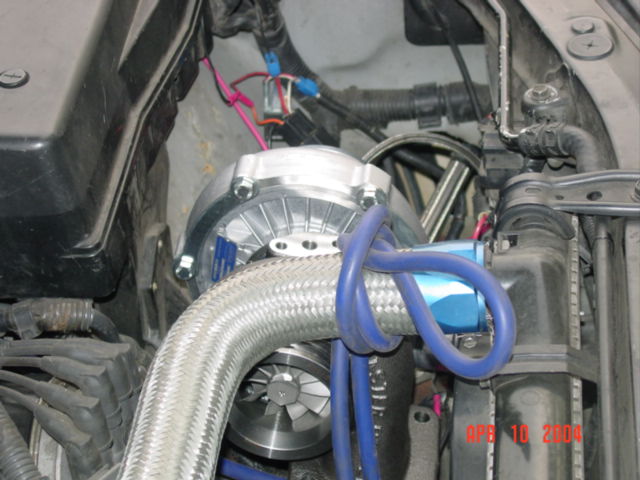
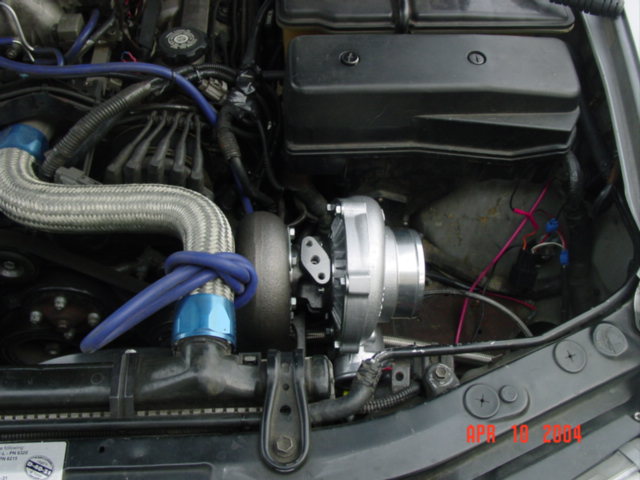
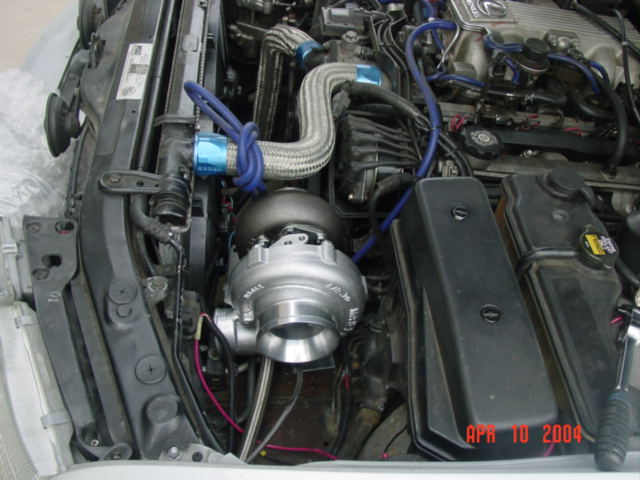
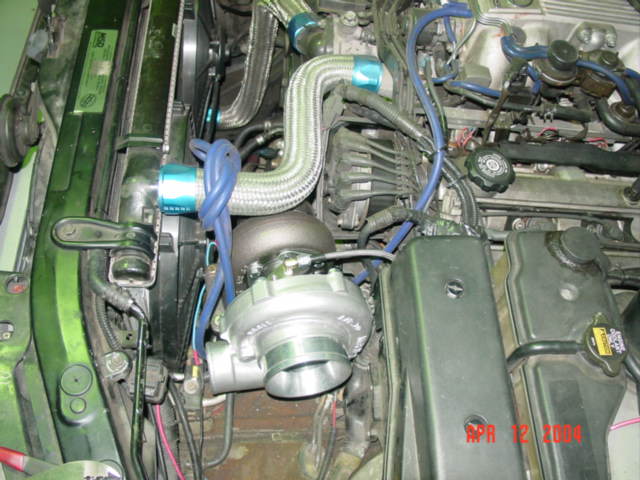
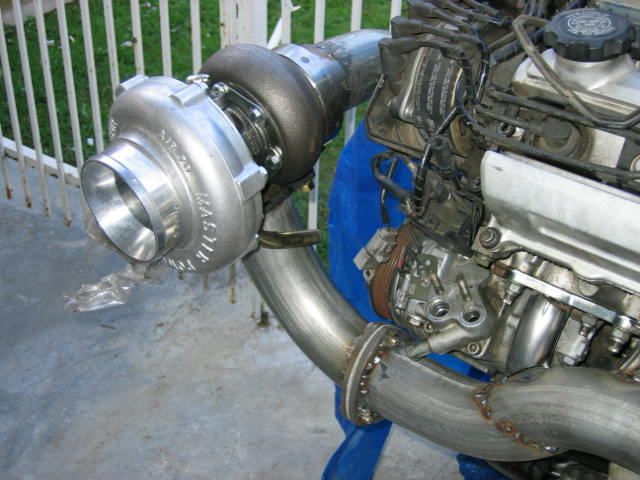
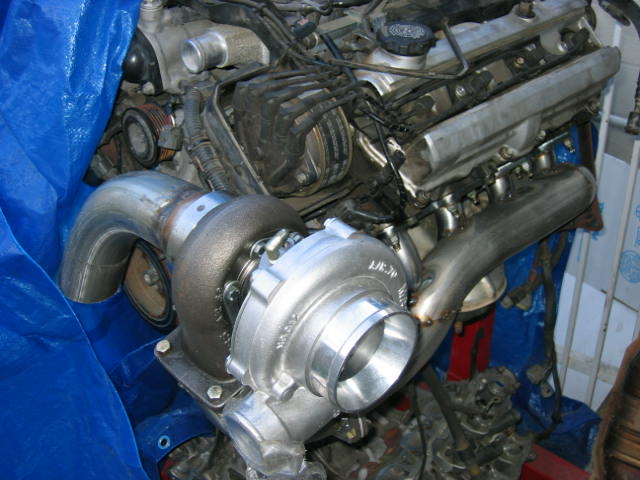
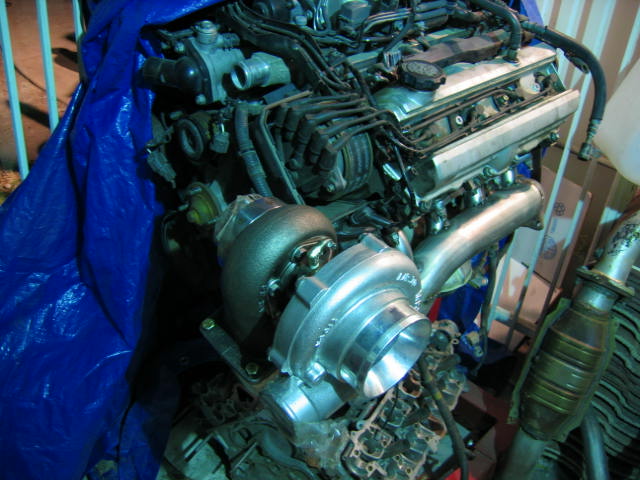
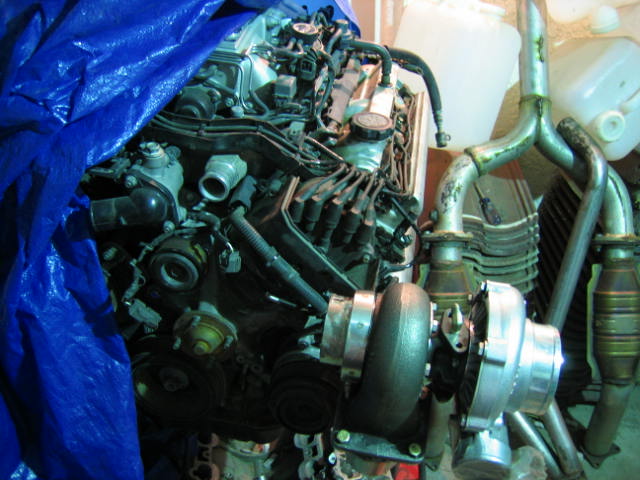
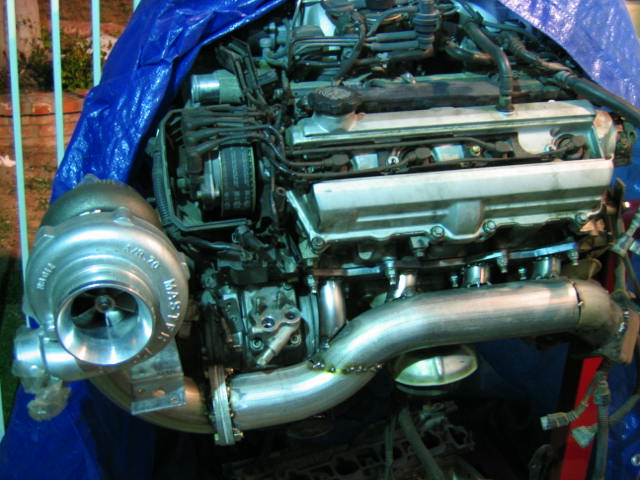
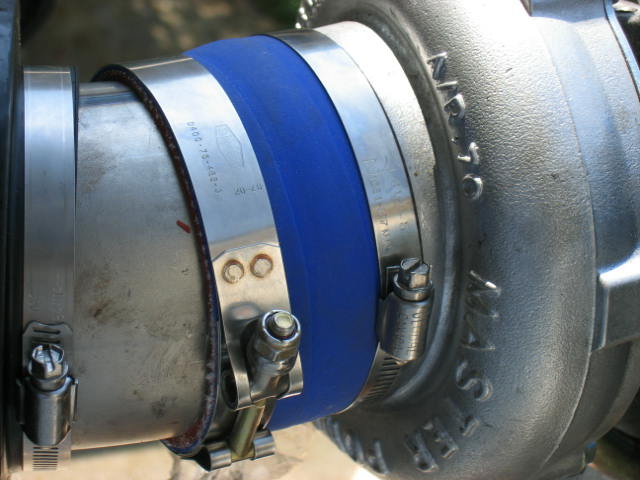
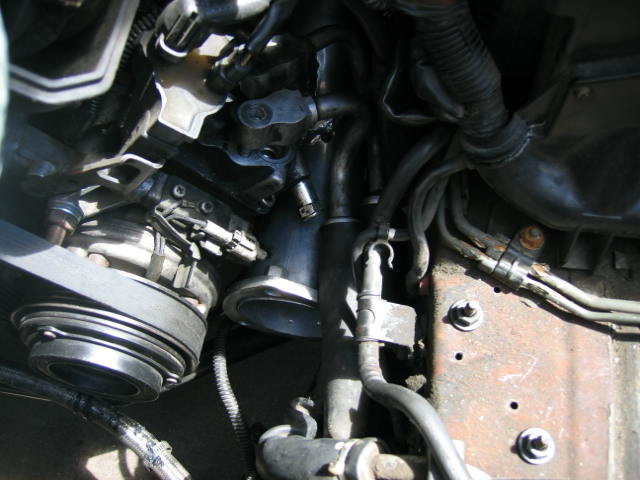
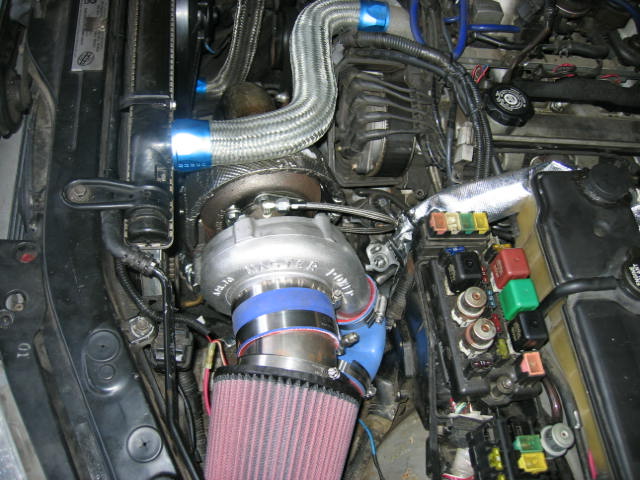
04-10-2004
In this project I try to reduce down time therefore the procedures are
reverse. Last night I dissembled the Master Power T70 Turbo and exam
its internals. All I can say is I am very impress with the quality
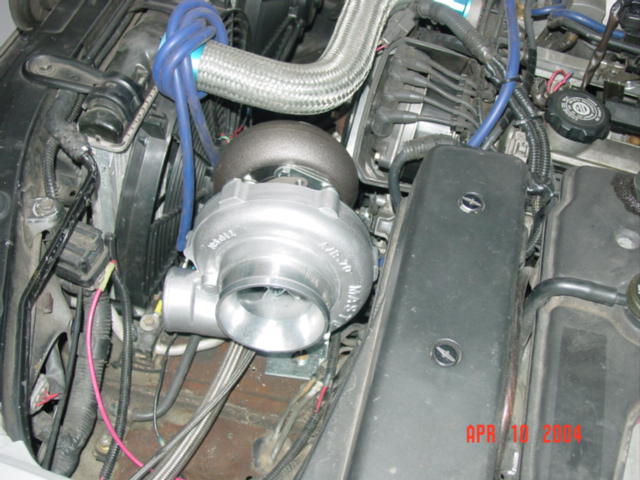
of craftsmanship and its the best bang for the buck. Earlier I made
a bracket to hold up the turbo in place so I can start making the
compressor intake pipes, air filter and outlet pipes to the intercooler.
The bracket will serve as an exact location where the turbo will seat.
Here are some pictures of the turbo internals and pictures of where the
turbo will be exactly located. The vision of having a single turbo
is coming along as plan. Currently, I am still waiting for the turbo
hoses and custom flanges for the exhaust manifold and outlet exhaust
adapter in both 3" and 2". I know exactly what you are thinking.
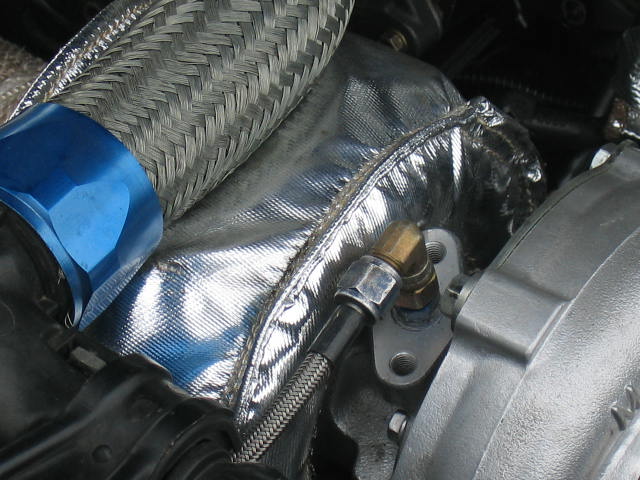
The heat will kill everything surrounding it. I will use thermo
carpet and wraps in the surrounding areas. I will do that once I have
everything in.

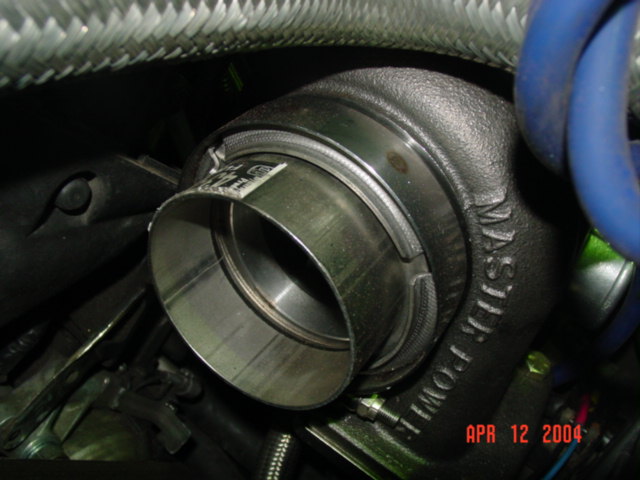
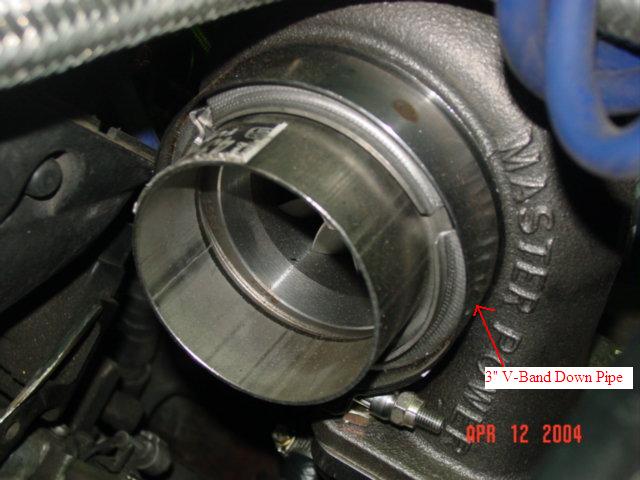
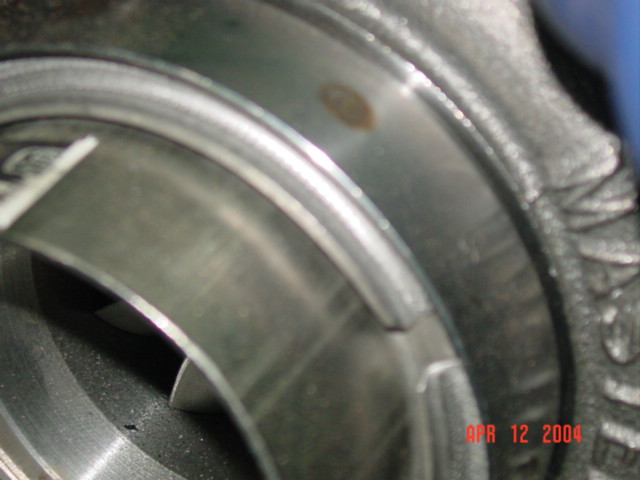
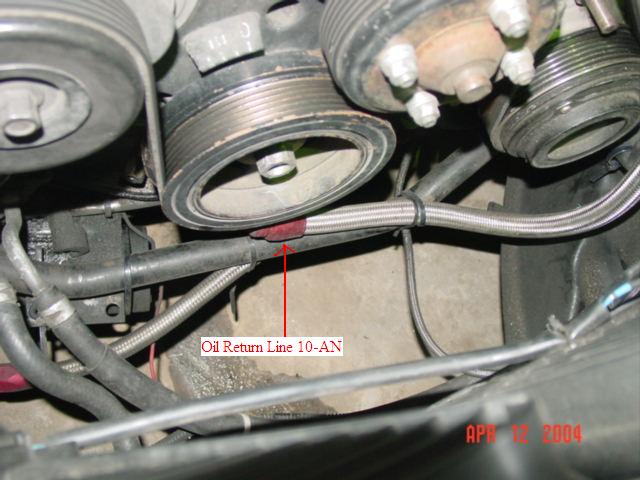
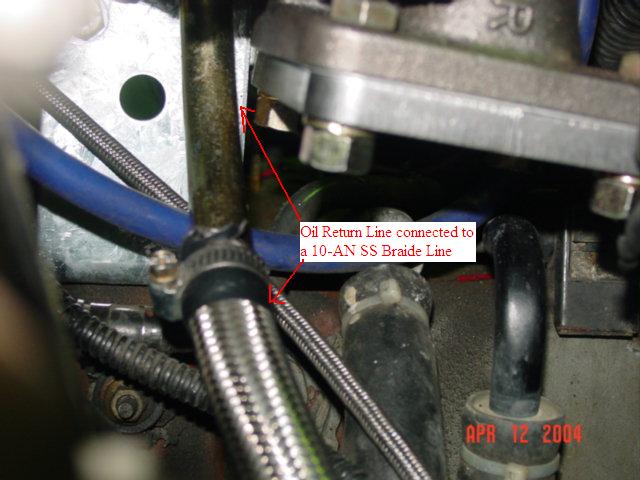
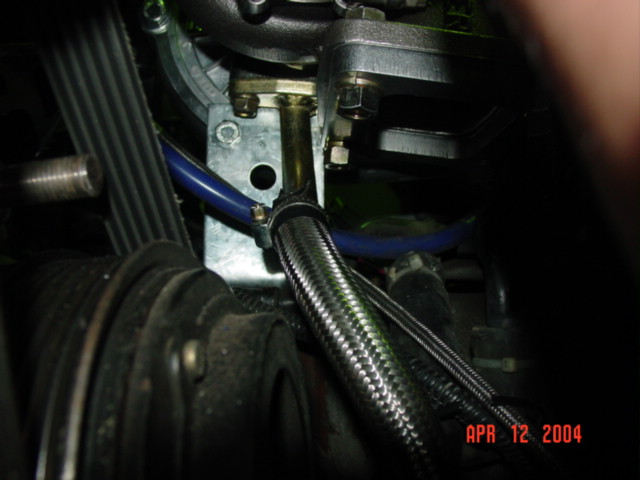
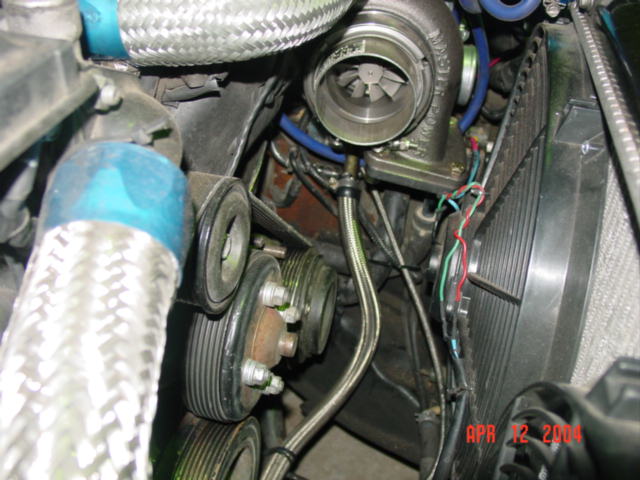
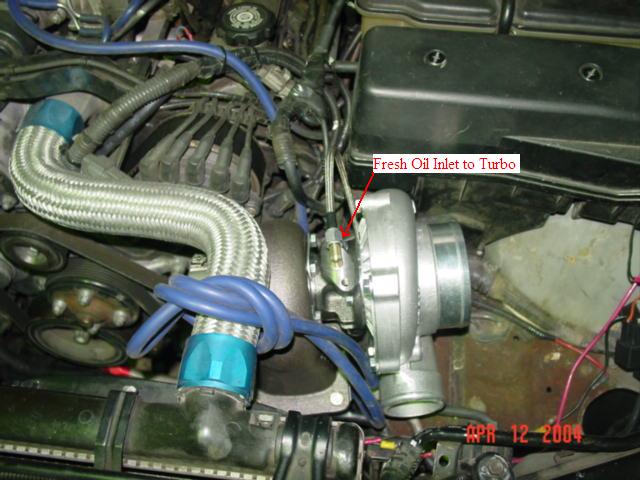
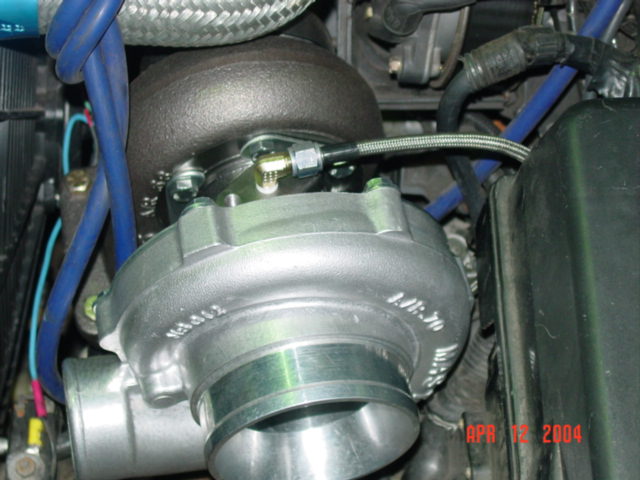
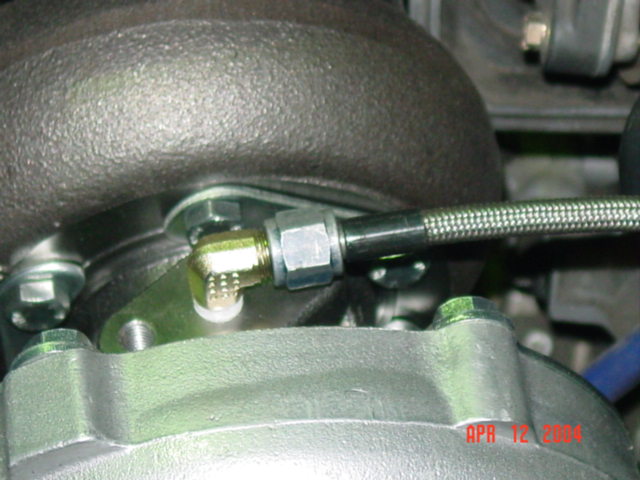
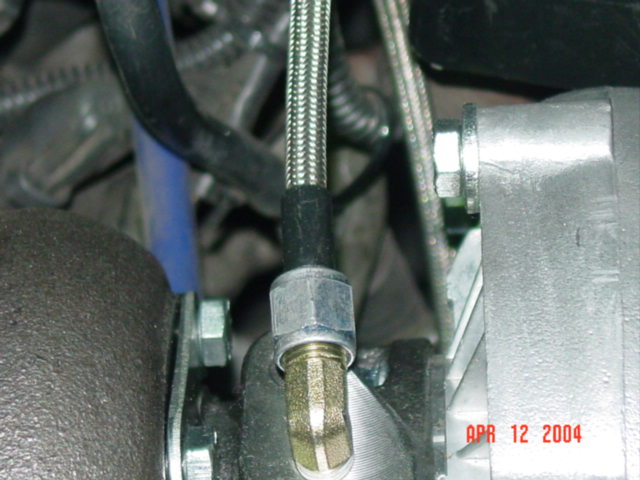
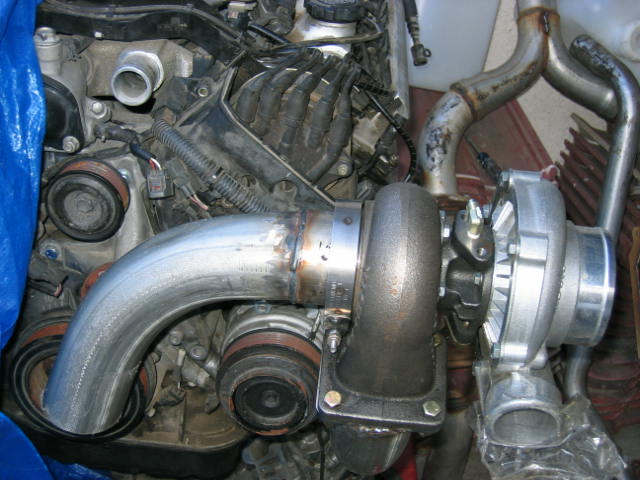
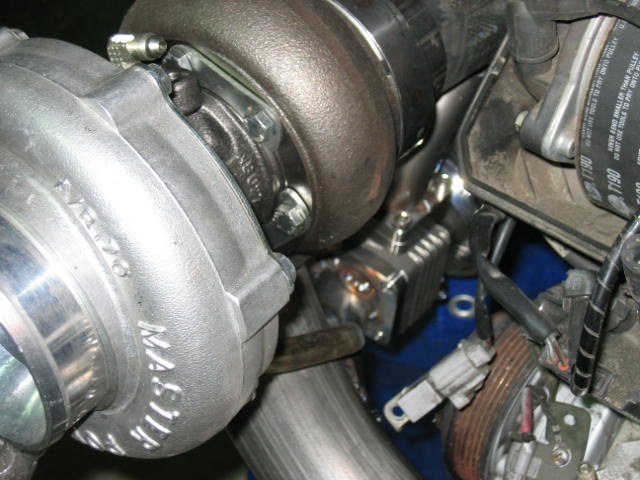
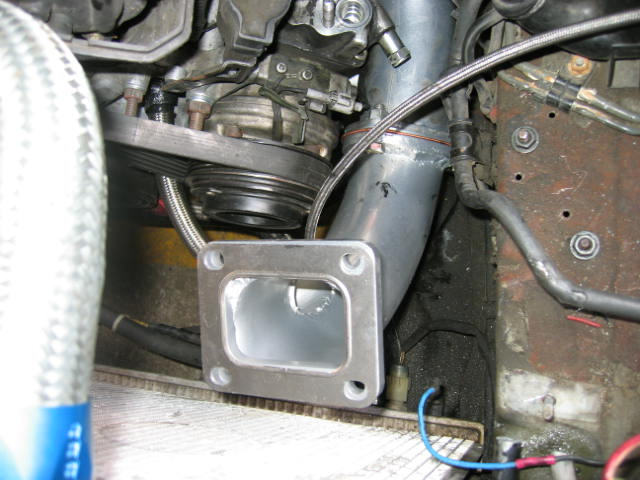
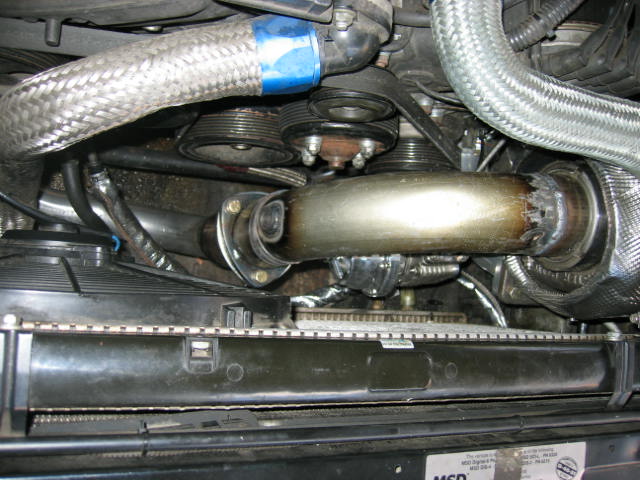
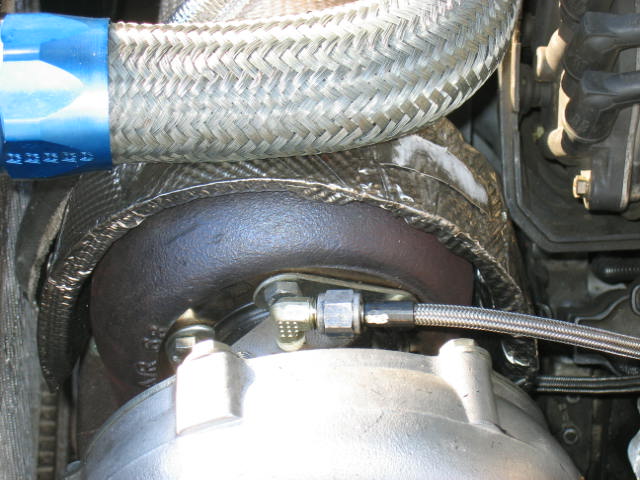
04-12-2004
Today we finished the oil lines both inlet and return. Oil inlet
is 4-AN and 10-AN return line. They are all stainless steel braided
line with Teflon coated internally. I also installed the T4 Flange along
with the V-Band down pipe adapter. I also used high temperature 3/8"
x 1.1/4" nuts and bolts for the turbine/T4 flange. The inlet oil
line is T-Off from the oil pressure sensor near the oil filter. The
oil return is tapped into the oil pickup pan with a 1/2" NPT and 10-AN
adapter. With 10-AN return oil line will eliminate oil return flow
problems. Here are some pictures of the progress. The
next step would be connecting the turbo compressor outlet to the
intercooler and attaching a 4" 90 degrees intake pipe along with a K&N
filter located in the fender.

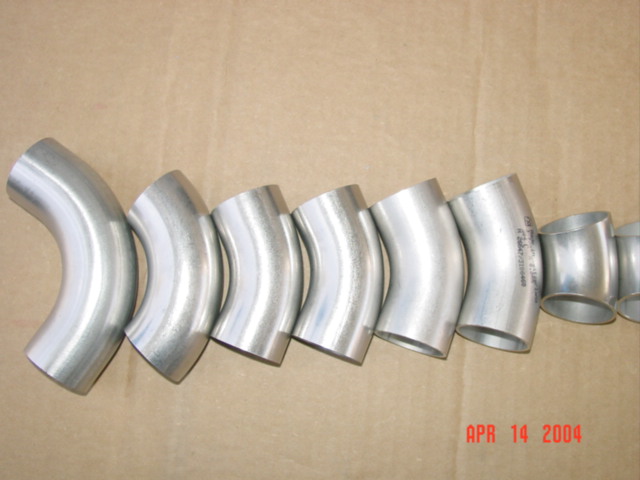
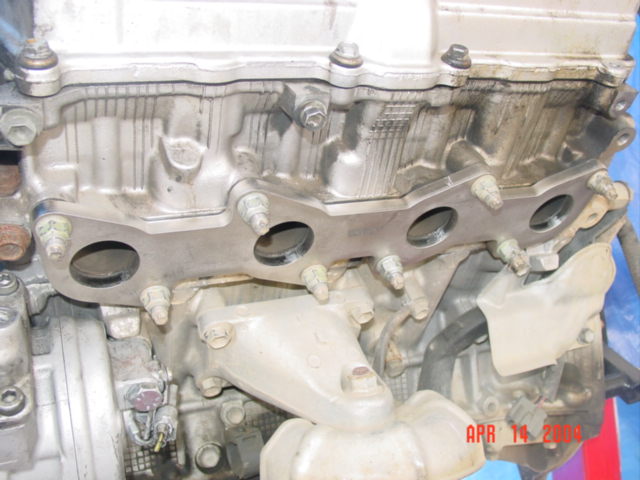
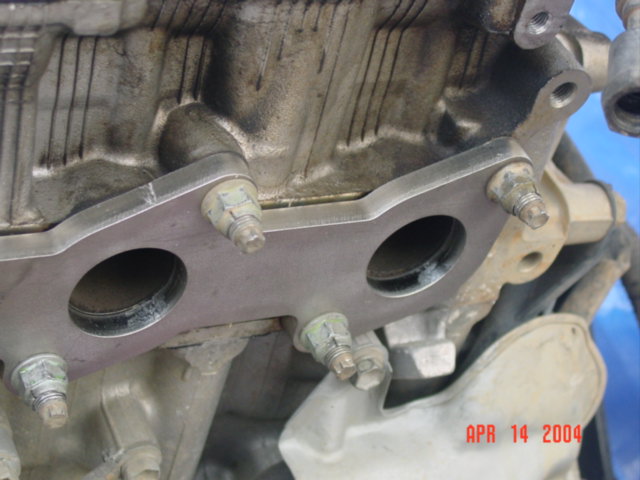
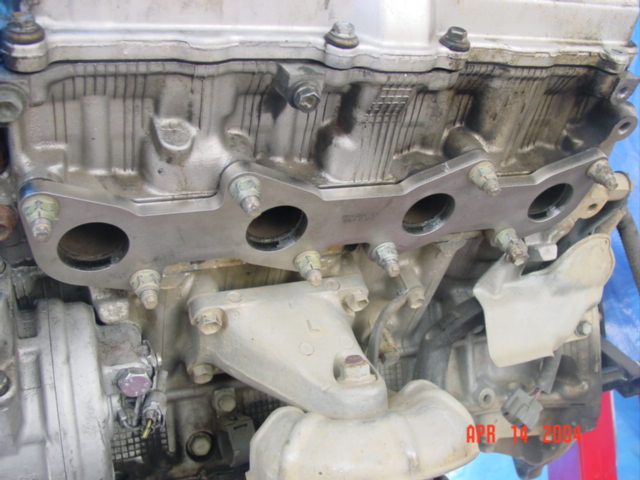
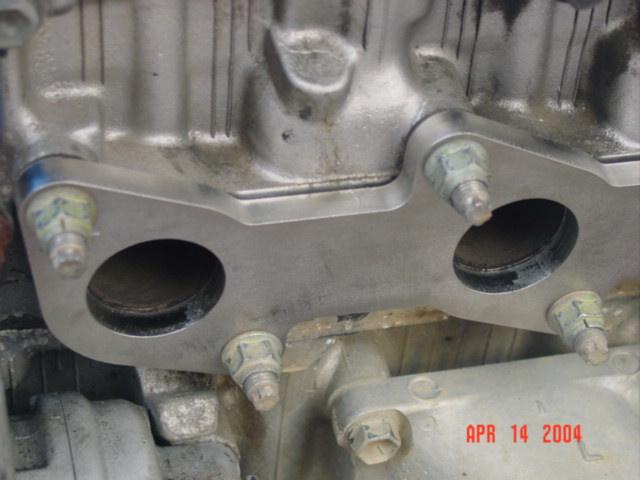
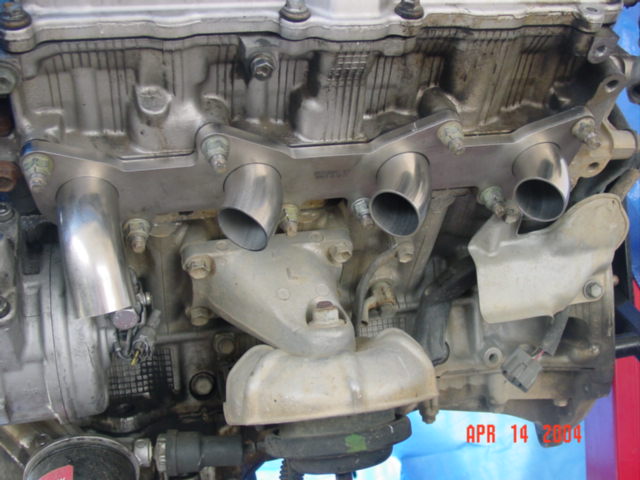
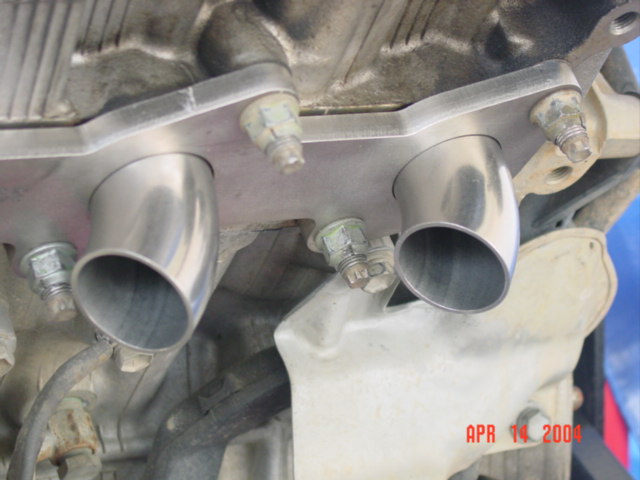
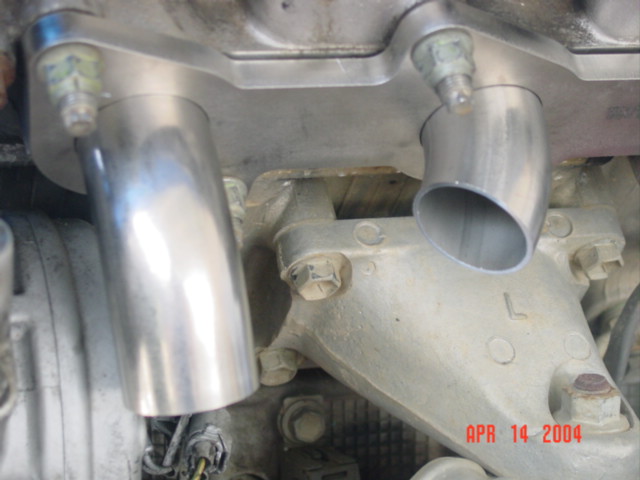
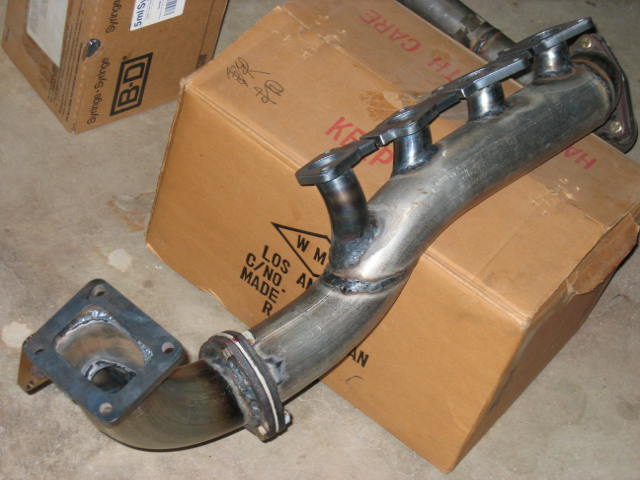
04-14-2004
Just received the Header Flanges from Carl C. They are laser cut
3/8" stainless steel and it fits perfectly. Thanks Carl! I
also lay down all the 1.5" stainless steel 45 and 90 tubes.
From short to long elbows. You also notice I mounted the flange into
the driver side header and I also mock fit the tubes in. Looking
real nice now.


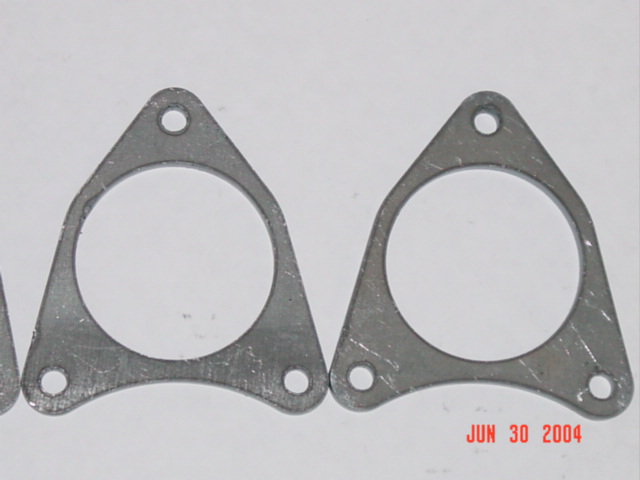
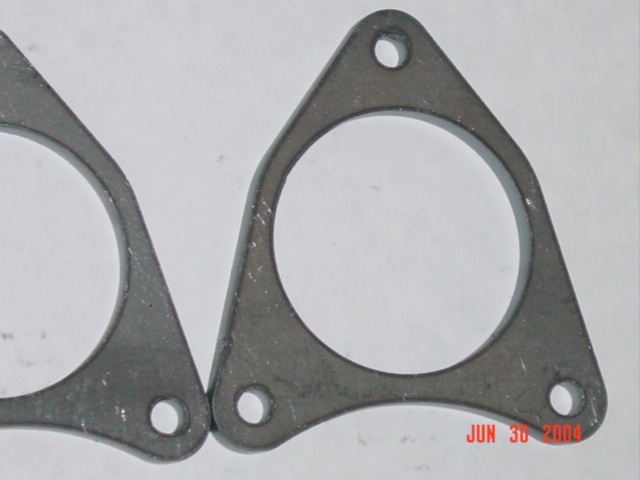
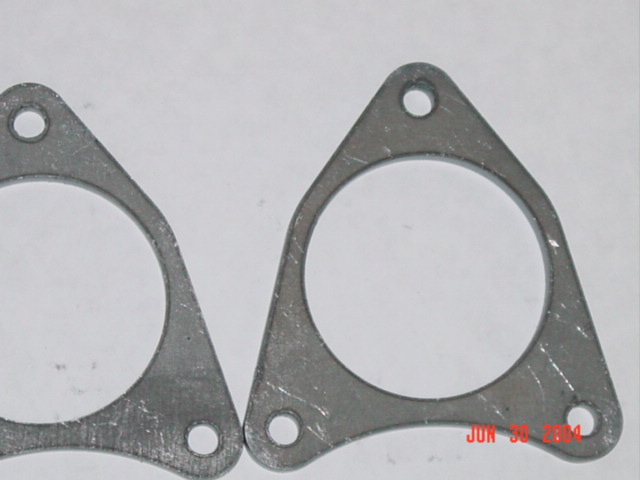
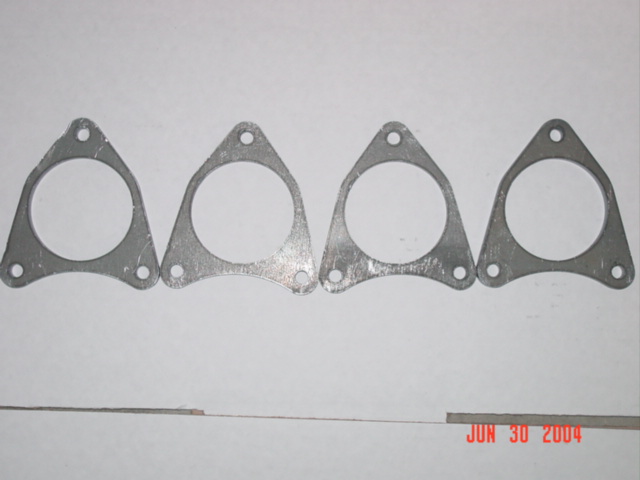
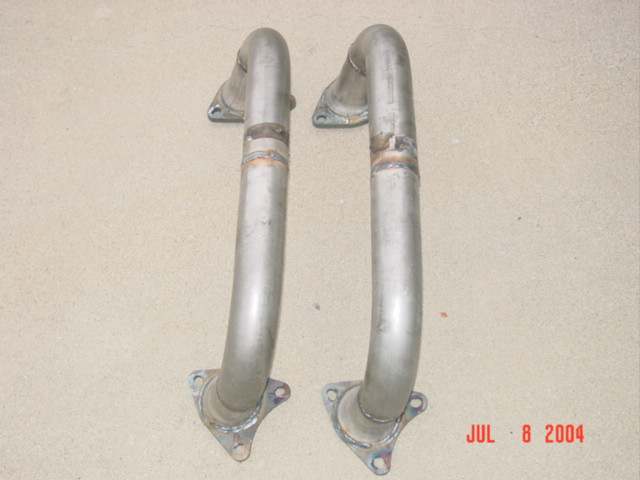
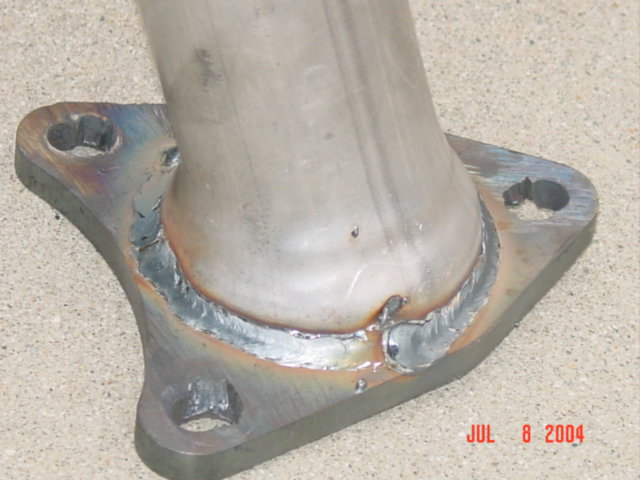
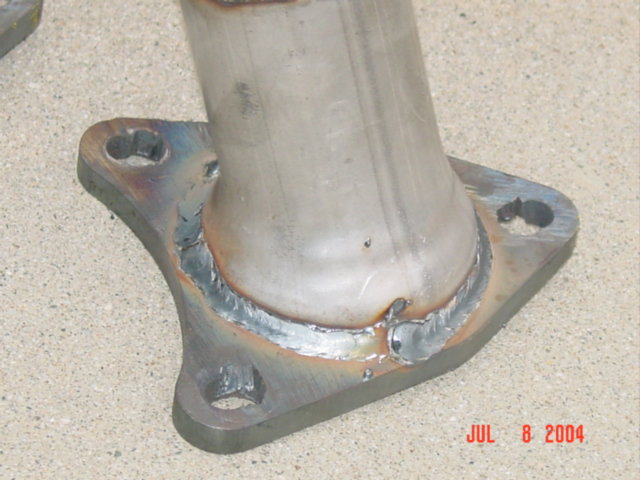
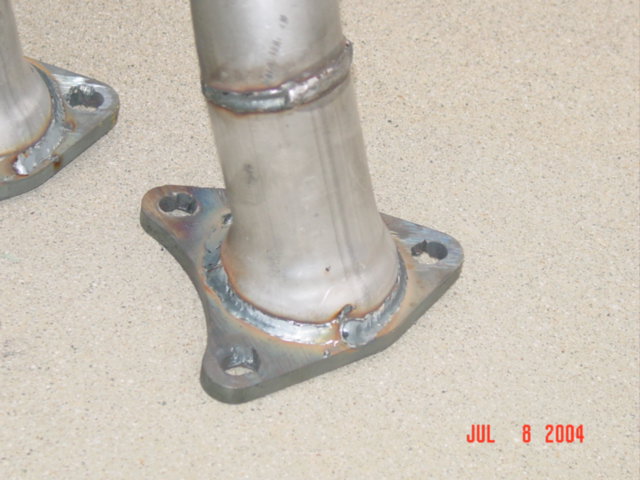
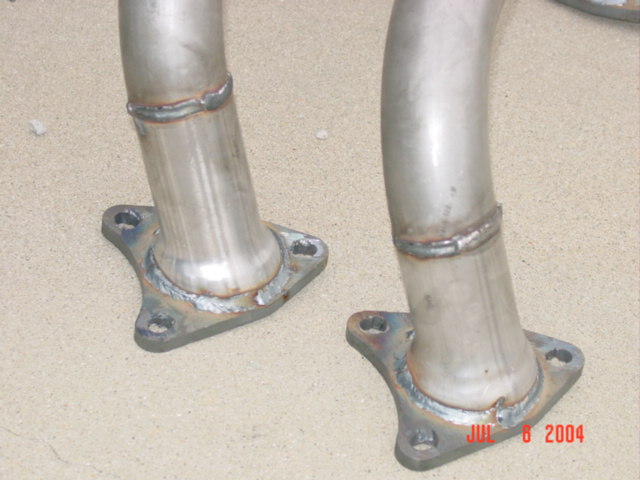
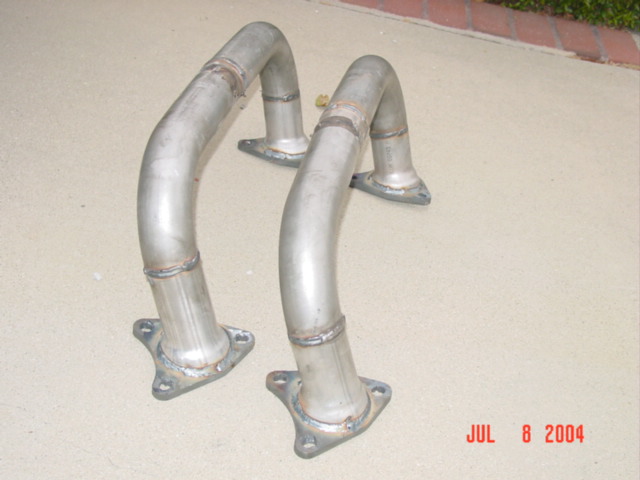
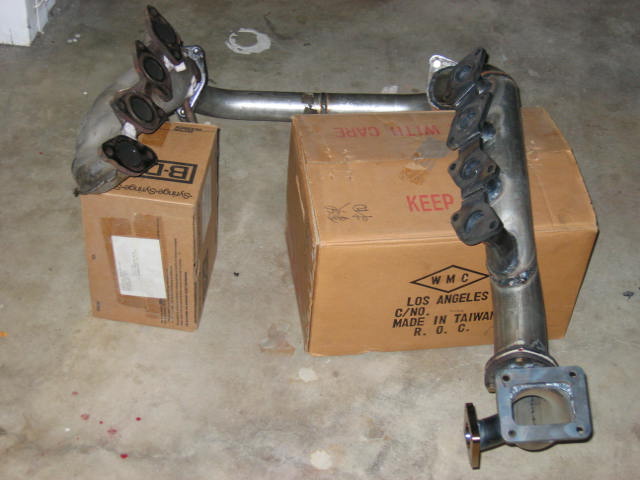
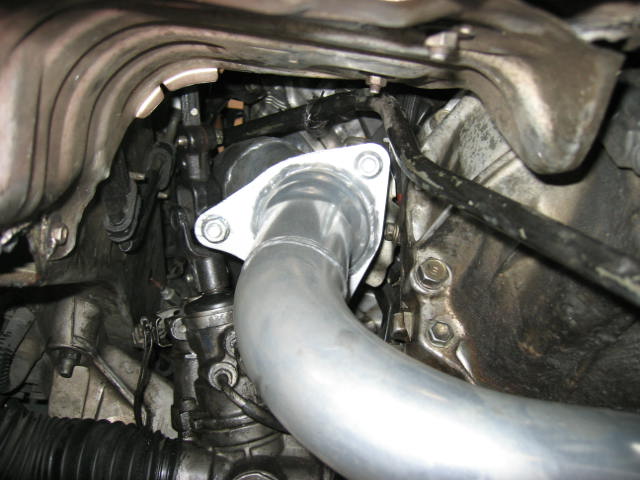
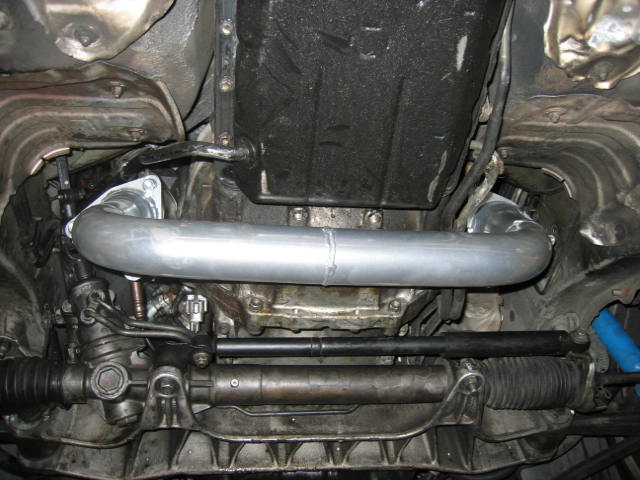
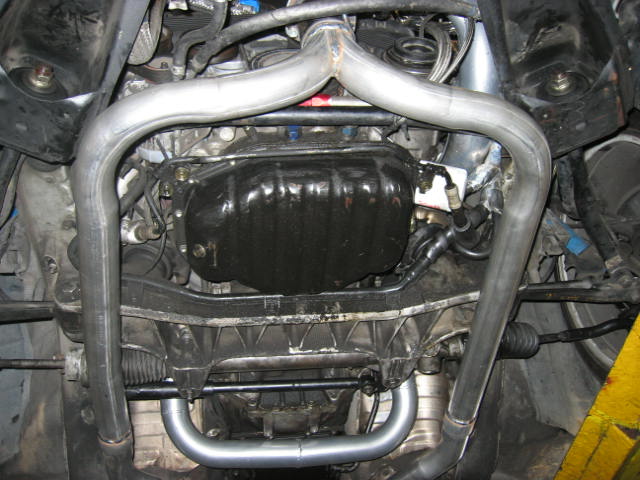
07-8-2004
Finally got my cats flanges after 3 months. They are 3/8" mild
steel laser cut. I also took my flanges to a local muffler shop to
make me a cross pipe for my single turbo. The cross pipe is made of
2.25" mandrel bend pipes. The cat flanges are 3" and the pipes were
expended slightly. Here are some pictures. These pipes will
get ceramic coating for heat containment and protection.
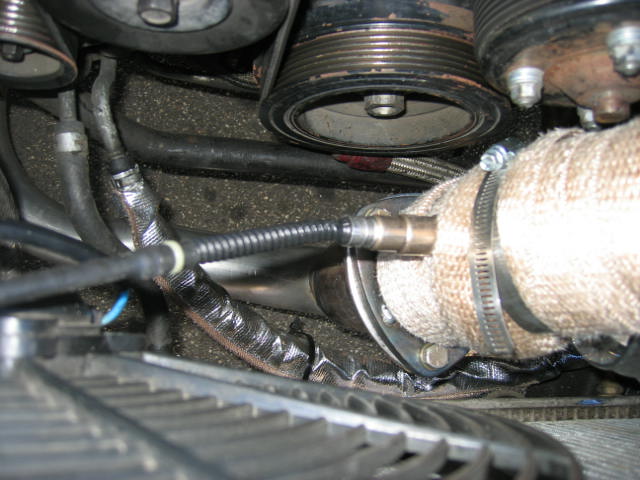
08-11-2004
Finally got some time to work on my project. I use mild
aluminized 3" pipe is because its easy to work with and 3" is easily
obtain. The driver side header is custom made and the passenger
side is stay stock. The outlet pipes from the head are 1.5" with
45 degrees. Mild steel is great for welding. Stainless is
better but it would be a welding nightmare due to different gas and
welding wires. I was fortune enough to spend about 6 hours on
this. The Master Power T70 is sitting at about the driver side
igniter. The down pipe is 3" and will be coated too. I am
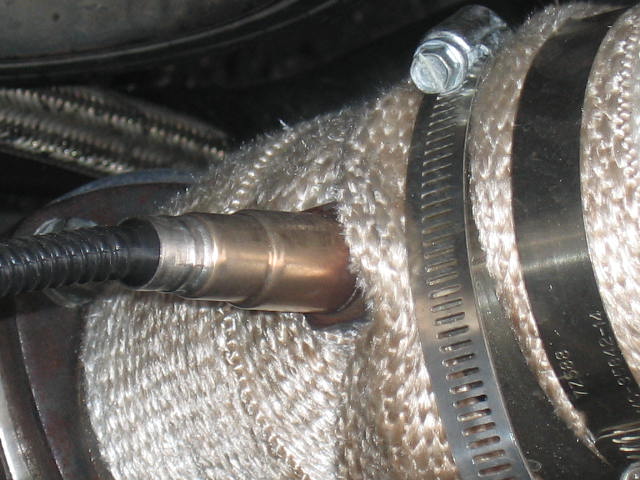
still waiting for the Tial Wastegate flanges. O2 sensor bungs in
to be welded on. I will also install a wide band O2 bung and
sensor to instance air/fuel ratio reading. This wide band will be
permanently install for tuning and monitoring. If you need
more information about the Innovative Wide Band.
If you are interested in the discussion of this topic please
see here for temporary pictures


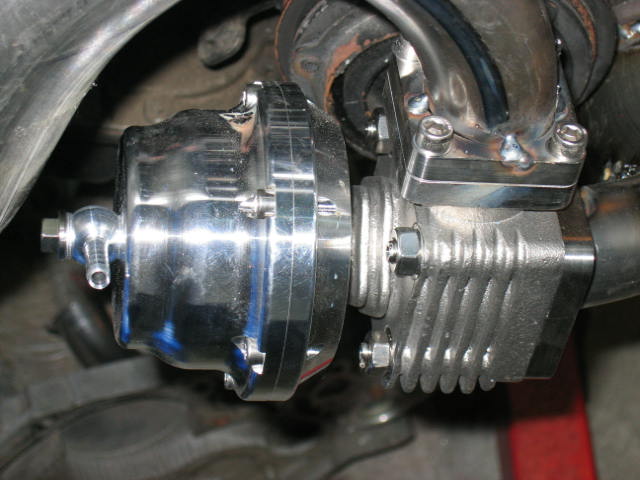
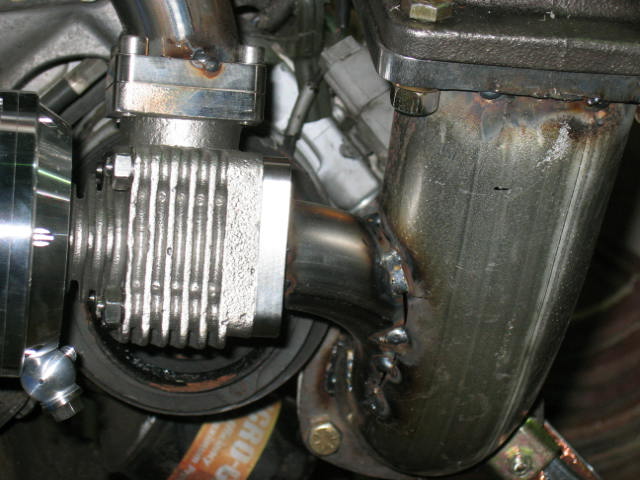
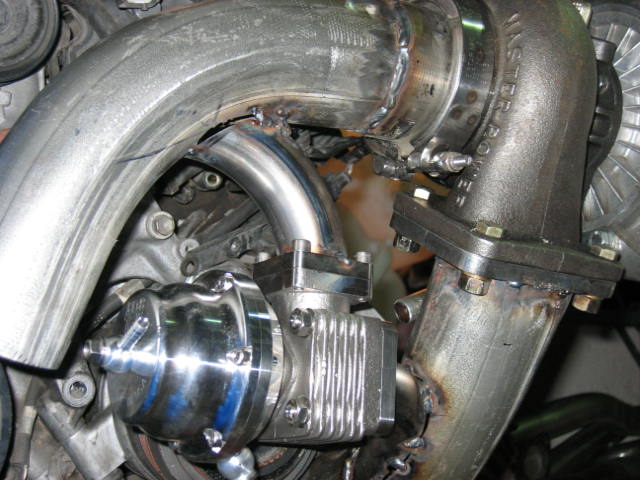
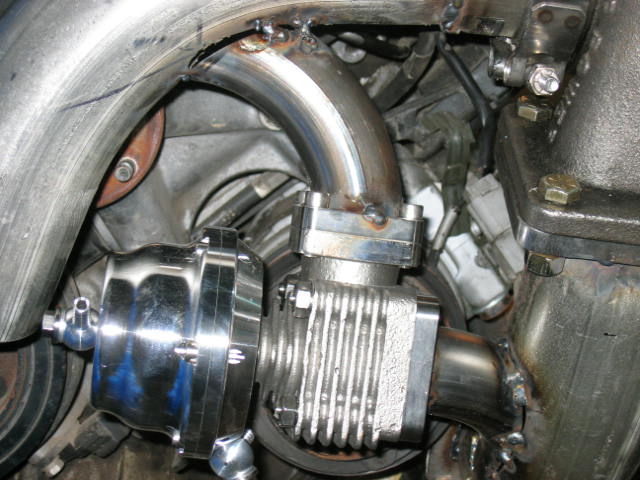
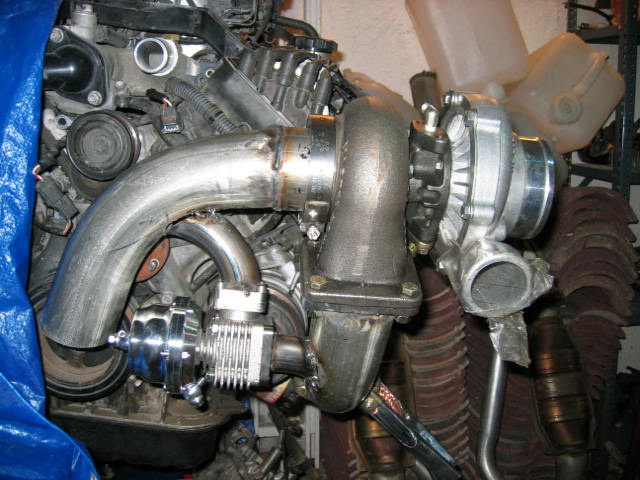
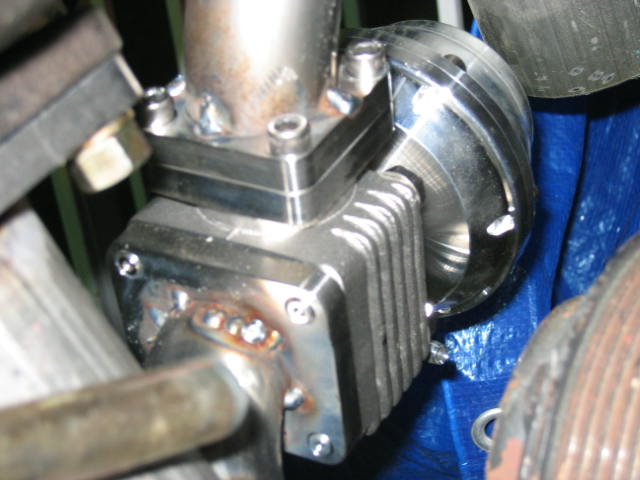
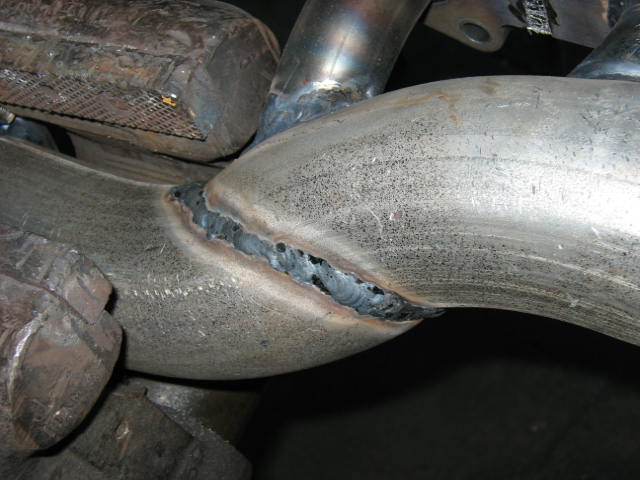
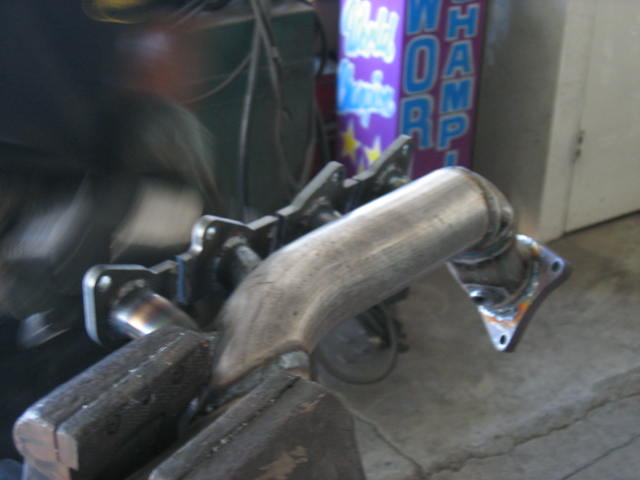
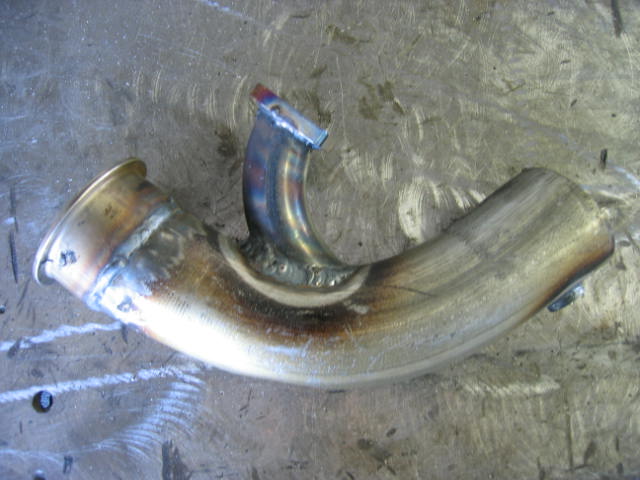
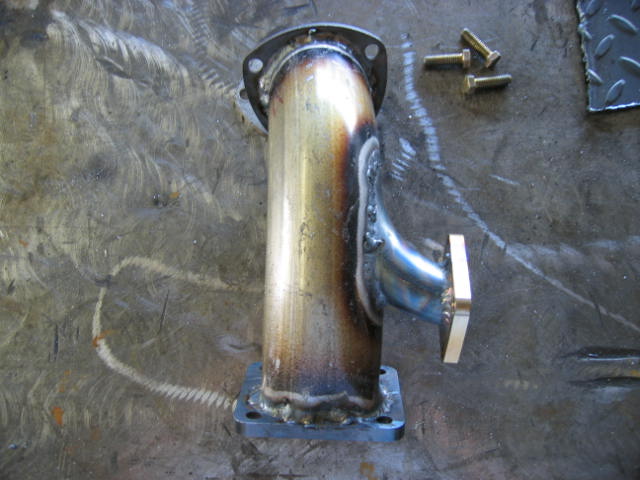
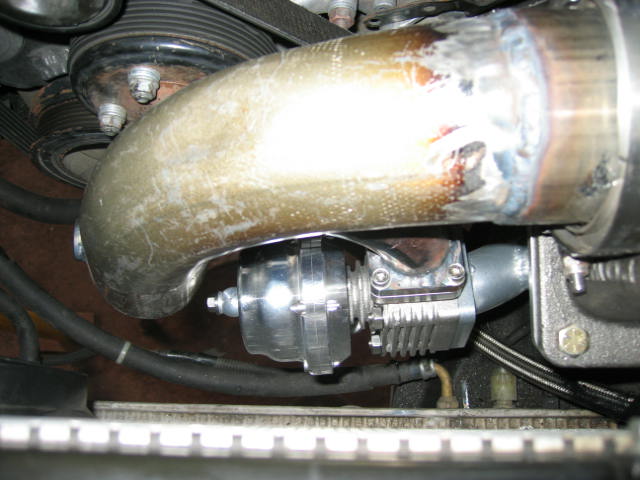
08-13-2004
When www.anderson-audio.com
sent me the Tial 40 mm Wastegate, this kit did not include the inlet and
outlet flanges. I got two stainless steel flanges for $80.
Ouch! Anyway, gotta have it. Tonight I fabricate the
wastegate pipes. The inlet I used a 1.5" 90 degree mild steel pipe
and cut in an angle to fit into the main exhaust pipe. The flow is
very smooth and the split is about 30 degrees. The outlet pipe I
used a 1.5" U bend and cut to fit into the curve of the downpipe.
I still have little things to be finished before sending it out to the
welder. For example would be the rest of the downpipe and openings
for the oxygen sensors. Here is my progress:
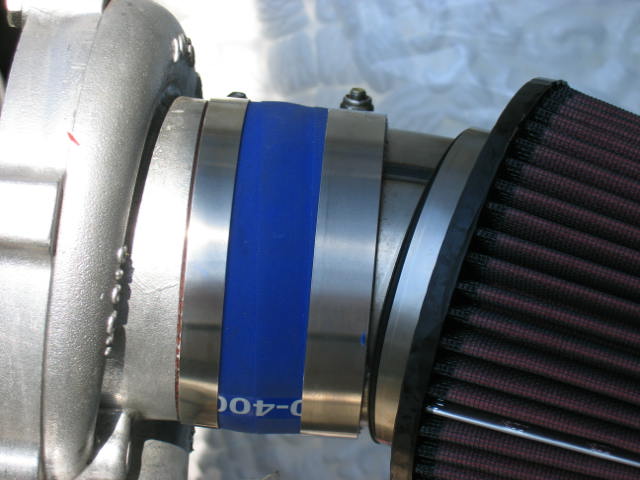
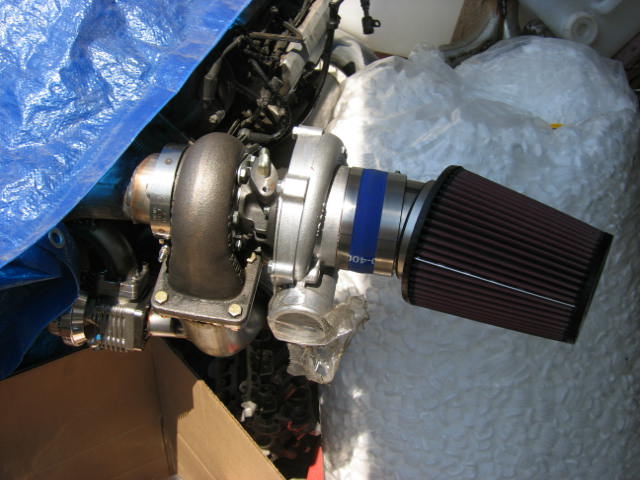
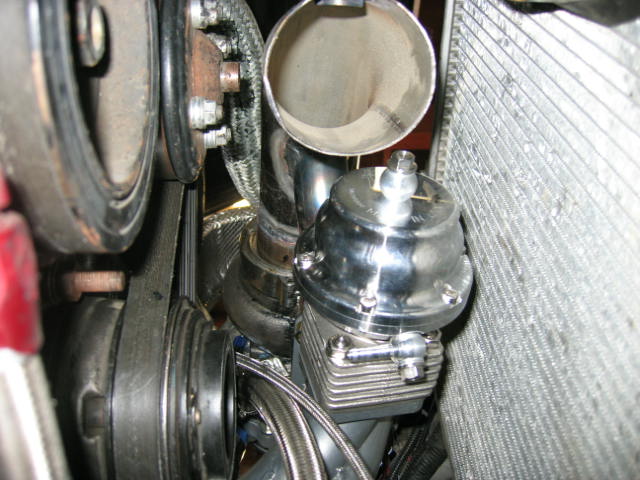
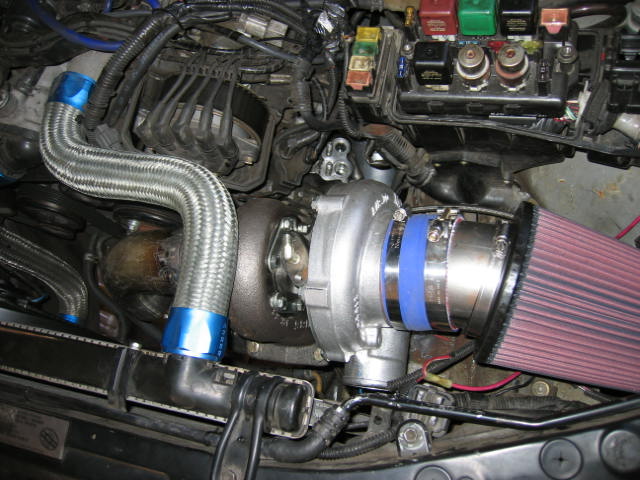
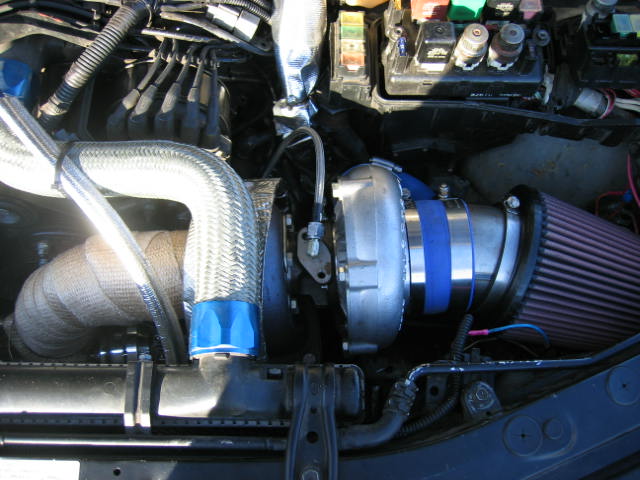
08-14-2004
Still waiting for more parts like turbo hoses and special reducer and
90 degree elbow. Meanwhile, I use a 4" U bend pipe and cut a small
piece to mount the K&N filter. This is done due to the contour of
the battery/fuse box area. As you can see, it a clean cut with the
turbo hose and clamps.

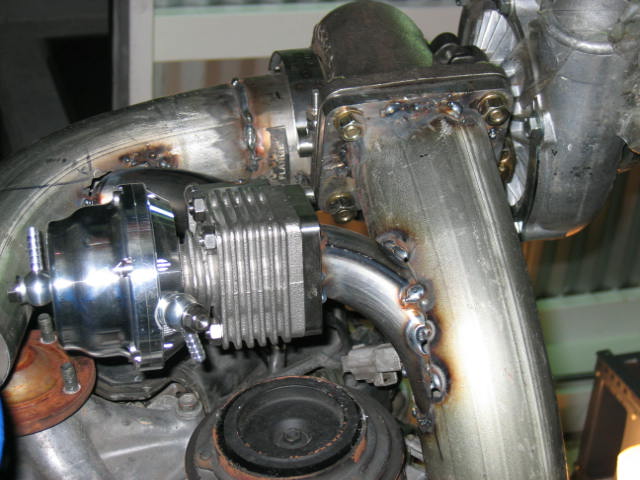
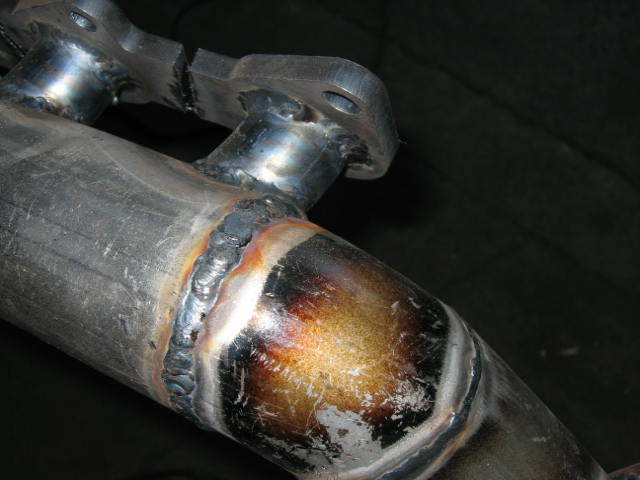
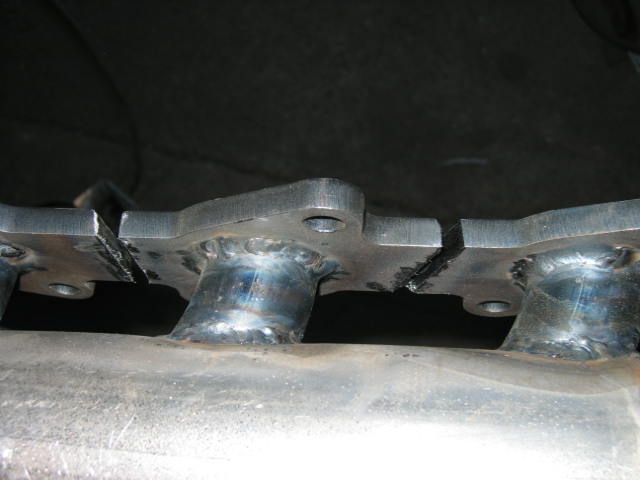
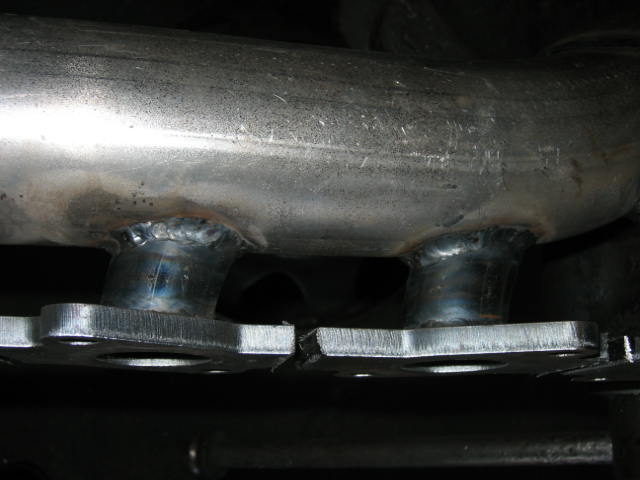
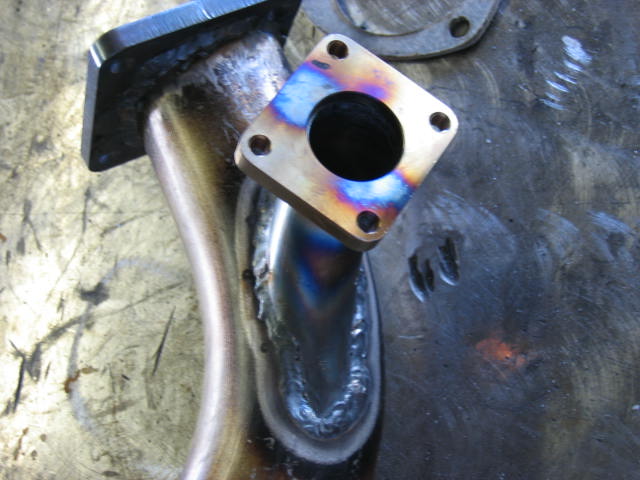
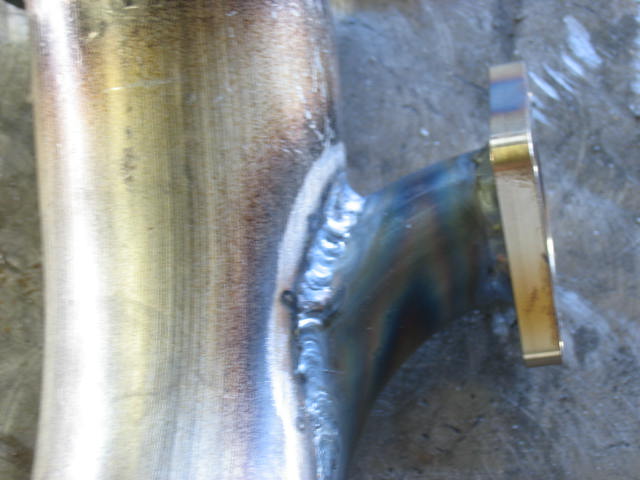
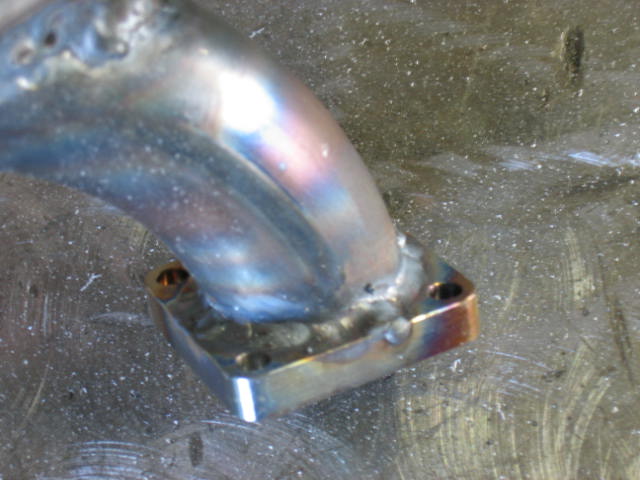
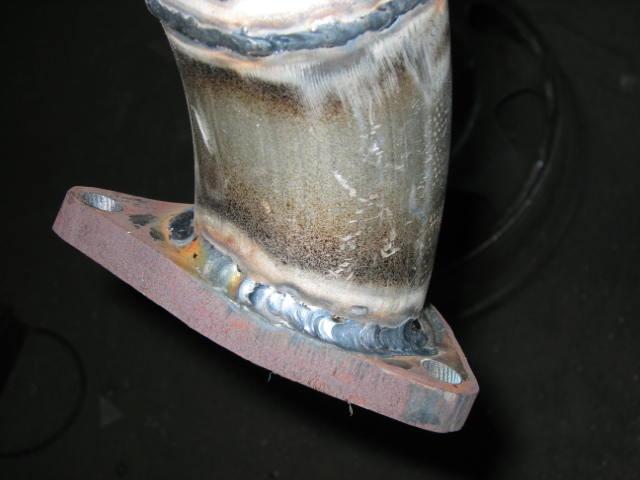
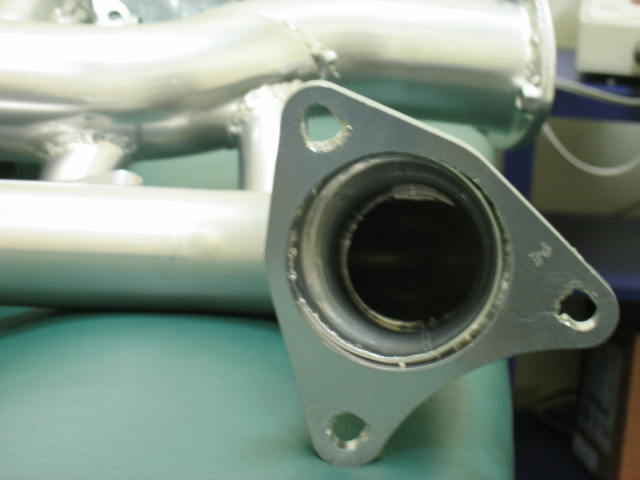
08-16-2004
Got some time to dissembled all the work and took the pieces to a
local professional welder. TIG is what I wanted for high quality
weld. I also cut slots on the exhaust flange for heat expansion.
Now it time for grinding and ceramic coating. Here are some
pictures:
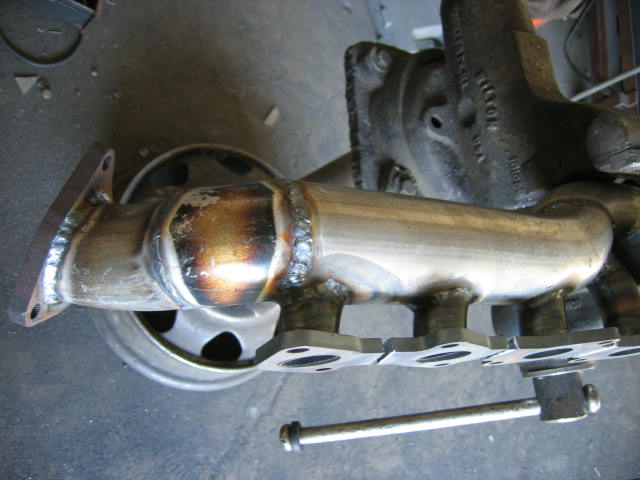


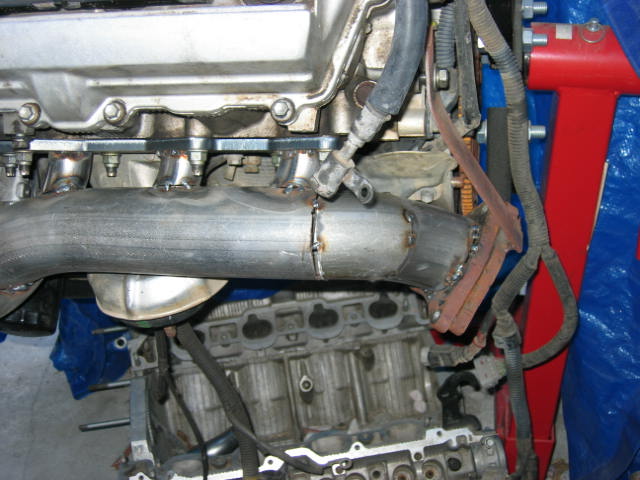
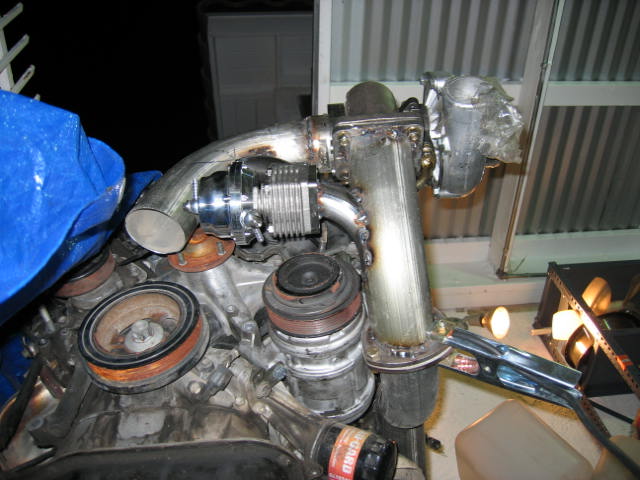
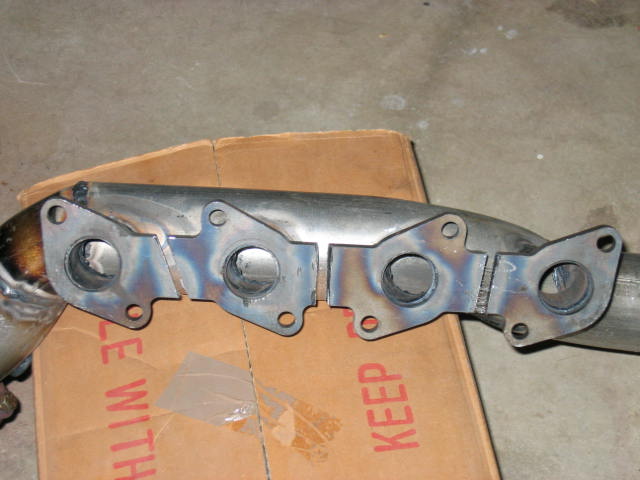
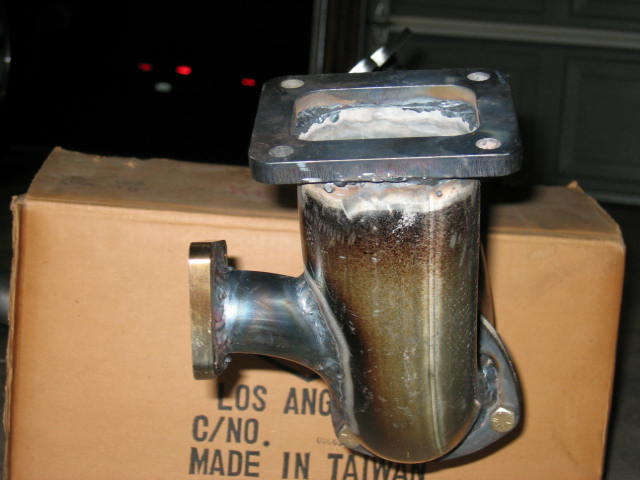
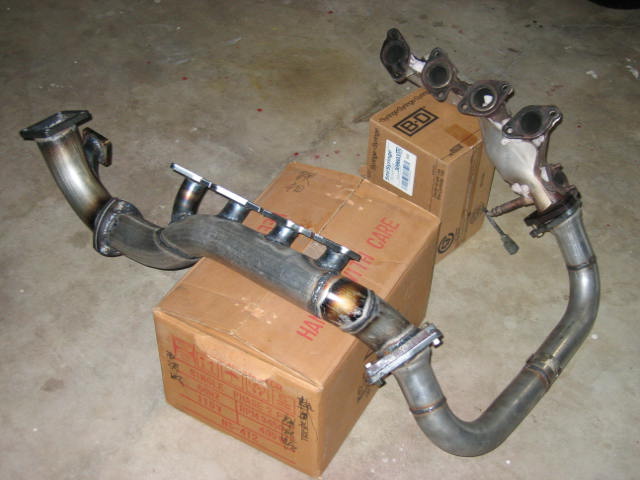
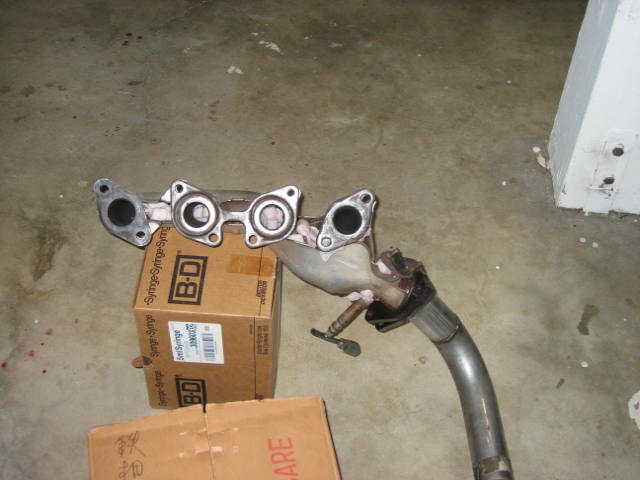
08-16-2004
After I picked up the TIG welded header I tried to let u see how it
would look like when all the pipes are assembled. Here you will
see the right (passenger) side header stay completely stock. I
have friends asked me why not making the right header too. I told
them… "why reinvent the wheel" If it works, don’t mess with it.
With the kind of horse I will be making, a new header is not necessary.
Here are some pictures of this setup.
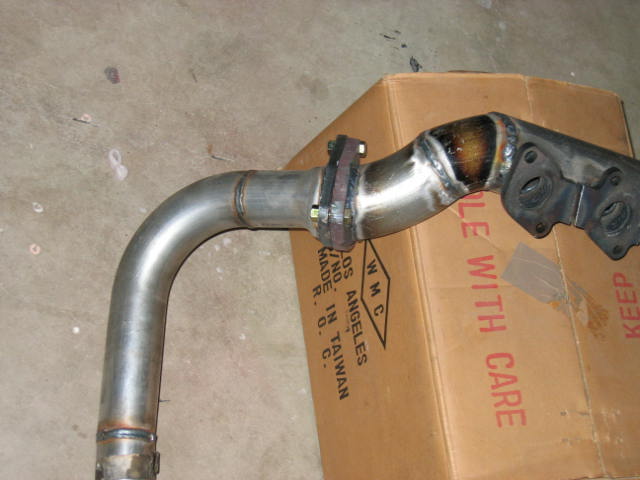
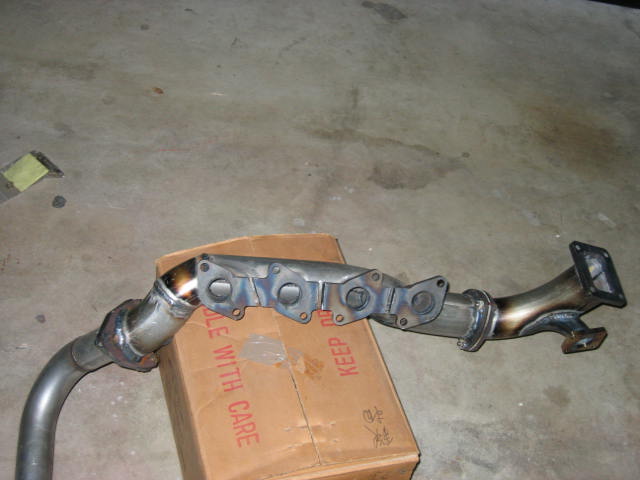
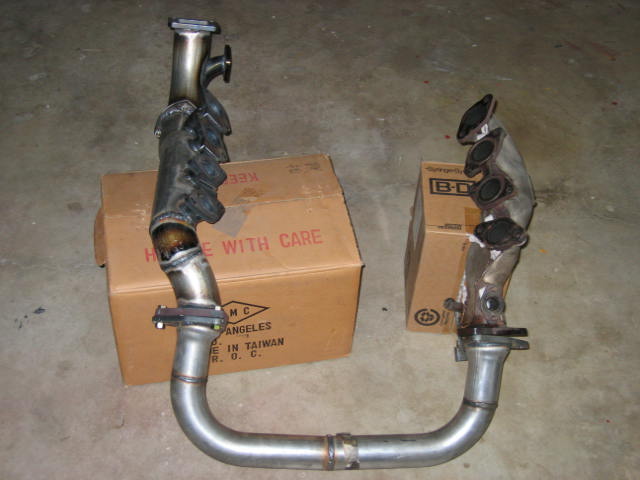
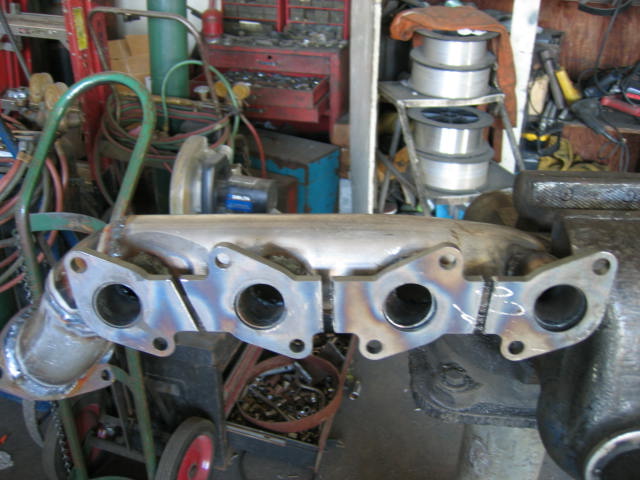
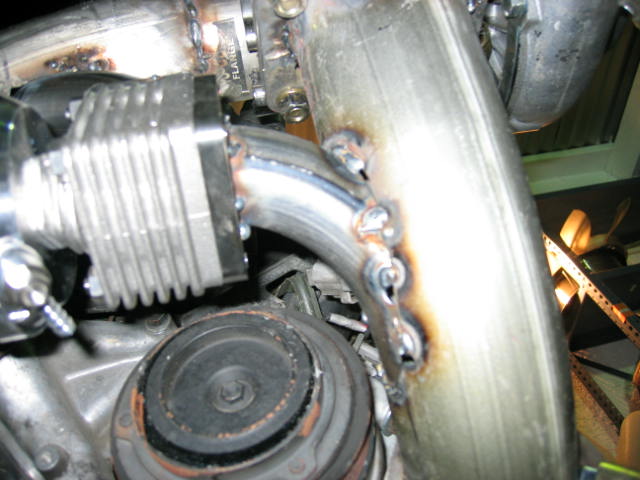
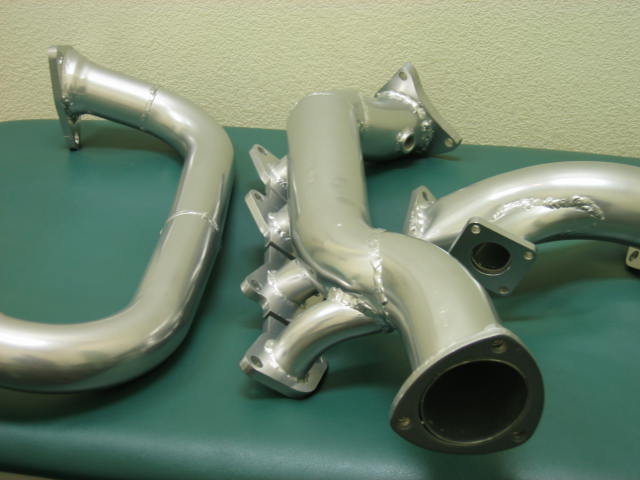
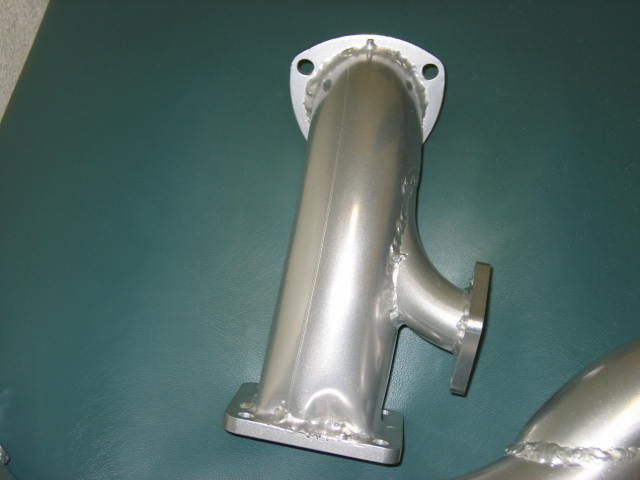
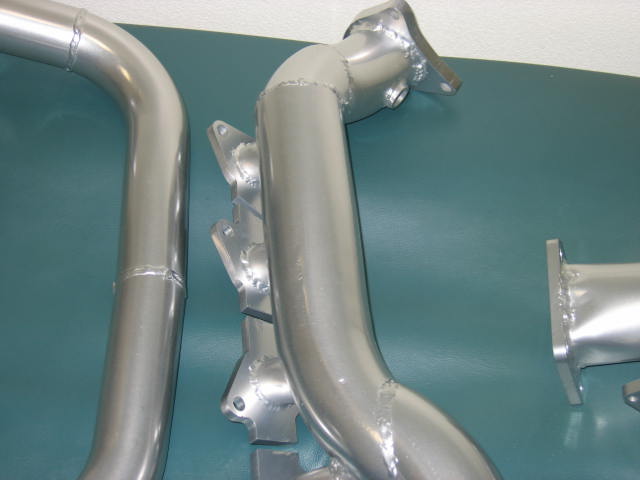
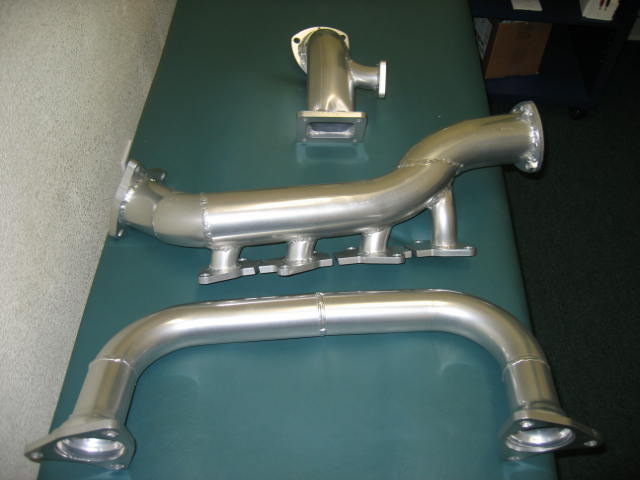
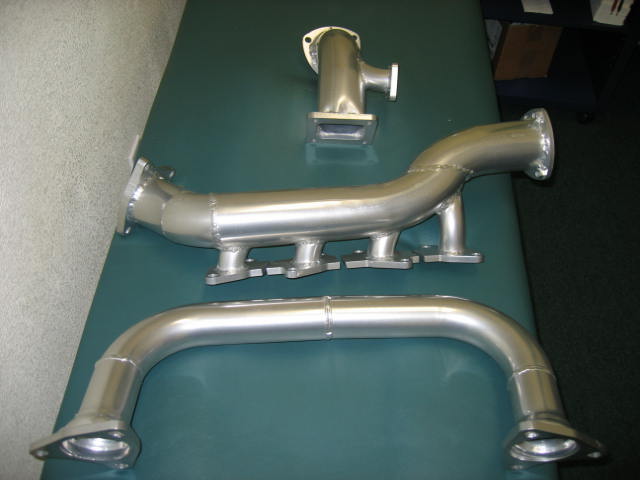
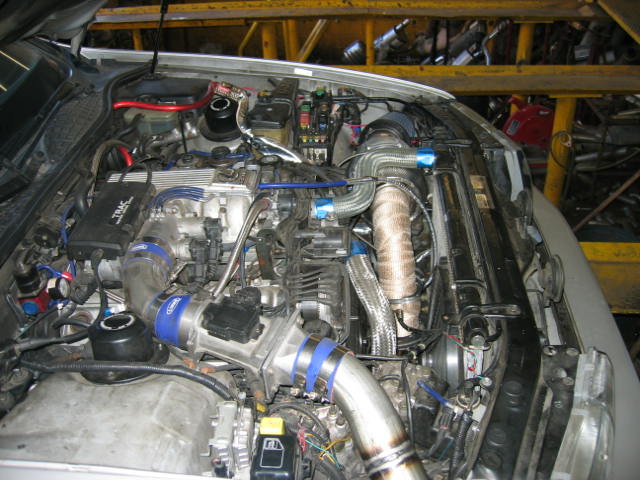
09-03-2004
After two and half weeks of waiting. I finally got my header and
pipes back. The pipes were coated with high temperature Sermetal
and can withstand high temperature. As you can see, these pipes
look a lot better after coating. Its like night and day. Here are some pictures.
For installation, we will try to install the pipes without the motor
coming out. I have talked to few Lexus Technicians and they said
the motor must come out. The reasons they said the engine must
come out is because the exhaust manifold studs are on the way.
Therefore, the manifold would not clear the studs. We will try to
remove the studs and slide the header out. Lets cross our fingers.
If the motor comes out, I would expect to pay about $1,000 for labor.
If not, it would cost about $400.

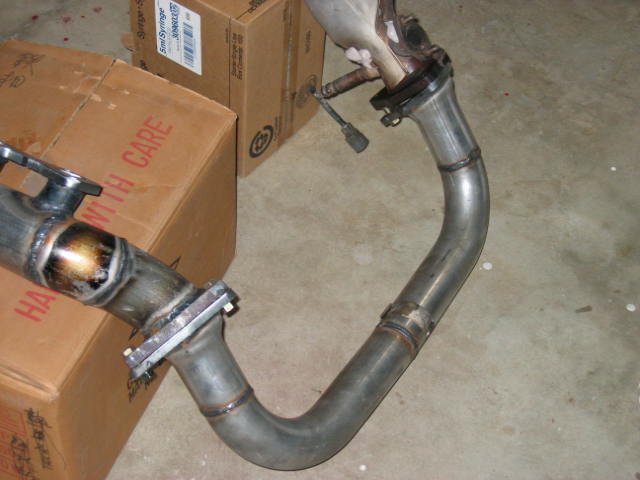
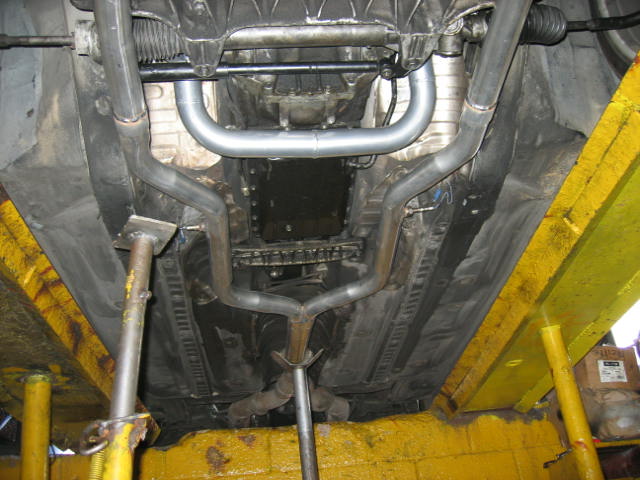
09-09-2004
Wow! took my car to a local mechanic shop and instructed them what to
do. You can read more about the
header removal process. After the mechanic finished his work,
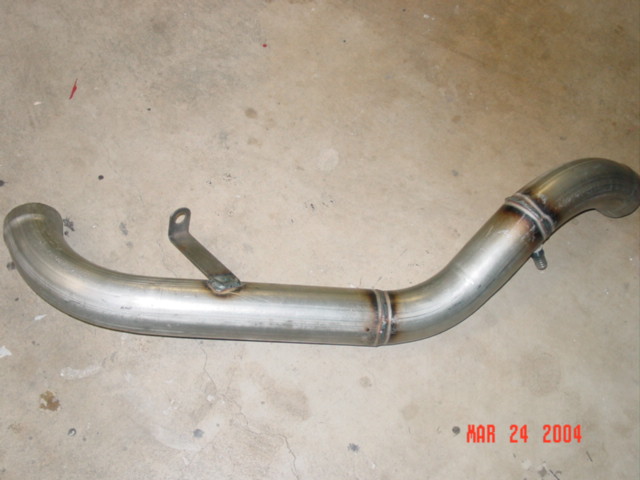
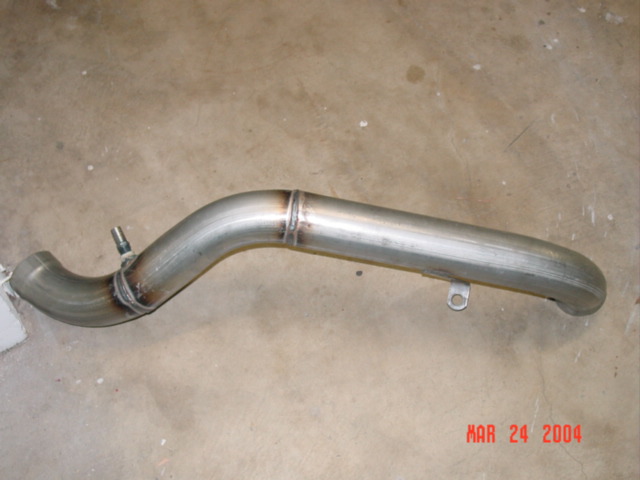
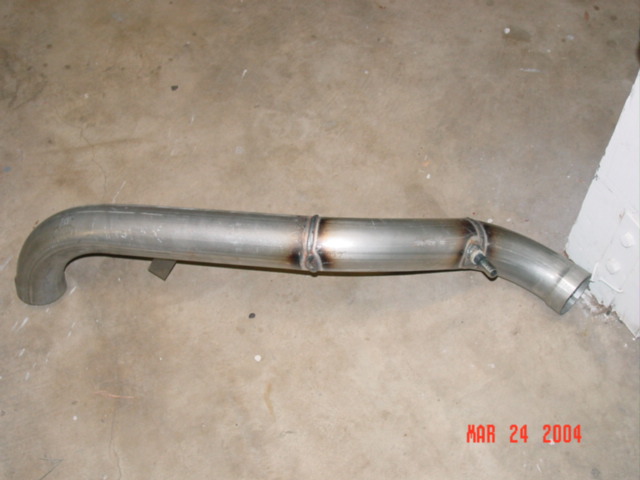
the car was tow to a local muffler shop and I install the turbo,
wastegate, oil lines, filter and other misc things. The welder
make a 3" down pipe that split into two 2.25" that passes under the
K-Member. The dual 2.25" pipes than join in a 3" pipe and to the
rest of the exhaust. The turbo fit perfectly as plan. When I
was making this header, I basically eye balled. We finished the
down pipe. However, not enough time for the compressor side pipes.
This will be done sometime this weekend.
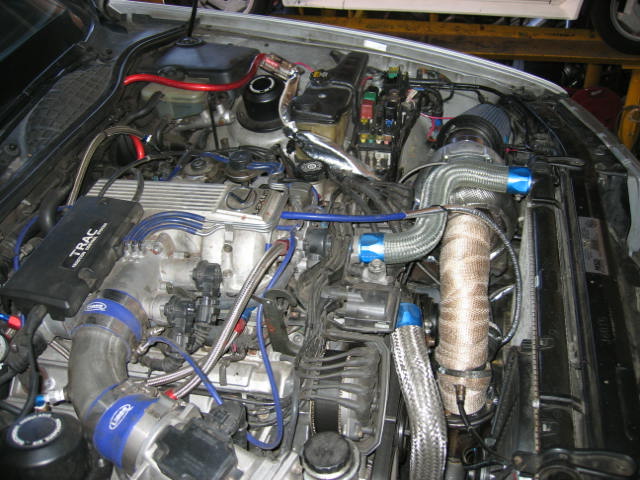
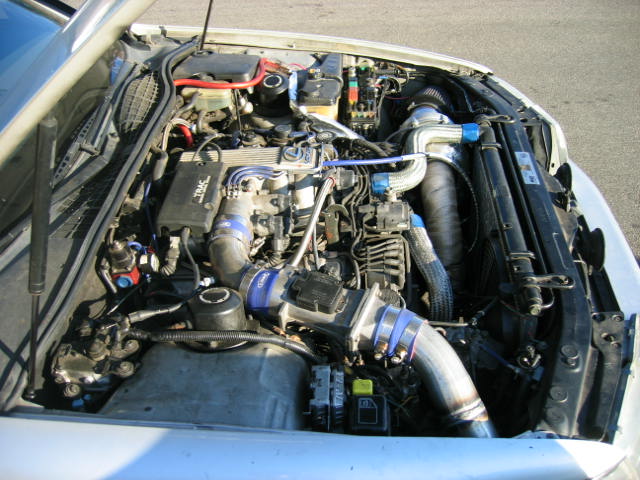
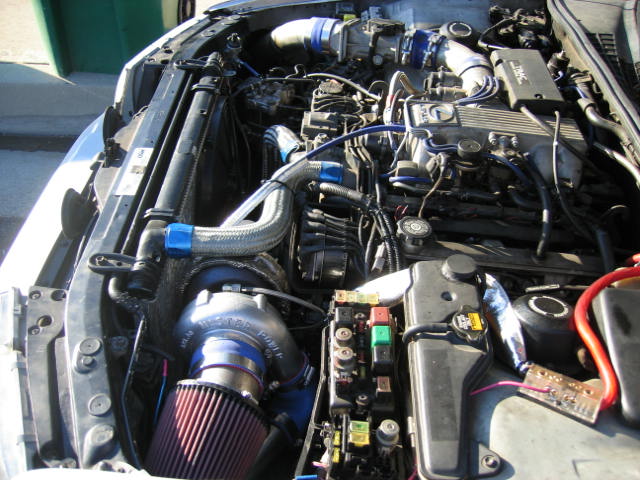
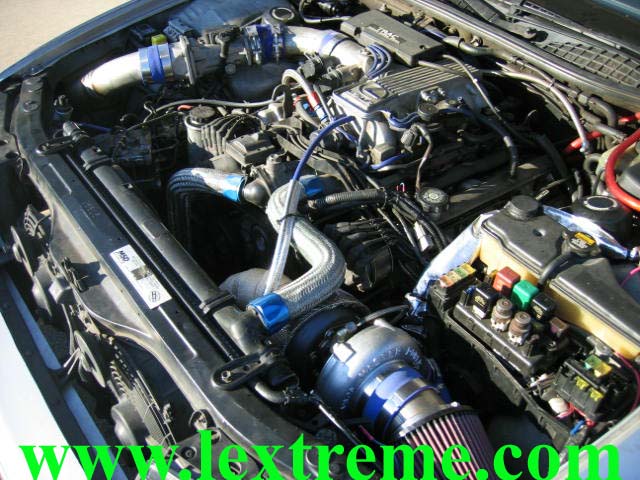
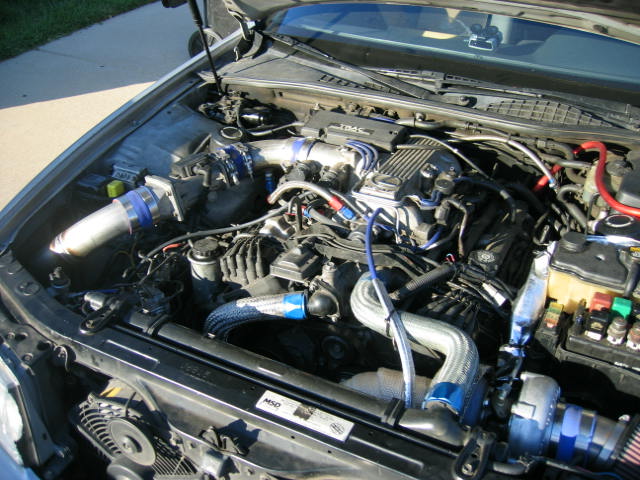
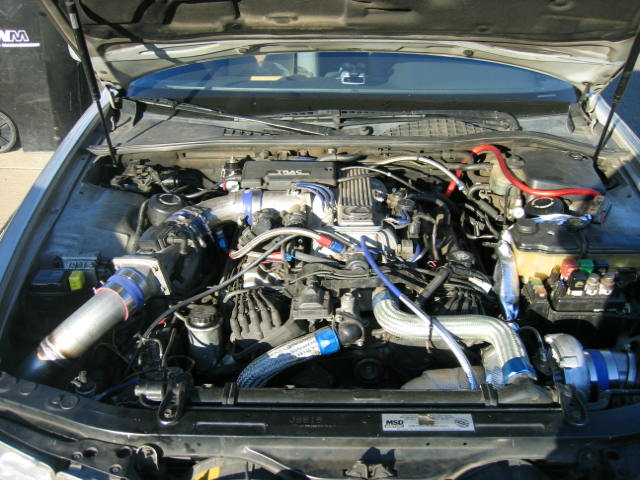
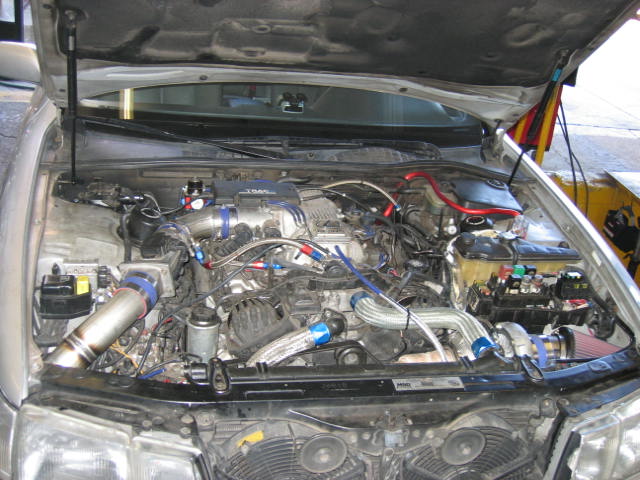
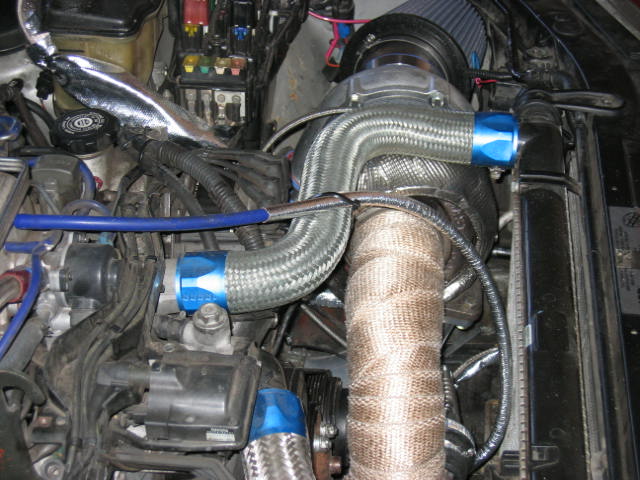
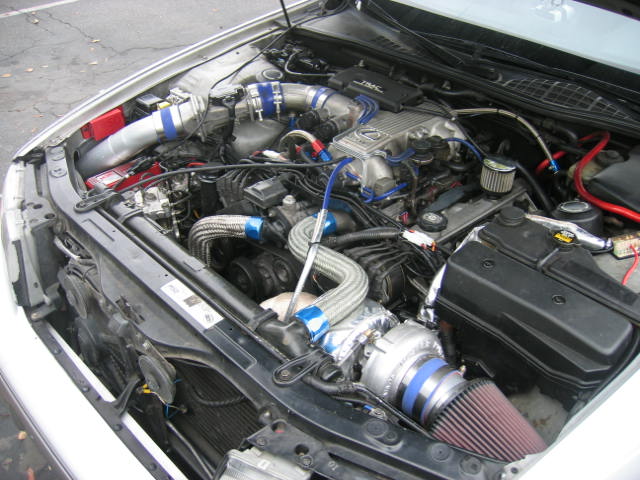
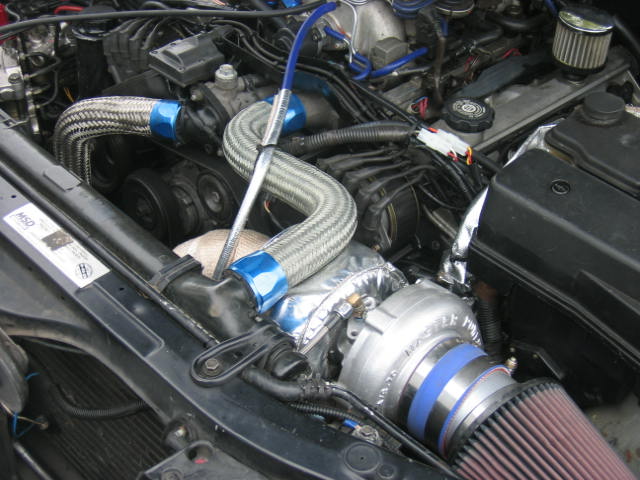
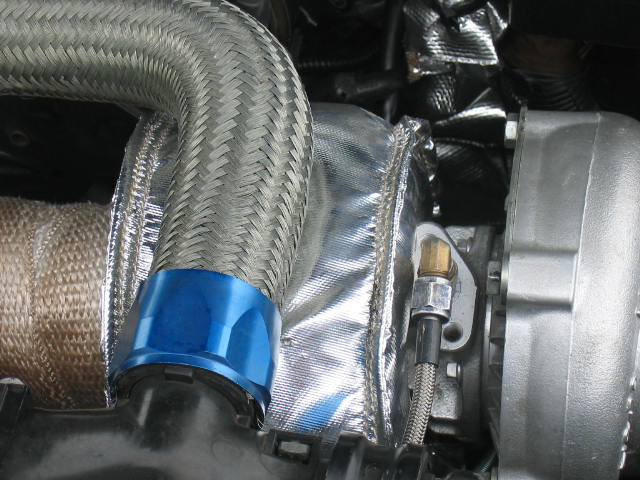
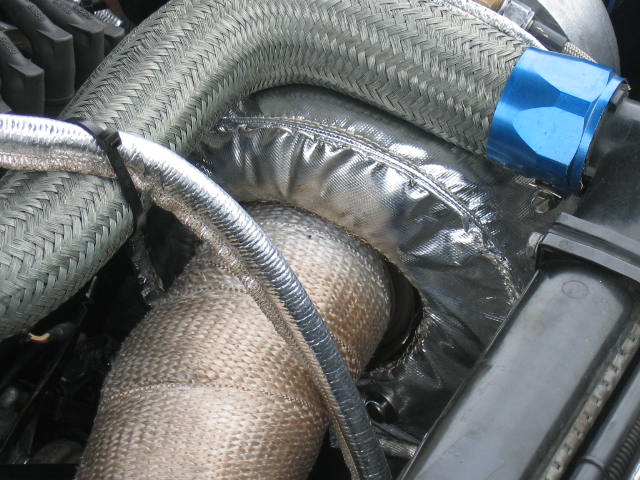
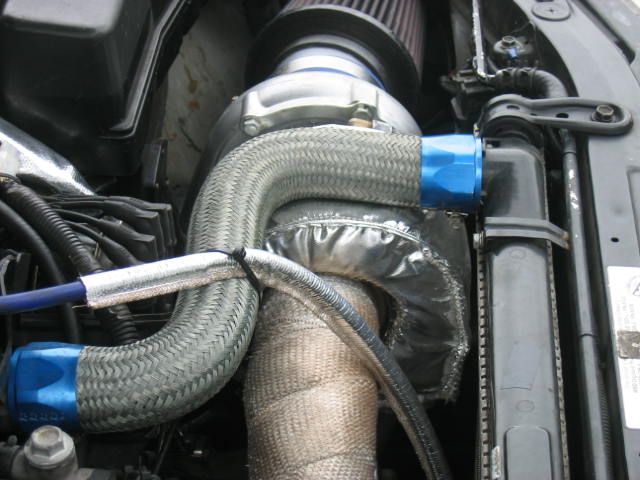
09-09-2004
After 6 months of work, its finally done. The inlet pipe,
the down pipe and all the heat shield. This is not a show car, but
its a go car. I am not into those fancy stuffs, but rather
functional things. This car is not tune yet, but I did manage to
push the car to 6 psi just for test. The car felt great and
strong. I can not wait until 15 psi. Here are some pictures
of the Lexus LS400T. I will update with you the finally results.


09-12-2004
Currently my mechanic spring is opening up at 12 psi. Although
its a 15 psi spring. The car start boosting at 2,000 and achieve 6
psi at 3k and keep on going linearly to 12 psi at 4k. The car
pulls like crazy from 2k and beyond. I also enjoy this 50 mm Tial
BOV. Unlike most rice bov that blow everything bit of air out to
make that bov sound. Tial bov is like sequential and doesn’t have
that rice bov sound and help my engine from dying. Overall, I am
Lextremely happy with the result. I would like to get some forged
pistons and turn up the boost. No dyno numbers yet, but soon.
I would like to thank all of my sponsors above for support and guidance.
Last but not least, my wonderful members. Thank you all.
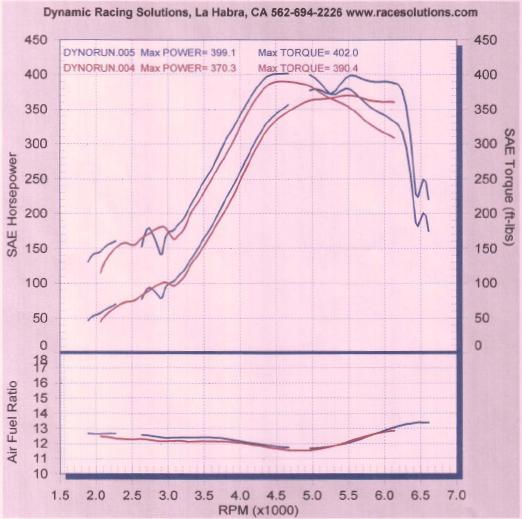
After more butt tunings I finally got my LS400T dyno again. I went to
a local Dynoject facility called Dynamic Racing Solutions (DRS).
The dynos were very consistant. The RWHP for all three dynos were about
370 and RWTQ was about 385. The car ran 3 runs on 14.7 psi and last run
we up to 1.20 bar. At 1.20 bar we got 399.1 rwhp and 402 rwtq. For
1 bar dyno, I should get little more with SS header (right header). I
think the stock passenger side header is very restricted and the
limitation is where is it. I strongly believe with a high flow header,
this car should see 400 rwhp. As for AFR, its quite good. It is
pretty flat line from idle to 4,000 rpm (12.5) and take a dip into mid
11 and come back to about mid 13 at about 6,500 rpm. With little leaning
out at around 4,000 to 5,200 and rich it out slightly at redline area
should give me little better AFR. I am very confident hitting 400
rwhp with header and little more tuning. All in all, I am pretty happy
with the results. The dynos were very consistent and the engine was very
smooth from idle to redline.
14.7 psi & 18 psi Dyno (pdf)