I get about 5-10 emails a day regarding Lexus automobiles and most of them are about Lexus brake system. So, in this article, I would like show you how to install a proper set of stainless steel braided lines.
I purchased this kit www.luxurymods.com and their products and custom service is best on the net. I have purchased many parts from luxurymods and I am extremely happy with them. I highly recommend them to anyone in the United States or out of this country.
Some of you might ask why would I need this conversion? Well, if you just drive normally like an old lady, then u don’t really need it.
However, if you ever drive little aggressive like turning and braking in a sharp corner or you take your car to open road, then this kit is a must. Stock lines are good for stock performance. One of the biggest problems with stock lines is that they felt soft when brake hard. The oem brake lines gives more and creating a less effective clamping on the rotors.
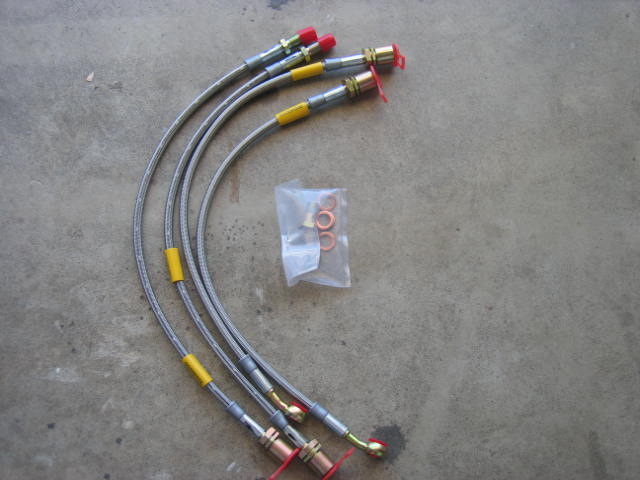
Here are some beautiful pictures of these high quality product from Goodridge. For more than 20 years, Goodridge has been supplying high performance hose and hose fittings to the world’s leading race teams. Goodridge stainless steel braided brake lines have become the standard in professional motorsports where the ultimate in braking is required.
Today Goodridge is a supplier to top teams in Formula 1, CART, IRL, NASCAR and World Rally Competition. But equally important is that Goodridge’s ongoing research and development has allowed them to convert the lessons they learned in competition into products available for serious streetcar applications.
Due to so many pictures on the tutorial, I put them into thumbnail. The procedure is from left to right and top to bottom.
REFERENCE:
· Frame Side: means the connector is located at the frame the of the car.
· Caliper Side: The connection is at the caliper area.
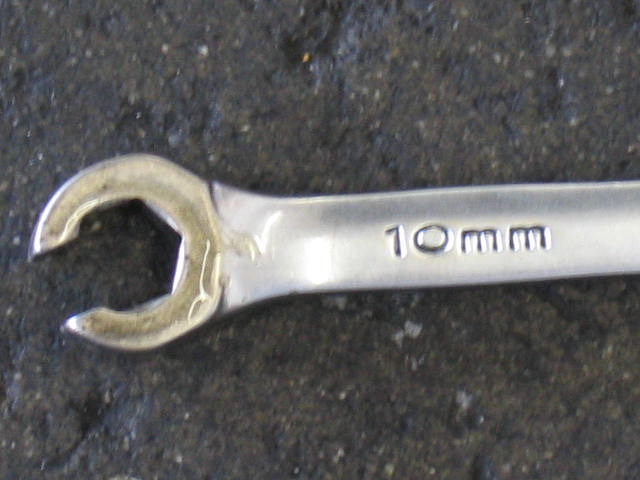
TOOLS:
· 6 angle 10 mm
· 14 mm socket
· 17 mm wrench
· Long nose pliers
FRONT BRAKE:
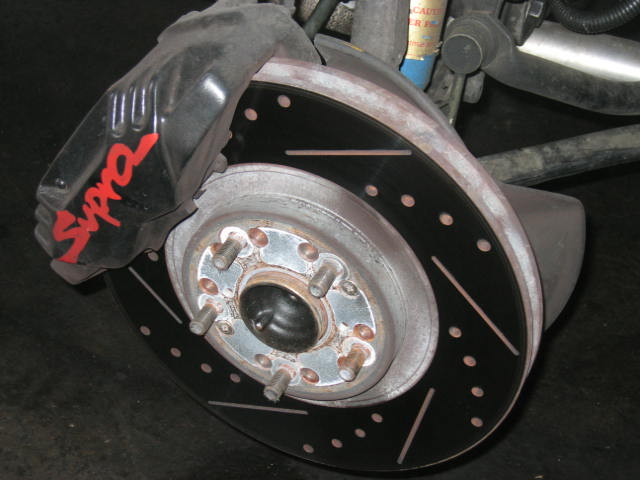
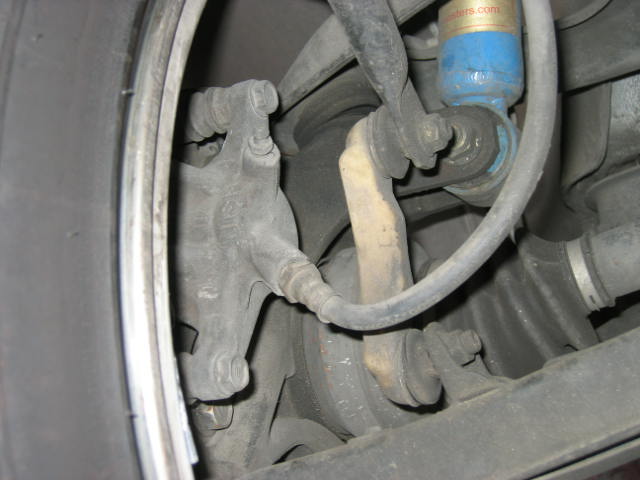
· Jack up the car and remove the front tires. This kit come with four SS brake lines and two banjo screws along with 4 copper gaskets. Once u removed the tire, you will see the brake caliper and rotor (Row 1 pic 6)
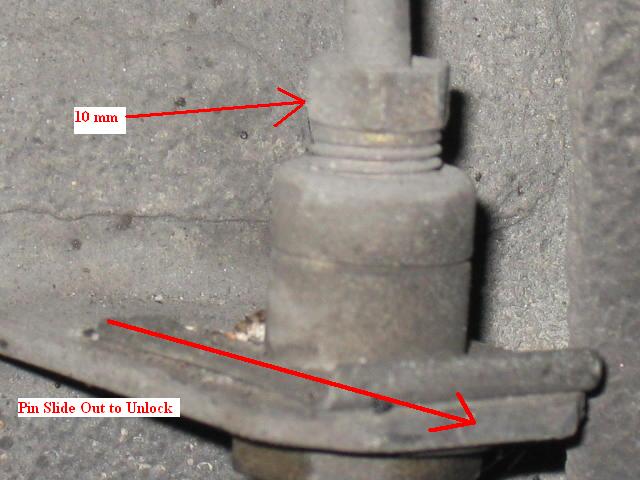
· You will use the 10 mm wrench to loosen the oem plastic brake line slightly by turning counter-clock-wise (do not completely loosen the brake line). After you loosen slightly, you will noticed brake fluid starts to drip. You can put a bucket under the car or just a cardboard.
· Use a plier and pull the thin brake line lock out (see Row 1 pic 8 and Row 3 pic 6)
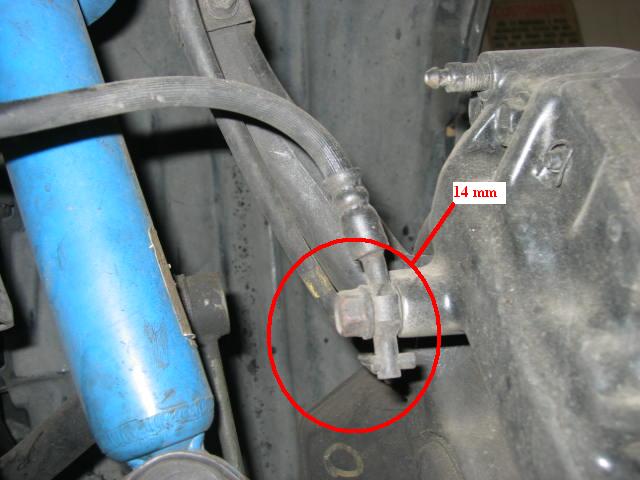
· Now you can use a 14 mm socket and loosen the banjo fitting in the brake caliper (see Row 2 pic 4)
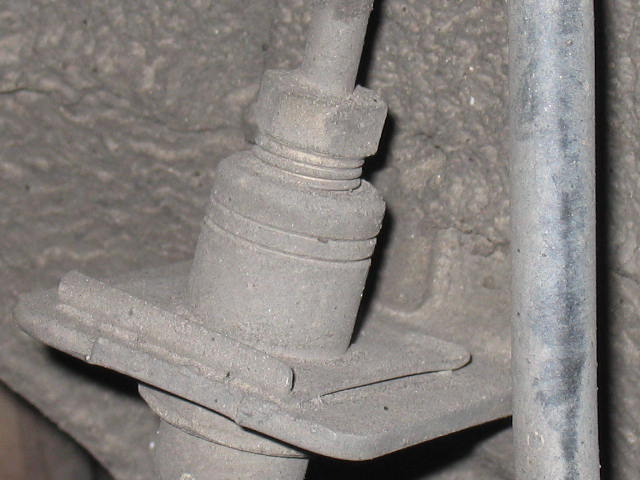
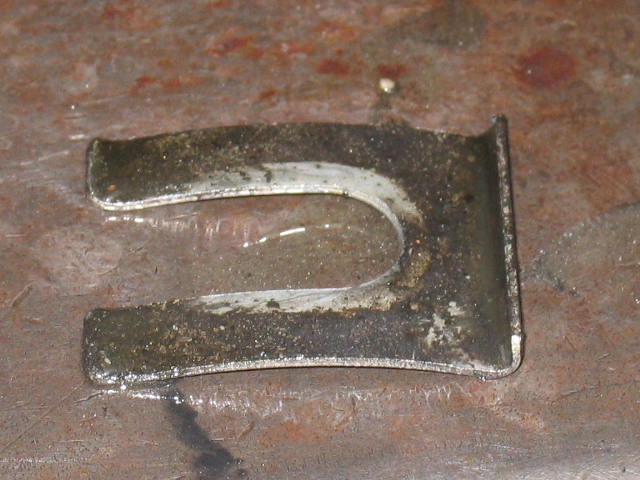
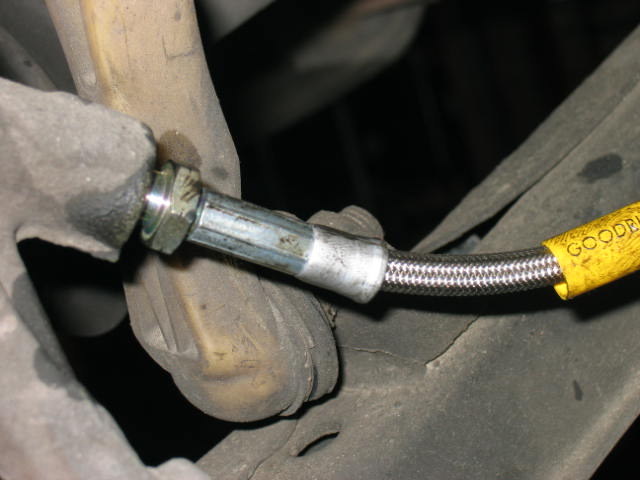
· Now You complete loosen the other connector at the frame. There are two locks that stabilize the brake line. There is C Style clip (Row 3 pic 7) on top and a ring like . Your remove the top clip to fully remove the brake line. However, you also want to remove the ring-like clip below and transfer it to the new line. The top and bottom clips are to stabilized the brake line from moving up or down.
· To install the new line, you must screw the frame end first with hands. Once the the fittings are in, the u can tighten it up with the 10mm wrench. Now u can install the two clips to stabilized the brake line.
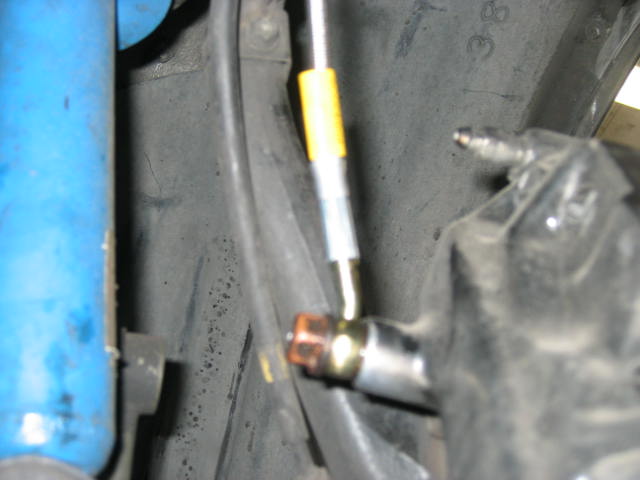
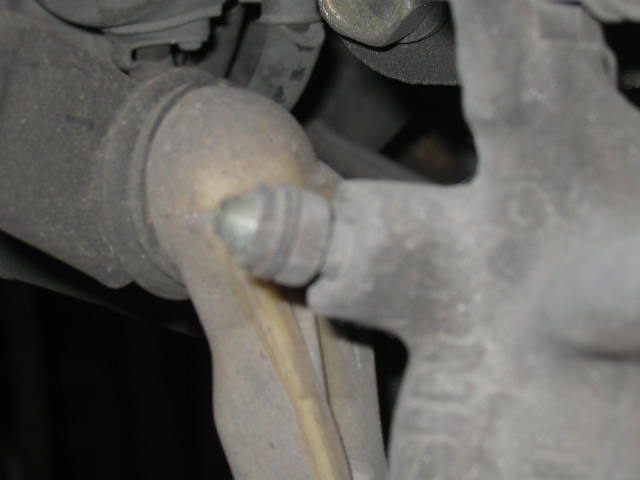
· Now you can install the caliper side with the new banjo comes with the kit. Make sure you put the copper gaskets on both side of the banjo. Its is very important that you position the line on the caliper side to be vertical going down. Please see (Row 2 pic 6). Now u can try to do the other side.
REAR BRAKE:
· The rear brake is little easier. The frame side of the connection is almost the same as the front. Use the same procedure as above. Un-install the frame side connector first.
· Unlike the front caliper side. The rear calipers are screw in type and should be un-install last.
· Removing and install the pin locks as above procedures for the front brake.
· Once you have finish un-installing the old line, now u can transfer the pin locks into the new line.
· Install the rear brake line with the caliper side first and tighten it.
· Now install the frame side with hands first and once the threads are in, you can use the 10mm to tighten it.
· After you install all the lines, recheck for brake oil leak.
Before installing the tires back, you make sure u fill up the brake fluid reservoir located in the engine bay driver side.
BLEEDING BRAKE SYSTEM:
· Now its a great time to call up a friend for help. Have your friend get in the car and pump the brake paddle few times and hold it while you will be slightly loosen the brake valve located near the caliper (Row 3 pic 1).
· You will noticed a stream of brake fluid coming out. When the fluid comes out, the driver (your friend) is supposedly keeping pushing the brake paddle as it move forward.
· You might see bubbles when the brake fluid valve is loosen. Immediately tighten the valve after you don’t see any more fluid coming out.
· You should do all the calipers and add fluids.
· Now its your turn to pump the brake paddle few more times and you start to notice the paddle begin to feel harder to pump.


