Project Thread Supercharged Supra

The 1UZFE EGR Delete Kit is available for sale here.
BTW, it looks like David has just uploaded the other article that Zuffen & I collaborated on. This one is about head shaving, block decking, and the effects on cam timing. Be sure to have a read of this before you give those heads a shave!

http://www.lextreme.com/Cam-Timing.html

Again, all feedback is welcome.
 
Excellent write up John! This makes it so much easier for anyone that is interested in changing to SUB. Great daigrams and research. I definitely know where to go in the future if I change to Kelford cams.

Damn John, just read the other article you and Zuffen put together on Head Shaving. Very informative. You guys are the shiite. Thanks again for a very good read.

Ryan
 
Last edited:
Thanks guys, hope these are of use to the community.

You may have noticed the sticky thread I posted in the Engine Mods section: http://www.lextreme.com/forums/showthread.php?t=12289

This ties into the head shaving article, because it would be very useful to know how thick the heads are from the OEM, before any shaving. Would really appreciate it if any of you can contribute your data to this.

Following the last dyno test of my #1 engine, when Dennis put a degree wheel on the crank and checked the timing on my reground cams, he found they were 11 degrees off (but apparently only on the exhaust side), and this is one of the reasons the engine wasn't making good power.

Now my #1 engine has obviously been shaved and decked several times, and we think this might have been the root cause for its cam timing being off, despite the timing tensioner being shimmed to achieve a nice tight timing belt. The next step for this engine is to get fitted with a set of adjustable cam gears, to see if the cams can be brought back into correct time, and to confirm whether it was only the exhaust cams that were mistimed, or whether the intake's were also.
 
Not much of an update as we're at an impasse trying to come up with a supercharger drive. Had hoped Gloverman would come through with his sets of Gilmer pullies, but haven't seen any updates from him since January.

So, I've been in contact with ATI (the dampner people) and they've offered to build an SFI approved dampner for the 1UZ with a Gilmer drive. They already have Chevy, Ford and other domestics here: http://www.atiracing.com/products/dampers/charts/damsuper.htm Their problem is cost - they're wanting a cool $1000 to design/build an SFI dampner for a new engine, and no, I couldn't get them to come down with an offer of a GP.

In other news, the milspec engine loom is coming along nicely. Here are the conduits nearing completion; now I have to get the sensor leads done, and get my existing harness modified to mate:
 

Attachments

  • John Cribb V8 wiring project (5).jpg
    John Cribb V8 wiring project (5).jpg
    192 KB · Views: 12
While I've been waiting for Kelvin to develop his Gilmer drive pulleys, I decided to see how my #1 motor was doing internally. This is the motor that struggled to pull 498 ponies on the dyno back in 2008. After that rousing success, we discovered the exhaust cams were 11 degrees out (at the cams), however due to the timing belt being uber loose, we're inclined to think the problem may have been the milling of the heads and deck, as well as the cams. But fast forward to the present.....

First, Scott Marshall & I had a brainstorming session by email a couple months ago, and the net result was an apparatus that could actually measure the compression ratio of an engine, if, and only if, you could keep the valves closed (and sealed). I thought this would be a doddle, since the cams were already out of this motor, but Murphy was watching.....

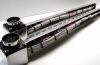
Keep in mind that I really like doing weird stuff with motors, and the weirder the better. My neighbors have been entertained by me spraying down the front shrubs with several M/W injection setups, testing my "Texas Chainsaw EDIS8 Timing Simulator" and loading & unloading many engines in/out of my Suburban at all hours of the day & night. But this compression tester rig is the ultimate in weird, and it had my brain surgeon neighbor making passes by the house in his 850 every fifteen minutes to see what sort of ritual sacrifice I was up to. Here's a couple of pics of the apparatus in use:

Getting it filled to the calibrated line (BTW, that's ATF, not blood, but don't tell my neighbor) BTW, how d'ya like those PVC pipe camshafts? They worked well for keeping the buckets in place, since the motor had no cams!:
IMG_1222Large.jpg


Barring the engine over and getting ready to measure the height of the column:
IMG_1218Large.jpg

So, with this apparatus, I "measured" the compression ratio to within around 0.25 points of what it was calculated to be. The only problem is that the exhaust valves in the cylinder I was measuring were leaking big time (thank you Mr. Murphy), so I was losing fluid. Had I had a good tight seal, I'm sure the results would have been closer.

So the next step was to run a leakdown test on the motor to see just how bad those valves were leaking. Now I don't have an air compressor in my shop/garage, but since my "other" hobby is scuba diving, I do usually have a full tank of air sitting around the garage, so with the aid of a few adapters, voila, one leakdown tester:
IMG_1322Custom.jpg

So I fired up my little rig up on cylinder #1, and the motor started blowing air out the exhaust port, and the tester showed 95-98% leakage. Hmmm, not good. Did it on all cylinders and here are the results:

#1......95.......Exhaust
#3......95.......Intake
#5......95.......Intake + Exhaust
#7......95.......Intake + Exhaust

#2......95.......Exhaust
#4......75.......Intake
#6......75.......Crankcase + Intake
#8......12.......??? maybe crankcase


Woohoo, #8 had a faint leak out the intake, but it indicated only 12% leakage. One good cylinder out of 8 (Thank you Mr. Murphy)

So since it looks like the motor has a major leakage problem, I decided to find out how much of this problem was in the heads, and whether there's any problem down in the short block. But to do that, I needed to isolate or seal off the valves completely. Hmmm, a couple of blockoff plates at the intake and exhaust ports ought to do it. So I took an intake & exhaust gasket down to my friendly fabricator and asked him to water jet me up a blockoff plate for the intake, and make a hunk of trimmed ally flat plate for the exhaust.

Two 10 degree wedge washers were necessary under each bolt head on the intake side, because the bolts aren't perpendicular to the manifold flange:

IMG_1315Custom.jpg

And the hunk of 3/8" ally on the exhaust:

IMG_1316Custom.jpg

Then I reran the tests and came up with these numbers:

Cyl.....1st.....2nd.....3rd
#1......38......35......45
#3......15......22......25
#5......15......25......20
#7......35......30......45

The 1st test was with dry cylinders, the 2nd was after a shot of WD40 in the plug holes, and the 3rd was after I spun the motor a bit with my 1/2" drill motor.

So, it would appear that #1 & 7 definitely have some issues with ring sealing. And all cylinders have issues with valves not sealing.

Next I'll rig up the plates on the right hand bank and will test them.

Bottom line, for any of you guys who have engines sitting on stands (Scott?, Justen?), now is a perfect time to run this very useful diagnostic test. For $50 in materials and water jetting, you can check the health of both your top end and short block, separately. I was stunned to see all the leakage this #1 engine has, and it leads me to wonder, just how much damage we did to it on the dyno, and how much was there already?
 
Last edited:
Great post as always Mr. Cribb. Informative and entertaining. My condolences for your sealing issues, I hope that they make you whole on the motor. Ring sealing problems are one reason why I shy away from rebuilding my motor in the first place - Toyota builds these motors a certain way with tolerances and methods that are very challenging for us to replicate.

I keenly look forward to you follow-up posts in this topic.
 
Hey John,
Mate you crack me up but jeez i wish i could find the time to do this crazy stuff ;)

That leak down is woeful, who lapped your valves? My poor old flogged stockie had 95% or better seal in all cyls bar the 'bad' one which was still 70% (so 30% leakage).

I don't have heads on the new engine as yet and won't do a leak down until it's run in and the rings are well bedded. By the engine builder and the guy i'll probably get to do the heads are 1st class so i have little concern. I will do a leak down though once run in for peace of mind.

So what plans for you leaky engine? A pity to bin it knowing the dollars invested but it would be back to square one for a rebuild ?
 
Hey John,
Mate you crack me up but jeez i wish i could find the time to do this crazy stuff ;)

Hehehe, Justen, you're at that point in life where you're raising a young family and struggling to find 5 minutes you can call your own. Just give it 20 years or so, and this period will pass, and you'll finally have some time to play with your toys again!

That leak down is woeful, who lapped your valves? My poor old flogged stockie had 95% or better seal in all cyls bar the 'bad' one which was still 70% (so 30% leakage).

The culprit may be the springs. IIRC, those are the OEM springs in there, with only 45 lbs of seat pressure. And we really hammered this motor on the dyno, so let's see what things look like when the heads come off.

I don't have heads on the new engine as yet and won't do a leak down until it's run in and the rings are well bedded. By the engine builder and the guy i'll probably get to do the heads are 1st class so i have little concern. I will do a leak down though once run in for peace of mind.

Yea, it'll be interesting to see once everything is bedded in on your motor.

So what plans for you leaky engine? A pity to bin it knowing the dollars invested but it would be back to square one for a rebuild ?

Won't know 'till the heads come off and we have a good look at the bottom end to see if it's cracked rings or something worse. A valve job I can live with, but going through the whole bottom end again would be a bit tough.

Thanks Steve & Thermactor; yep, there's usually something weird and interesting going on out in my garage. That's a good comment about rebuilding motors, and I'm inclined to agree. I wonder how many builders could hold their hands up and say they can truly build a better motor than Toyota?
 
Last edited:
I wonder how many builders could hold their hands up and say they can truly build a better motor than Toyota?

Not many, which is why i haven't 'built' an engine for well over 10 years now ;)

There comes a point though and serious track work usually requires something a little stronger :cool: The mighty 2J being one of the few engines that can supply even the extreme needs of most without requiring tougher innards :eek:
 
Just swapped the blockoff plates over to the right bank & repeated the test. The right bank is definitely in better shape than the left, which I seem to recall from the compression readings I took just after the dyno:

#2......20%
#4......15%
#6......35%
#8......12%

Next step, pull the heads and see what's going on with these leaky valves....
 
Went off the deep end? I'd say more like jumping off a freaking cliff! That's wayy hardcore, Scott!

Let me know when you get your cams are out and you want to run the leakdown, and I'll send you these blockoff plates. They're great for isolating the top end and checking just piston & ring leakage.
 
Went off the deep end? I'd say more like jumping off a freaking cliff! That's wayy hardcore, Scott!

Let me know when you get your cams are out and you want to run the leakdown, and I'll send you these blockoff plates. They're great for isolating the top end and checking just piston & ring leakage.

LOL, Brakes took me a lot longer than I thought, I just had to have them.

Cams are coming out today, I will be sending them over to add the pins, Also setting up to measure the Compression ratio. I am going to see if I can find me a leakdown tester for sale around here, Hopfully the auto parts guys will have it, otherwise I will get one ordered.

All this work you have done is such great info, thanks!
 
Murphy in full force :eek:

My hats off to you John for perserverence and creativity.

Unfortunately the harder you seem to try the more problems you seem to discover :confused:

I STILL lobby for you to get an UNopened engine out of a 90-94, bolt your setup on it and let it rip. Not only will you get to discover what your gear will do on a base engine but if something goes bang... it will be of minimal expense.

You will then can have even more fun modifying and re-designing.

You may even opt for bolting the stocker into the car for some actual road testing. How cool would THAT be... :cool:

Wow, that's a novel idea John. I've been building and breaking these things on the dyno for so long, I've sorta forgotten what the end goal was! :D

All this work you have done is such great info, thanks!

No problem Scott, that compression tester was a hoot to play with, and this leakdown testing is just getting back to basic principles. It's all fun.
 
JBrady is right on. An unopened 90-94 motor can be found for less than $300. $100 worth of new gaskets and I'd say it's a great road test platform!


Top