remains. If you own a 1UZ from 1990-1997, you
for help with ordering or questions. This will probably be the last kits I have made.
All other parts are SOLD OUT and won't return, including the LS400 and SC400 turbo kit, rebuild kits, supercharger and performace torque converter. We're not an auto parts supplier and I can't respond to inquries for random Lexus and Toyota auto parts.
We carry the following Lexus & Toyota LCD Replacement:
- 90-92 LEXUS LS400 LHD
- 93-94 LEXUS LS400 LHD
- 93-94 LEXUS LS400 RHD
- 92-96 LEXUS SC300 LHD
- 92-96 LEXUS SC400 LHD
- 92-96 LEXUS SC J SPEC / SOARER RHD (TT)
- 92-96 LEXUS SC J SPEC / SOARER RHD (V8)
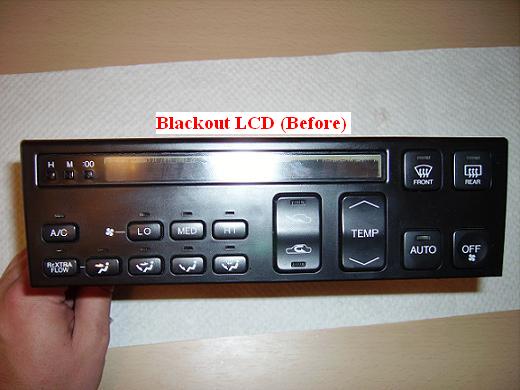
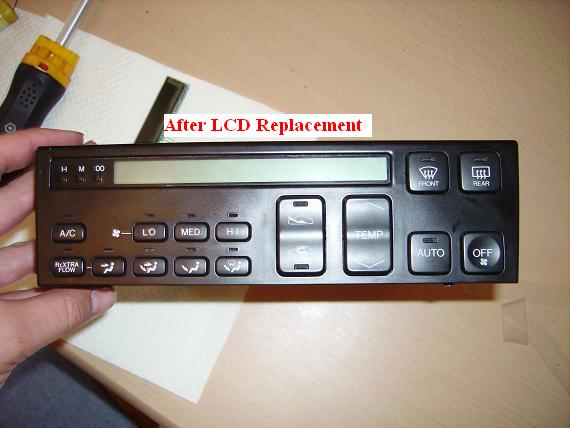
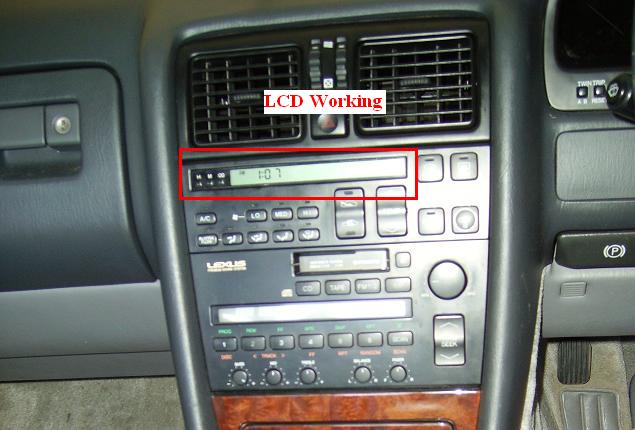
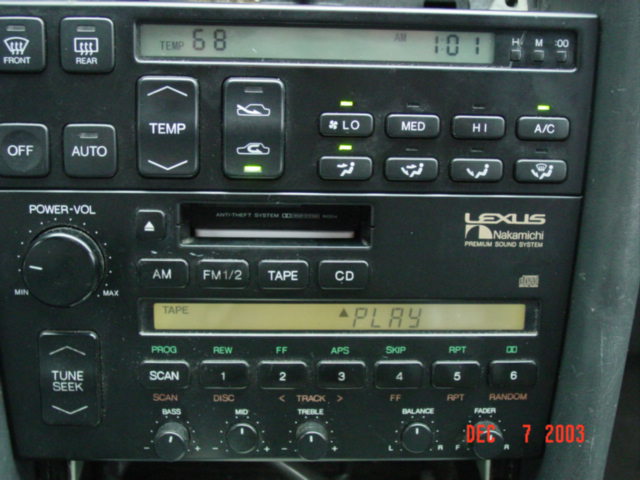
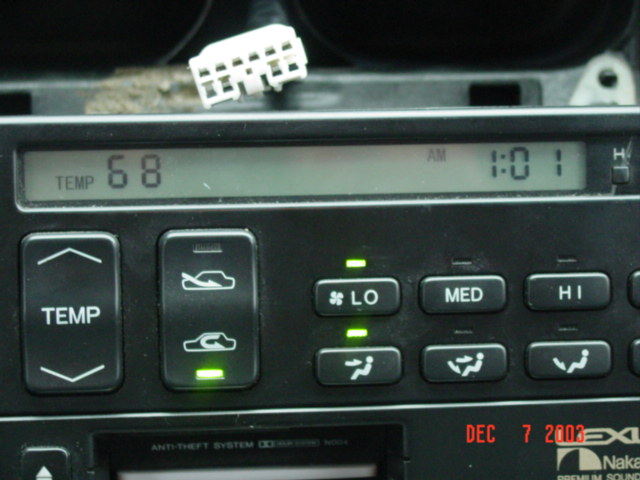
Black out LCD is almost in all first generation SC400 and LS400 or Celsior. If you are driving a 90-94 LS400/Celsior or 1992-1996 SC400 (SC400 LCD Replacement Tutorial), its time to change it out. More detail installation instruction on the SC400/Soarer.
We are offering the LCD part with little soldering skills you can complete refurbish your ride. For an average person, the step by step instruction should able to get through this project. However, if you like you can take your LCD and the oem climate controller and they can swap it out for you. It was just too expensive to replace it with Lexus OEM climate control. Local dealers are asking $750 USD.
Some re-manufacture unit runs about $300. Can not justify paying that much just for a display. This is a very common problem with the Lexus LS400/Celsior from 1990-1994 or SC400 1992-1996. As you might guessed I tried the capacitors replacement and did not do any good. There aren’t too many choices for fixing the Lexus Climate/Clock LCD Display.
One is to get an re-manufactured unit from a company in California for $300 or get a used LCD from a junkyard. However, getting it from a junkyard has no guarantee and most of the LCD over a decade would have the same problem sooner or later and the price would run you about $250-300.
This is the best bang for your buck. Now available in both Left Hand Drive (LHD) like the U.S. Spec LS400 and Right Hand Drive (RHD) like J-Spec Celsior
Here is the tutorial of this replacement process:
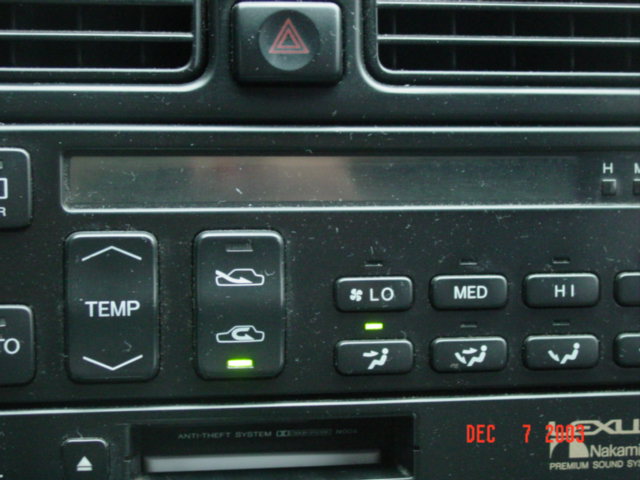
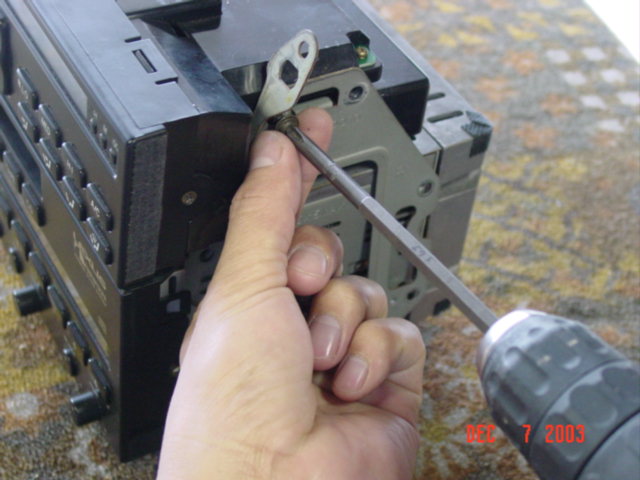
The following instructions are for the removal of the A/C Climate Control Unit on 1990 through 1994 Lexus LS400 model vehicles.
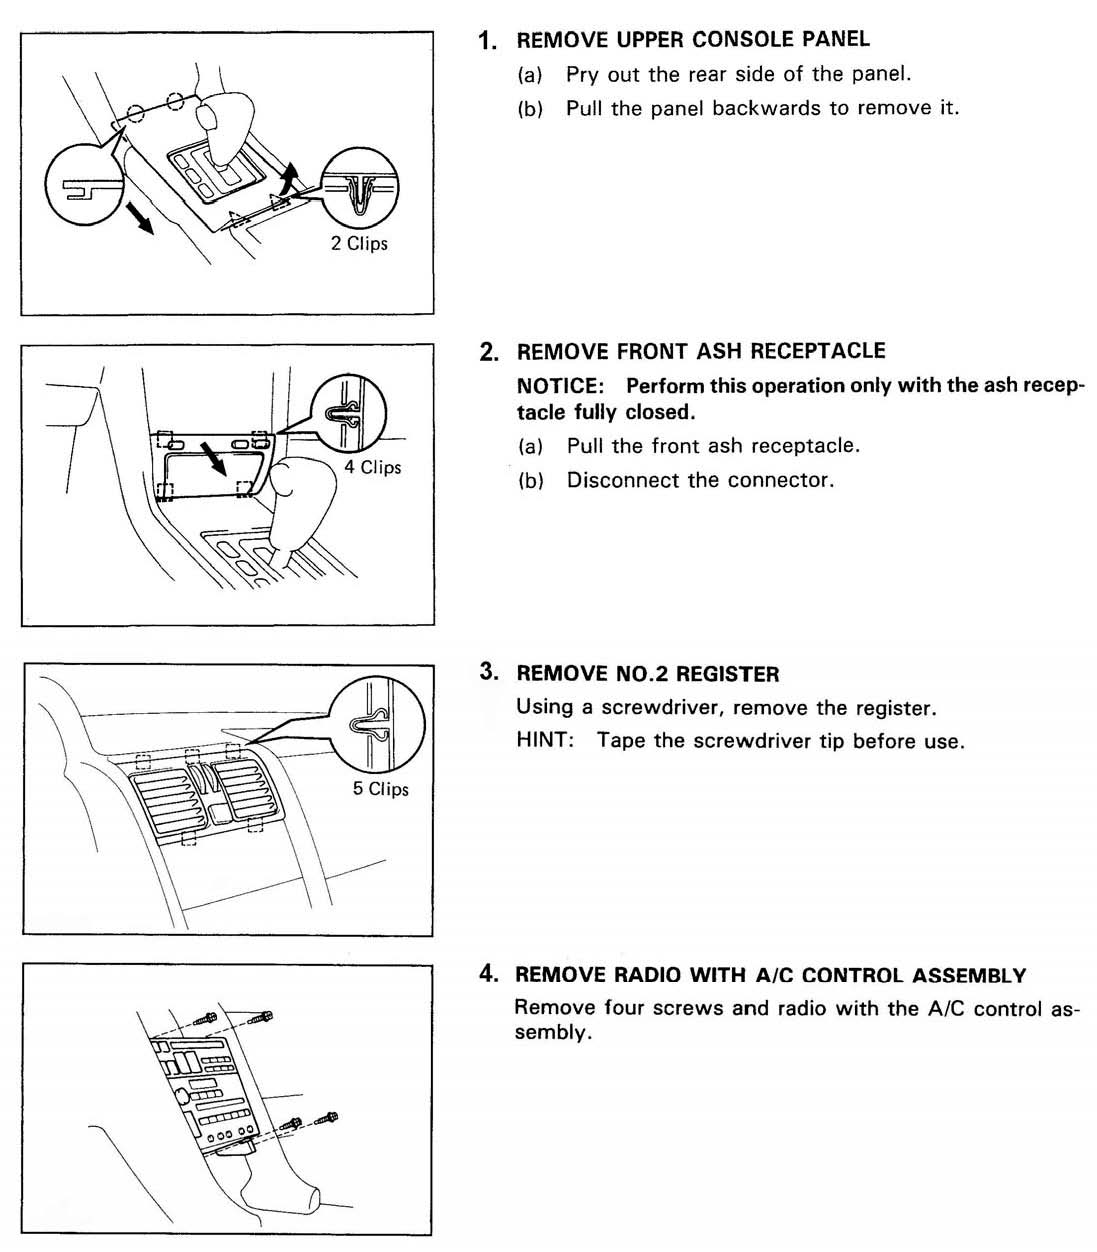
A/C Climate Control Removal Instructions
The following instructions are for the
removal of the A/C Climate Control Unit
on 1990 through 1994 Lexus LS400 model vehicles
Notes:
-
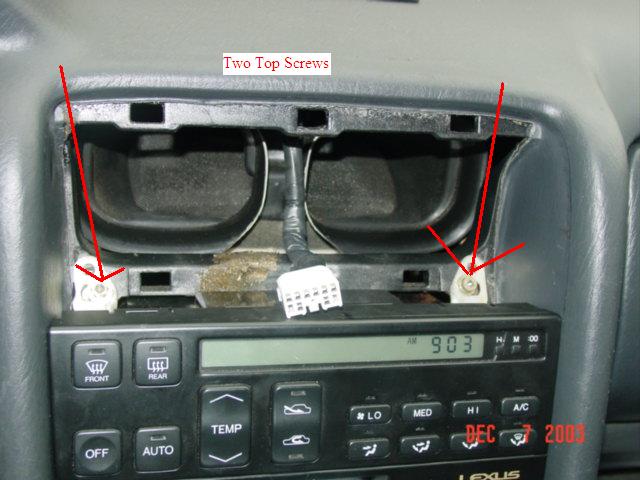
- On step 1, don’t pull the rear part of the console cover up more than
an inch or so because you can break off the clips that hold the front of
the console cover. Then slip the console cover back about an inch to
disengage the front clips. It helps to put the car in neutral in order to
remove the console cover over the shifter.
-
- On step 3, the air register just pries right out, go straight back,
not at an angle.
-
- Careful on step 4 not to drop the screws, they are hard to fish back
out. If you do anyway, use a magnet to retrieve them.
-
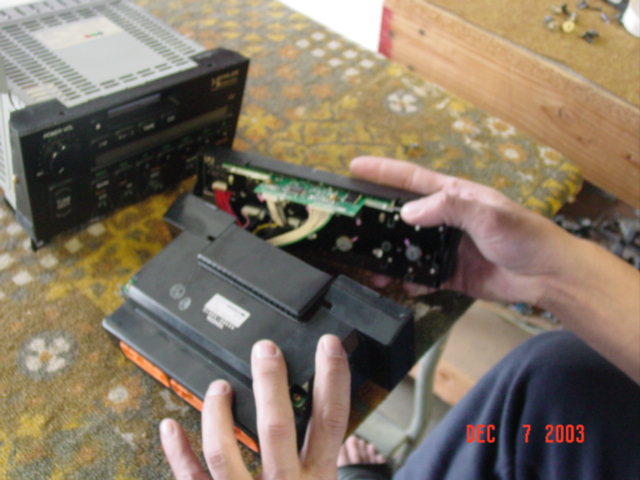
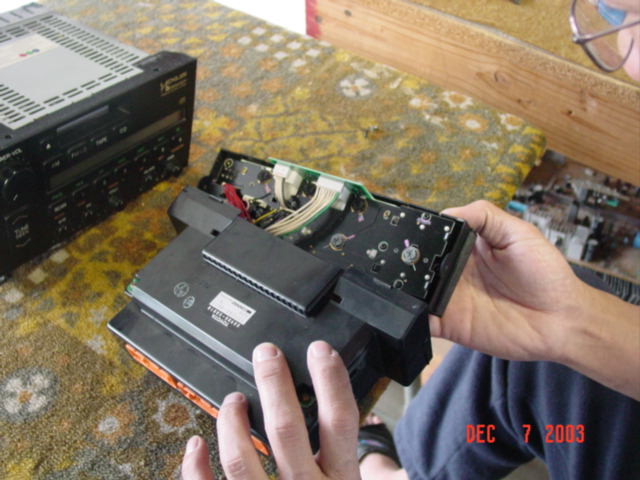
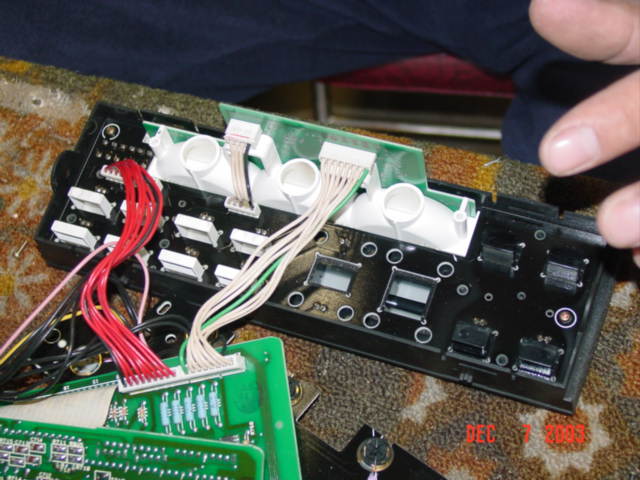
- The diagram doesn’t show it, but when you pull the Radio and AC
Control assembly out as far as you can, you then have to unplug all the
plugs on the back of the two units in order to fully remove them from the
car. All the plugs have a locking mechanism on them. You must push on the
locking tabs quite hard in order to disengage the locking mechanism and
unplug the plugs.
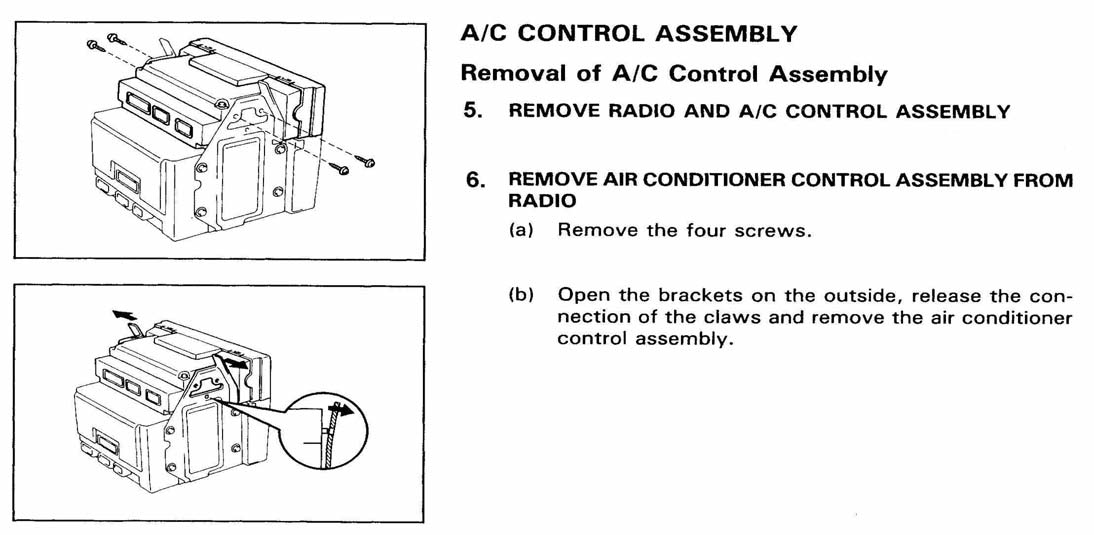
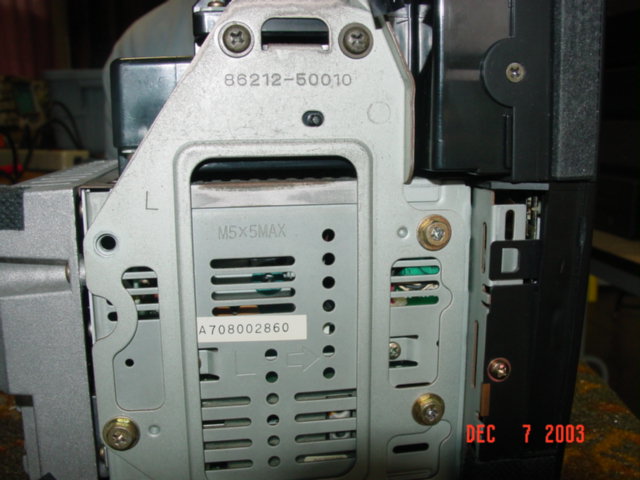
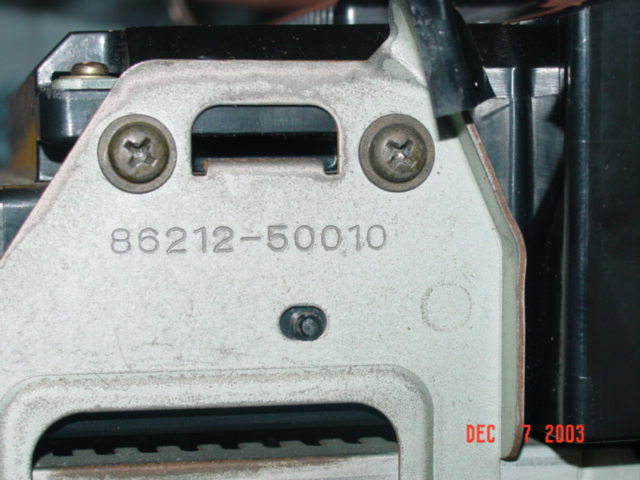
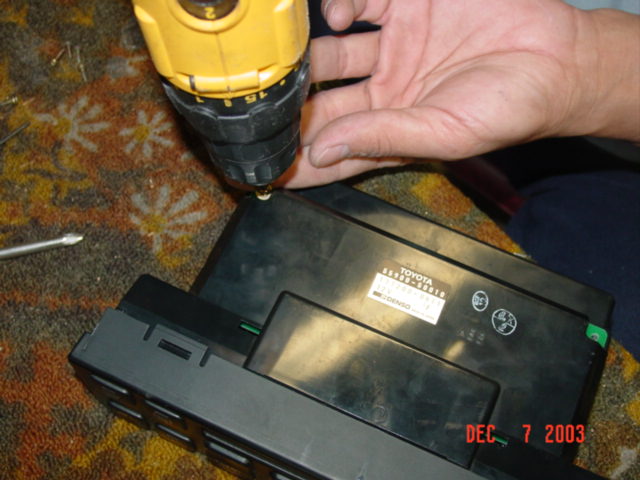
- After removing the A/C Climate Control assembly from the radio
assembly, package it carefully with at least an inch of cushioning
packaging material on all 6 sides of the unit. Make sure your name,
address, phone number, and email address are included on the inside of the
package.
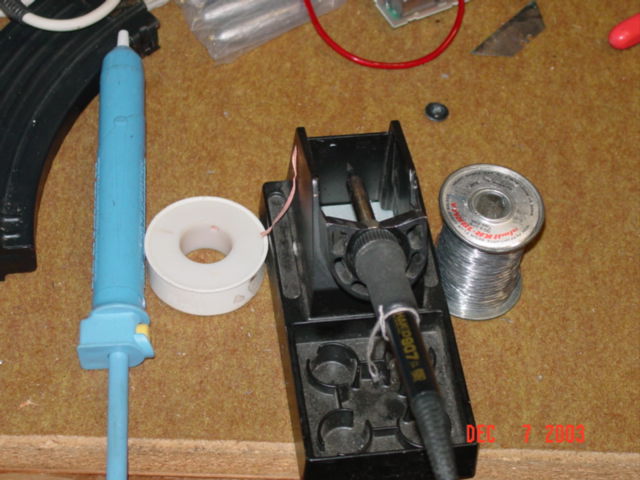
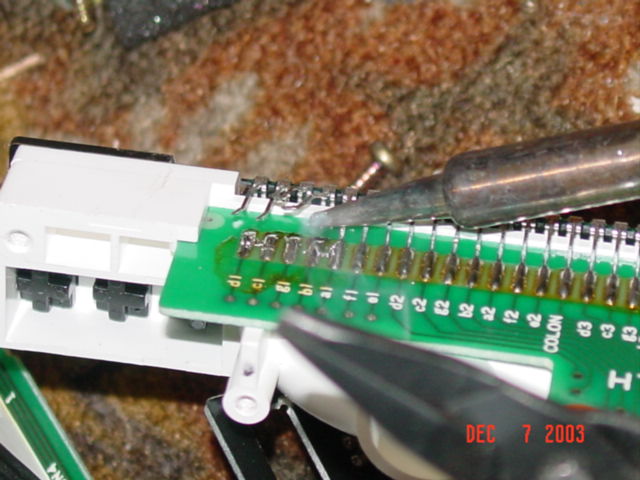
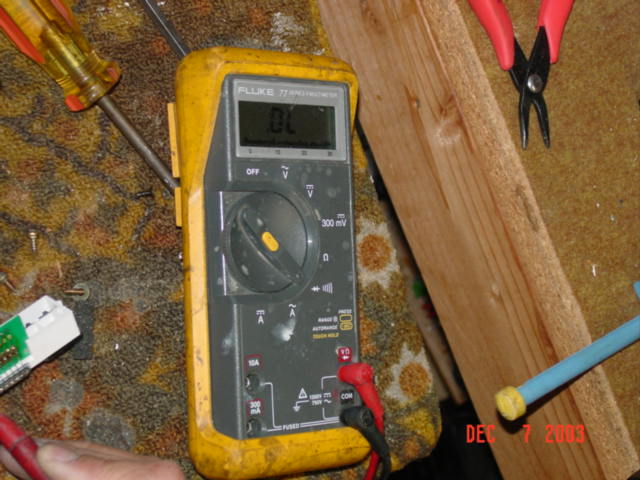
Tools: The basic tools I used for this project was a screw driver, solder,
solder cleaner and a volt meter
Time: Took me about an hour. Since this is my first time.
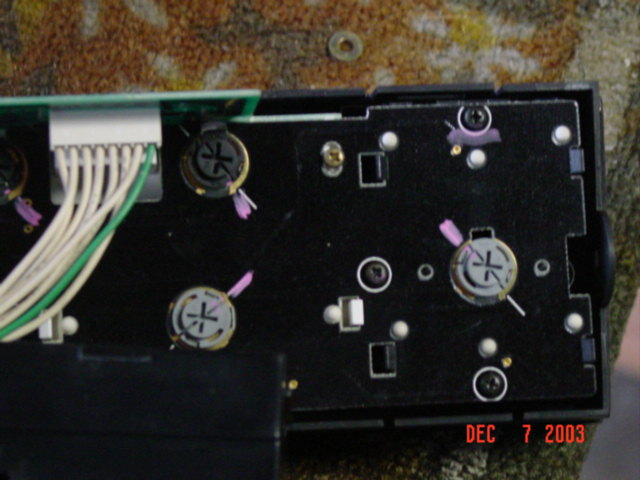
Warning: Since your unit had been exposed to extreme temperature like
heat, cold, sunlight and UV light for the past 12-14 years. The clock
control bottoms sometime get stuck into the plastic plate. Secondly, there
is also some glue on the plastic face cover. If the used LCD
doesn’t come out easily, do not force it out. You will break the plastic
piece guarantee . To avoid this problem, from my personal experience I
recommended that you should use a blow dryer and slowly heat up the LCD and the plastic plate
from the back. This will take about 5-8 minutes. Be patience the
glue will soften up. Don’t heat
the LCD in the front of the unit. Heat it from behind. With heat,
this piece will come out easier.
Impression: I am so impress with Jim’s LCD product. Its easy and
no guess work. I highly recommend this product to all the first generation
Lexus LS400 owners. Its affordable and very easy task.
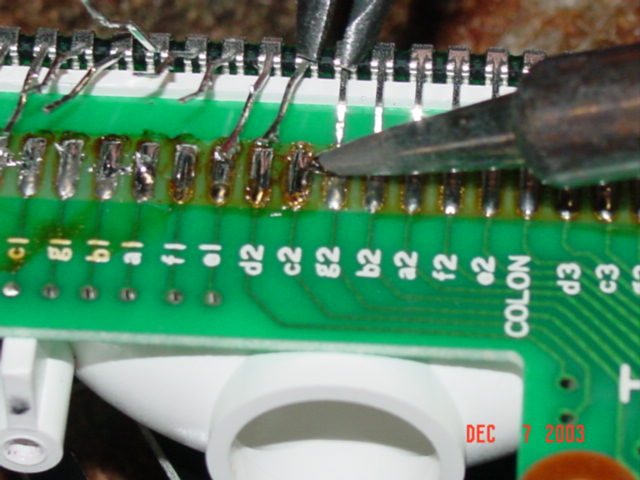
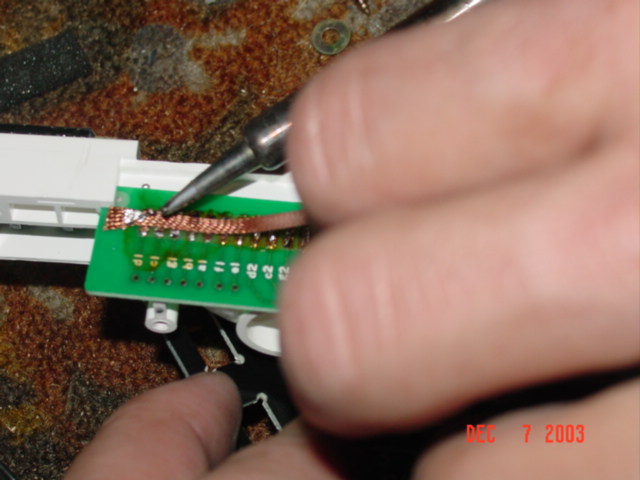
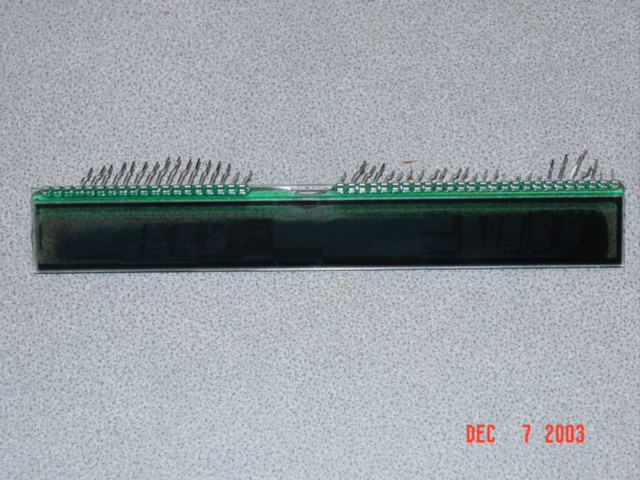
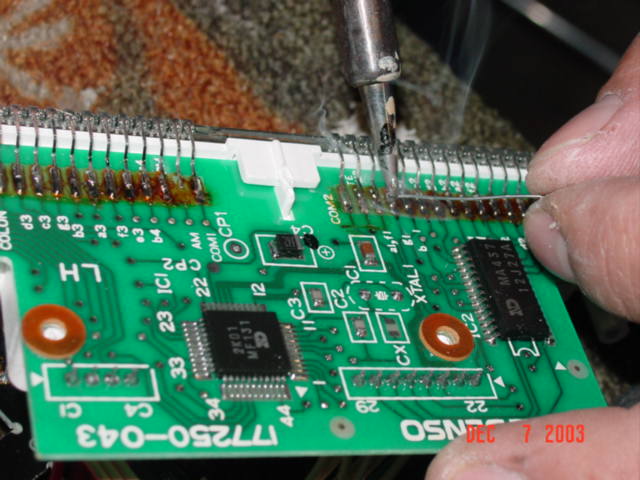
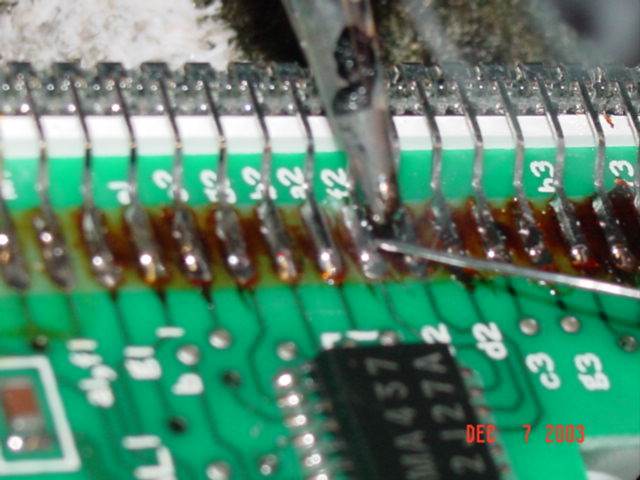
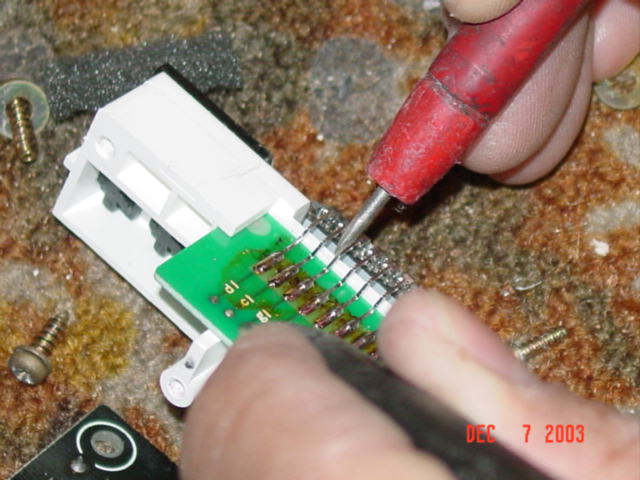
Here are some pictures of RHD LCD replacement.
1. You can buy just the LCD module that you install yourself (lots of soldering, somewhat
difficult, no warranty) comes with instructions for $160 + $10 S&H.
RHD LCD is $170 plus $20 for shipping).
Now available both RIGHT or LEFT HAND DRIVE from 1990-1996… US-Spec LS400 OR J-SPEC CELSIOR.
US Spec 90-94LS 400 LS400 (LHD)
and 1992-1996 SC300/SC400
$160 Plus $10 (Installation
Instruction)
J-Spec 90-94 Celsior & 92-96 Soarer (V8) or Soarer (TT) Right Hand Drive (RHD) $170 plus $20 for International
shipping. (Installation
Instruction)
4. LCD Display Background light bulbs, $5 each
What would I do differently? You must be careful removing the LCD. Since it last installed and heat, sometime the clock got stuck on the plastic cover. Use extra caution on removing the LCD. Secondly, don’t stay on the pin for too long when you use the solder. You can easily burn the board. The project can be done by an average handy person. If you are not comfortable with it, I would highly recommend someone with soldering experience or we can do it for you. Good luck! Once again, Jim did a great job on this unit.
Here are some satisfied customers’ comments:
I received the LCD in perfect condition and thanks for the extra bulbs. I installed it with the instructions you included and had no problems…very easy to follow. Except that when I pulled the old smudged LCD it cracked the front plastic lens on the cover. By the way, Do you have one for sale?…or know where I can get one? We’ll anyways the LCD worked perfectly…Thanks to you. For anyone who owns a Lexus LS400 with the same LCD problem…I highly recommend these guys. By the way great website!!!…Lots of info. Thanks again. Caesar Curamen [email protected]
David-I hope to get it installed this weekend and I will leave you positive feedback. This is a great, affordable product for a very frustrating
problem. I’m glad that somebody “in the know” finally took action to remedy it. Thanks for making this product available to all of us with older Lexus cars. I wish you great financial success with this project!! David, I got the LCD installed this morning. I thought it would take two days and it only took two hours!! Took it out for a test drive and it worked perfectly. This is the fix that we’ve all been waiting for. Thanks for a great product. Jim [email protected]
I received my LCD screen from you less than a couple of hours ago and it is installed and working perfectly. You have saved me a ton of money and now I can say that I repaired it myself. I was going to have somebody else put it in for me but my impatience got the better of me. Thank you again and I will pass your product along to anyone I encounter with the same problem as I. good luck and I hope you do well. Louis DeMaria Jr. [email protected]
David: After much frustration with my Lexis dealer, I was elated to find not only the parts I needed, but an honest person to deal with. You not only did exactly as promised, but you did it in a very timely business like fashion…Would recommend your excellent service to anyone that asked…[email protected]
Ron Berke
V.P. Berke Enterprises.


Hi,
I’m looking for a aircon lcd screen for a 1994 mk1 LS400 RHD. I’m in the UK, do you stock this part?