Serpentine Belt. Power Steering Delete

The 1UZFE EGR Delete Kit is available for sale here.

Doug68

Member
Messages
54
Location
WA, Australia
Hi All,

Starting to look at the engine for my car, there'll be very minor mods to it just to get the thing up and running.
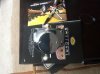
Firstly I'm getting rid of the power steering as I'm not using it in the car but the a/c stays, so I end up with a belt routing like this:

Serpentine.jpg


Now the tensioner is rotating the wrong way and I realize that its in the wrong place for a auto tensioner now, so either I'll swap the spring to get the tensioner working the other direction or make the tensioner a manual device.

Anyone else done a similar thing or something better that they care to share?

Aslo...

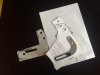
If I get one of these (below) to replace the hydraulic pump bracket, what pulley do people use? Is there a cheap source of them?

5c8c_12.jpg

Thanks,

Doug.
 
Doug,

The idler has a left hand thread on it so if you run it backwards there's a risk it will come undone!

Why not put a small idler wheel above and to the left of the idler to replace the P/S? It wouldn't have to be as far out as the P/S was.

I'll have a look and see if I have a spare idler pulley.
 
Hi Zuffen,

On the left hand thread I thought a good dose of thread lock would sort that issue out, but the point is noted.

Frankly I think 6 pulleys to drive 2 devices is too many already, if I could figure a way to make one of the other 2 idlers adjustable then the tensioner in qustion could be deleted. And just writting that down has got me thinking on how to do that, so cheers well done!
 
hey did you ever get this issue sorted?
as im running into almost the same issue, im deleting both ps an ac but want to keep the hydro pump setup
 
I would run the belt from the crank up to the top idler (it will engage the hydro pump with the back of the belt) Then down to the alternator and around the tensioner to the crank.

You can delete the tensioner by making the alternator rotate around its lower mount and put an adjuster on the top mount.

so i decided to ditch the hydro pump and am now just running the idler crank and alt
now i know the tensioner isnt putting enough pressure on the belt
would you know how to make the top mount adjuster? or where i could find one?
thanks
sorry for the thread-jack
 
so i decided to ditch the hydro pump and am now just running the idler crank and alt
now i know the tensioner isnt putting enough pressure on the belt
would you know how to make the top mount adjuster? or where i could find one?
thanks
sorry for the thread-jack


Just run a short belt around the crank and alt pullies and make the alt adjustable as suggested by Zuffen.

Cheers

Daniel.
 
I deleted the factory PS pump and put a smaller replacment pump into the vacant a/c compressor position. I then just swap the spring in the tensioner so that the tension is reversed.

A simple bit of engineering is required ie drilling a new hole for the spring to lock into and drilling and tapping the central shaft so the backing plate can be re-attached after reversing the spring.

This has worked for over 7000 miles in two Cobras I've built using the LS400 engine.

Cheers,

Tony
 
I am only using the alternator on my 1UZ project.
I am using a slotted lower alternator mount as some people have suggested, but when it's all put together, any pressure on the belt results in excessive flexing of the alternator mounts and bolts.
So, here's what I did:

Firstly, as it is stock:
am1ya.jpg


I made one of these out of 6mm steel:
am2w.jpg


..And mounted it on the alternator, thus:
am3ux.jpg


Next I machined the alternator boss slightly where the bracket bolts on, and the mounting boss on the block, to a total of 6mm:

am4u.jpg

You need to ENSURE both surfaces are flat and inline. This is imperative!


I then made up this bracket:
am7i.jpg

As you can see it mounts against the (now disused) tensioner housing, and uses two of the housing's bolts. This spreads the alternator belt tension load across the whole tensioner face.

Here is a shot of it showing the whole assembly:
am6j.jpg


And now a little detail to finish off the empty tensioner housing:
am8a.jpg
 
Diff approach

I moved the alternator up one bolt and made a bottom swing bracket out of 6mm polished stainless could have stayed on the original bolt but I needed steering rack clearance
 

Attachments

  • image.jpg
    image.jpg
    141.1 KB · Views: 39
Only one left

I deleted all the ancillaries as dint need them and moved the alternator up a bolt hole and made it swing able made a bracket out of stainless and polished it
Pictured is the 3 stages paper panel steel to check if it worked and the finished item
 

Attachments

  • image.jpg
    image.jpg
    141.3 KB · Views: 26


Top