Here is my version of water pump/timing belt replacement.
I will focus mostly on the timing belt installation. I think this is the most important step. If you don’t do it right, the whole car would not run properly and it will be very time consuming. It’s not fun to do the same job twice.
So in this supplementary article, i would like to stress the timing belt installation. I have done this myself and I pretty much know it inside and out by now.
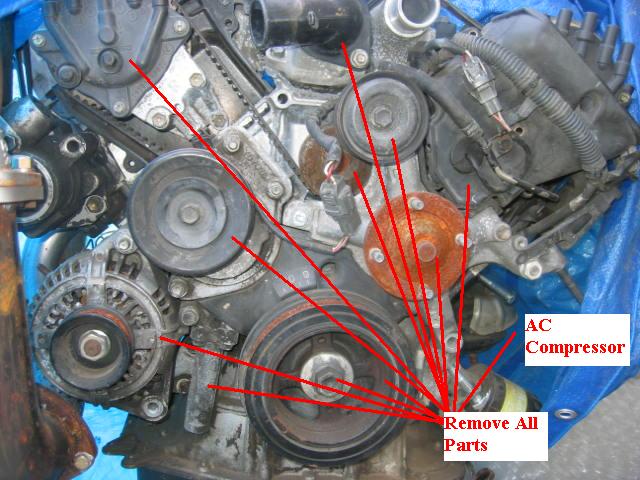
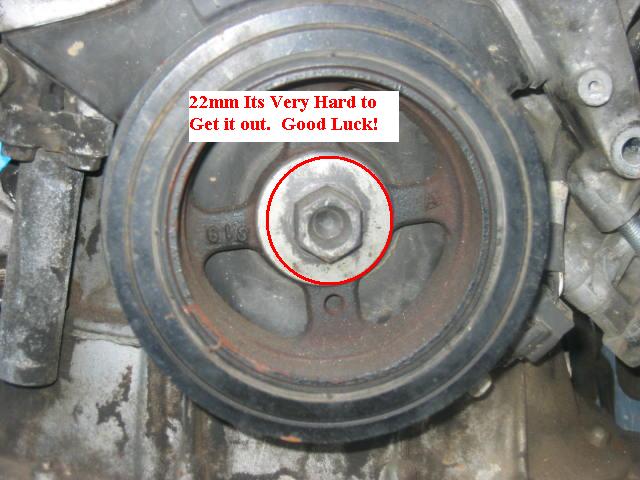
So here it comes. The below pictures shows all the parts need to be removed. The second picture is showing the crank pulley bolt. This is the toughest challenge u will face. Lexus mentioned about the special tool, but you would need at least 3 to 4 feet extension in order to have enough leverage. I also tried air gun and failed. The cheapest and fastest was would be the “Old School” method. Yes, that is right ” No school like the Old School”
I put the 22mm socket with a wrench and placed it in a loosen position. I placed the handle next to the frame in the passenger side and crank the starter. I am using the starter power to turn the bolt. After two turns, the bolt came loose. It’s almost like magical.
Honestly speaking, the hardest part is not taking out the crank bolt, I think the hardest part was to make sure you got the time belt on properly. Most of the parts are pretty much self explanatory.
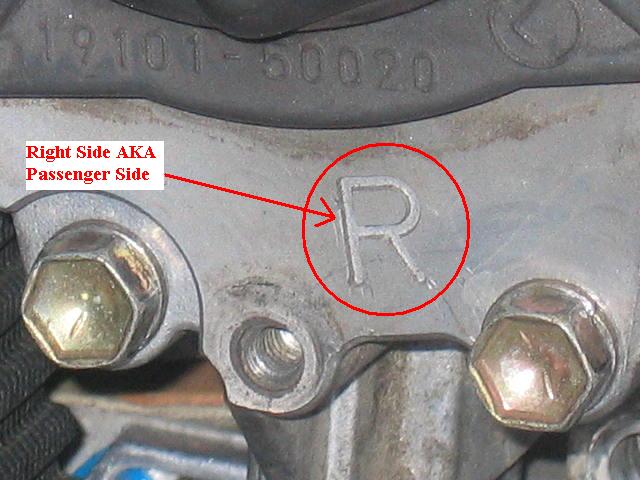
The two pictures below I would like to emphasize is the R means Right. The right and left reference is from the driver/passenger prospective. So, when the engine part marked R means Passenger side and L means driver side.

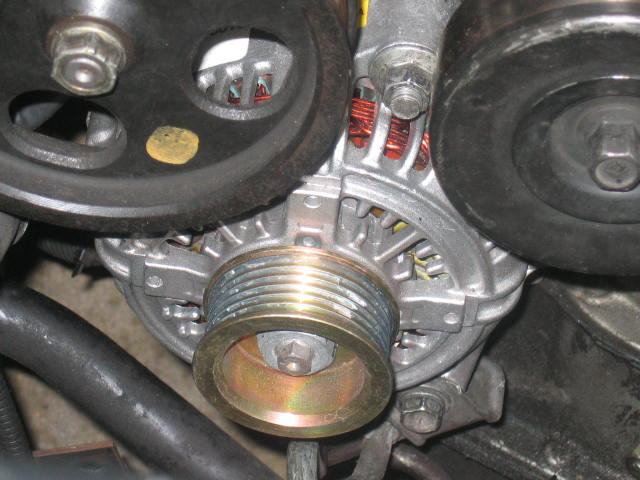
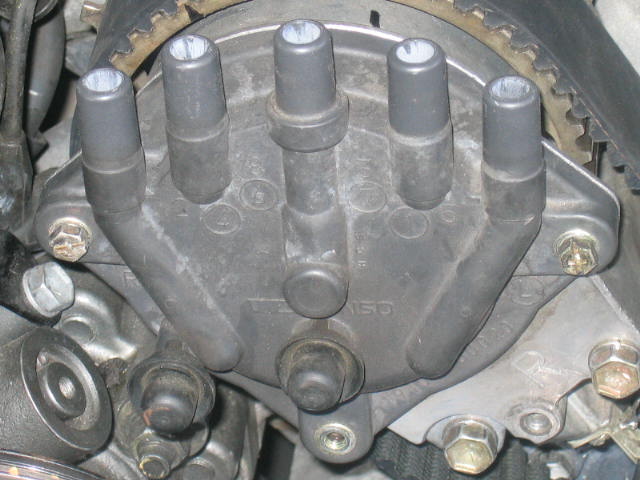
The two pictures below show an alternator and an ignition part. Removing them is pretty simple. The alternator has two 14mm bolts and they need to be remove and slide the alternator out so the belt tension can be removed.
The wires connected to the alternator doesnt have to remove. Just the two 14mm bolts. FYI, when you remove the two Distributor Caps, they might get stuck due to time. Use a flat screw driver and pry it out.
When u buy original timing belt from Lexus, the belt itself has three reference points. Here are the three reference points:
*CR – Crank DOT
*L CAM – Left Cam Pulley
*R CAM – Right Cam Pulley
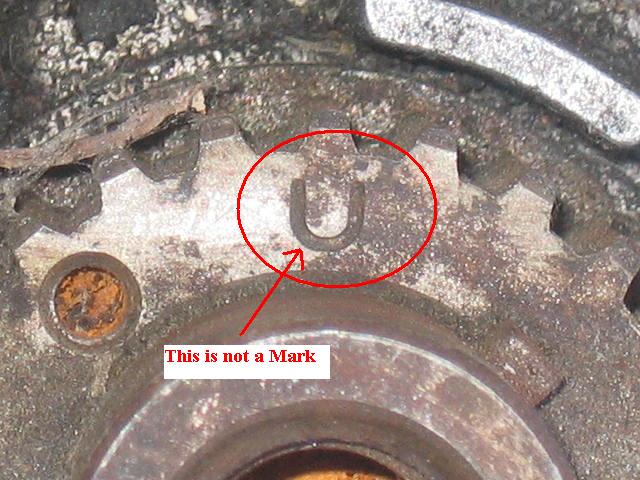
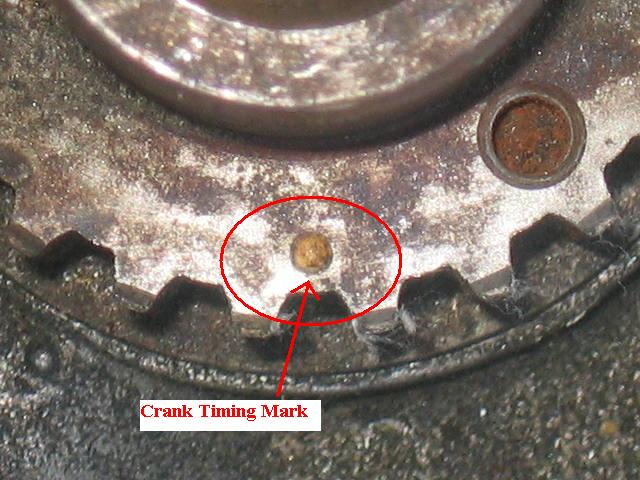
Here is the tricky part and I will try to explain it very carefully. There are two marks on the crank timing pulley. One is a dot and other is a upside-down U. Your goal is to align the DOT at the bottom position. Basically it will be at the 6 O’clock position.
Once you align the crank timing pulley to 6 O’clock then now you are ready to adjust the cam pulley to the proper position. There are two cam pulleys and they are different. The left cam pulley has double lips vs. the right cam pulley has single lip.
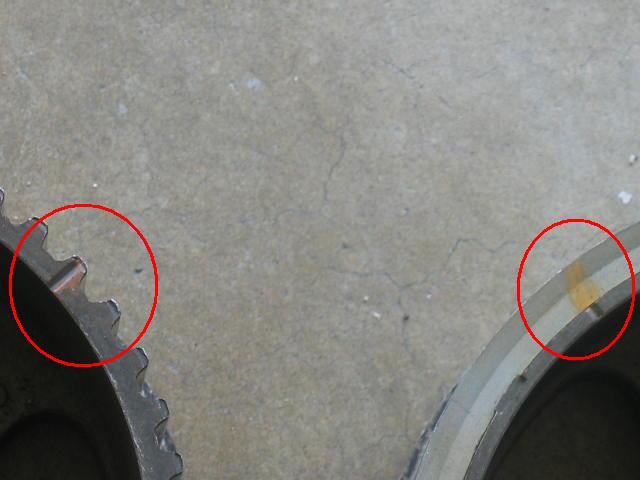
The cam pulleys also has reference mark as L or R. U should mess them up. The two marks are clearly defined at the pictures below. The timing marks are located in front of the pulleys.
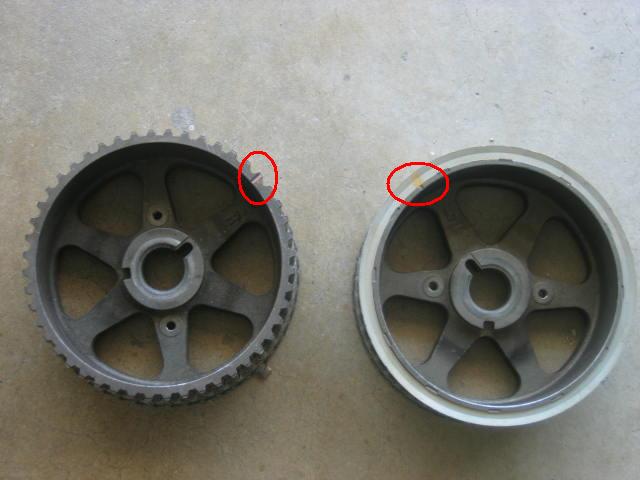
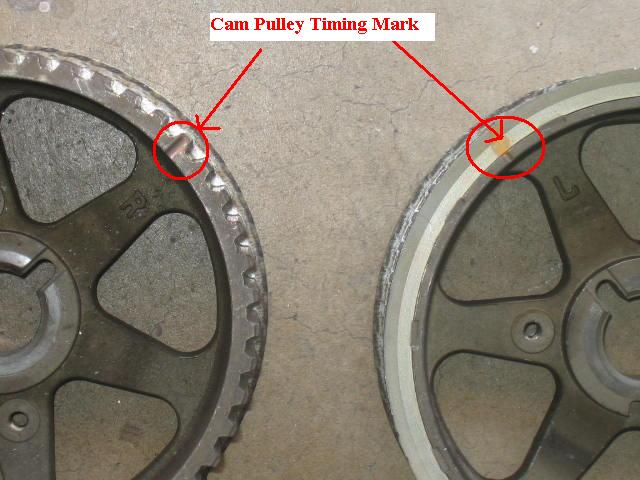
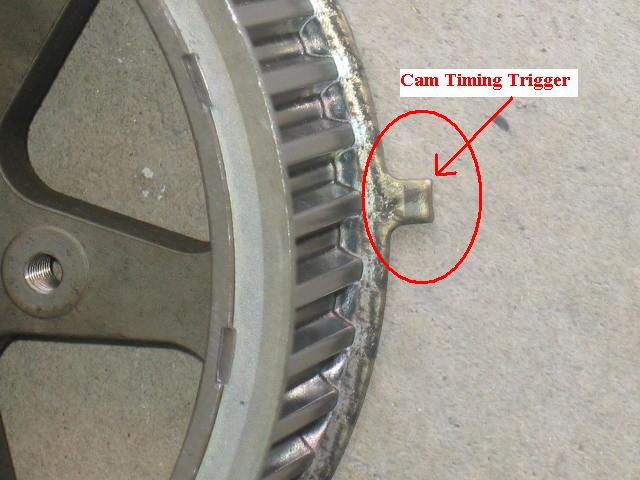
The picture below on the left clearly show the timing reference marks. The R (right) cam pulley should be in the position of 1 O’clock and the Left cam pulley should be in the 11 O’clock position. Please reference the pictures above. The second mark on the cam pulleys are the cam timing trigger.
The picture on the lower right demonstrated that. Please ignore that mark. Don’t get confuse with it. That is why I took a picture to show u that. Many people use the work reference points and the cam timing trigger is not part of your project. The cam timing trigger is located at the rear of the pulley.
Here is a picture of the Left Cam reference on the timing belt aligned with Left Cam pulley. If you can get all three marks in the proper position, then u can continue to install parts back. If not, try it again.
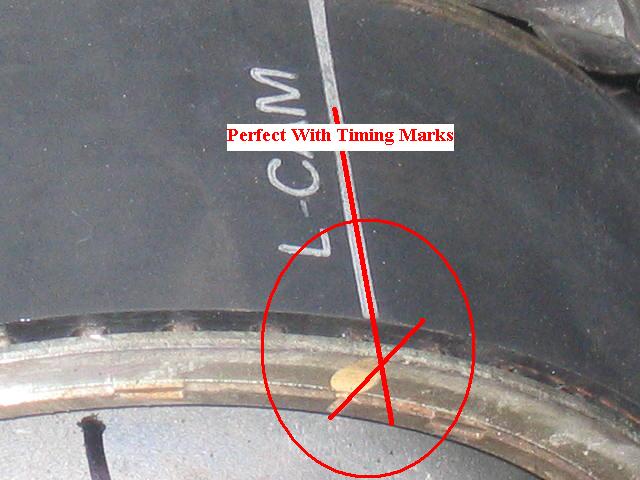
NOTE: Make sure the crank timing pulley is at 6 O’clock position and the L Cam (Driver side) is position at 11 O’clock and R Cam (Passenger Side) is position at 1 O’clock. Slide the timing belt according to those marks.
Good luck and I hope this detail timing belt replacement article help with your project.
David