Car is a 1996 Lexus LS 400 with 115k miles. Click Here for First Generation Timing Change
Timing Belt Installation Supplementary By Lextreme
The most important thing is put the parts that you take out in the order they were removed otherwise its really easy to get lost and you can have some extra parts after assembly.
Tools used:
In order to get this done you need a big 500 piece set of tools. The regular craftsman 100 pieces set will not do. All the tools are standard. You need couple of rachets, extensions, and regular 6,8,10,12 gauges.
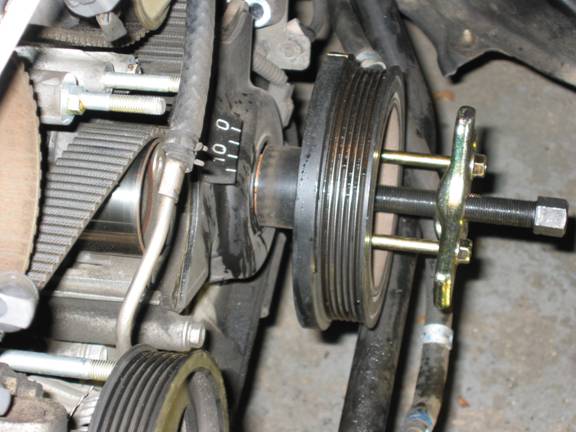
To remove the crankshaft pulley you might need a compressor if you are doing the job alone. Otherwise all u need a strength in your hands. To get the crankshaft pulley out you have to rent a special tool caller “harmonic balancer pulley removal kit”. The rent is free at Autozone.
Parts.
Timing belt 51$
Water pump 154$
Timing belt idler pulley L 96$
Timing belt idler pulley R 63$
Timing belt tensioner 40$
If you are opening the engine it’s a good occasion to do the tune up. Parts for the tuneup are:
Cable set 100$
Spark plugs 90$
Rotors X 2 15$
Caps X 2 23$
Fuel filter 20$
Ari filter 15$
All the parts are original Denso OEM parts for Lexus purchased from the dealer.spark plugs are denso iridium spark plugs model IK20 purchased on ebay.
The procedure.
- Let your car completely cool down. This is vital for your health first of all. I hope everyone knows why. J
- remove the engine undercover. This is the big plastic cover under the engine. There are around 10 bolts holding it.
- drain the coolant. Once its done dripping you can continue. Oh and don’t forget to open the cap on the coolant reservoir.
- once you are done with this start taking off the covers. First get the big v-pan cover. That’s the one that is on top of the engine. There are 3 screws holding it.
- remove the air inlet. This is the big thing located on the top of the radiator.. there is only one bolt holding it.
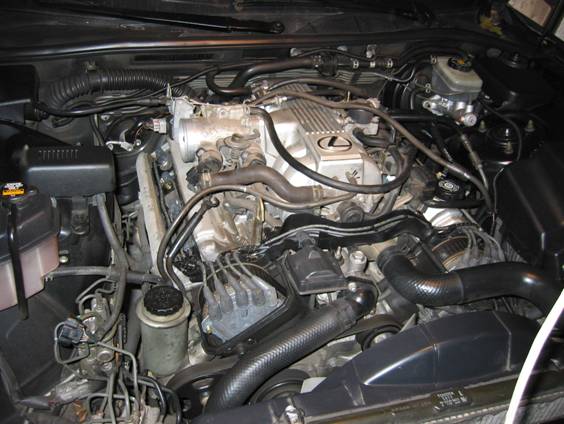
- remove the air cleaner and intake assembly. Now be careful there is an airflow sensor in this assembly make sure you disconnected it. This sensor is around 400$ FYI. Intake assembly has 3 bolts : one on the engine near the firewall. You cant miss it. The other 2 are on the body and they are pretty big and obvious.
- remove the battery. Disconnect both connectors and unscrew 2 bolts holding it.
- now you are ready to take 2 top timing belt covers. They cover the spark plugs, cables and distributors with caps. You can also see the timing belt.
- Ahhh so close yet so farJ by this time your engine will look like this:
- now you are ready to take off the radiator. First disconnect those 2 big hoses that goes from the engine to the radiator. They are located on the top of the engine and you cant miss them. Use pliers to loosen the hoses. Be ready for the dripping coolant at this stage. Don’t try to remove the radiator you because we need to disconnect the ATF hoses as well. Jack your car up before doing next points and make sure it’s not going to drip on you. Get comfortable under the car And disconnect 2 hoses for the ATF. Make sure you have some paper towels around you. Once you disconnected them plug paper towels into the radiator and hoses to minimize the ATF leak. Now unscrew 2 big bolts holding the radiator and take the radiator out.
- loosen up and unscrew 4 nuts holding the fun/clutch assembly and remove it from the pulley.
- remove the drive belt. Don’t worry on how to install it back. There is a sticker with a diagram located on the hood. (just behind the grill).
- remove the lower left timing belt cover (remember that when you stand in front of the car your left is cars right and your right is car’s left). Disconnect the camshaft position sensor connector from the ignition coil bracket. Disconnect the sensor wire from the timing belt cover. Remove the wire grommet from the timing belt cover. Disconnect the wire clamp from the timing belt cover.
- Unplug all the wires from the rotor caps and remove the rotor caps. Your engine should look like the one on the picture.
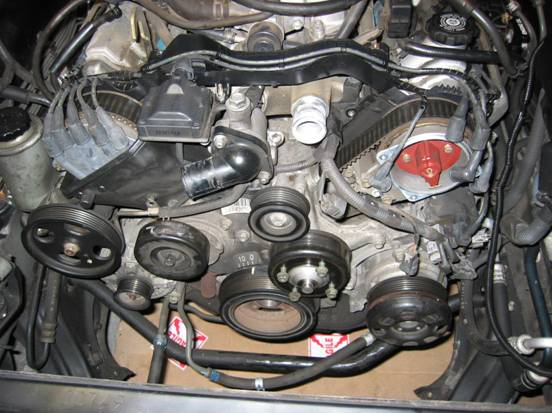
14.disconnect the sensor from the right lower timing belt cover. It’s almost the same as for the right one. Removal of the cover itself is a little bit more complicated since there are more bolts holding it and one of the is located under the Ps pump so you need a long extension for your rachet.
15. remove the idler pulley. Very easy. No comments.
16. remove both coils. Disconnect noise filter connector and high tension coils
17. remove fan bracket. It’s a pretty big iron thing and has 2 nuts and 2 big bolts.
18. disconnect the AC from the engine. Don’t disconnect it completely. There is 1 bolt you have to remove in order to get the cover out. Align crankshaft pulley that the pointer on it will make a line with the center of the left camshaft pulley. It is necessary for the installing of the new belt.
19. now you are ready to remove the crankshaft pulley. You will have to use that rented or bought harmonic balancer removal tool. Set it up like on the picture below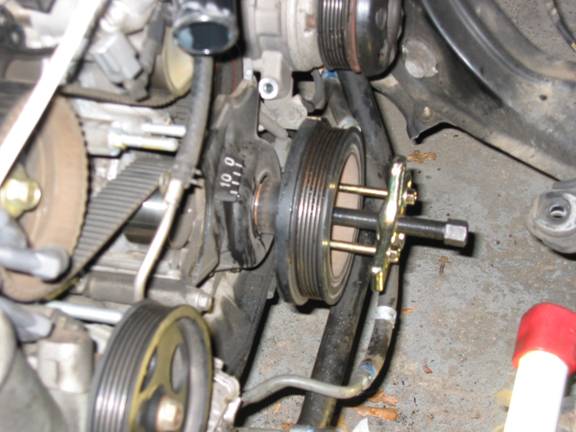
here is a closer look:
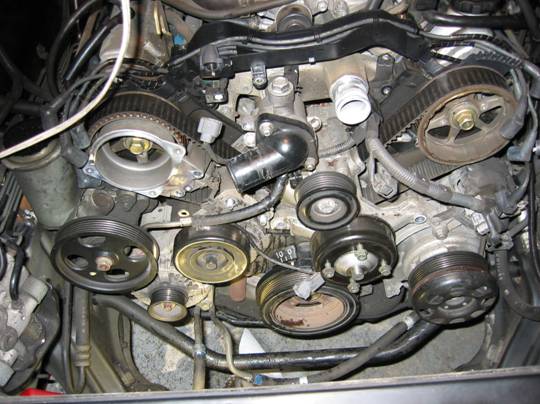
20. once you done removing the pulley you are ready to take the last cover out.
21. Unscrew all the bolts for the alternator
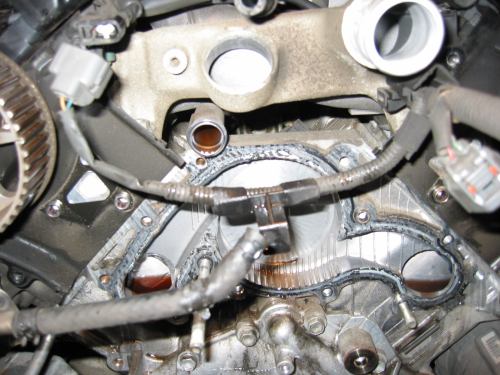
22. remove the last cover. Timing belt guide will be visible as on the picture.
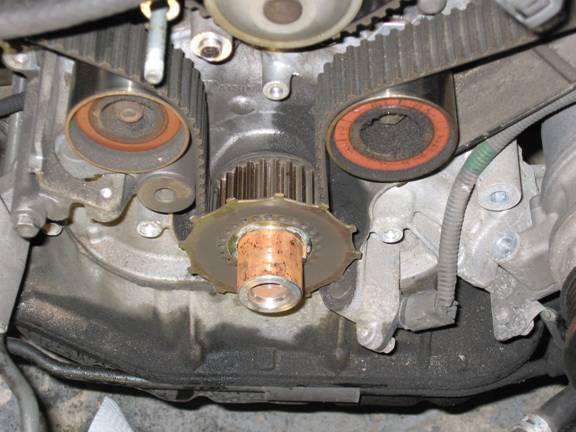
as you can see in my case the left pulley was leaking oil and its really not good for the timing belt material.
23. remove the guide, tensioner and timing belt.
24. remove thermostat water inlet housing.
25. remove thermostat. Unscrew all the nuts and bolts for the water pump.
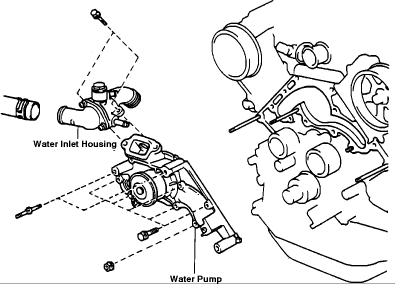
26. remove water pump. Be ready for the dropping coolant.
27. remove dust and grease from the new water pump and put the hot temperature sealant. Be careful coz its stick and stinky and toxic.
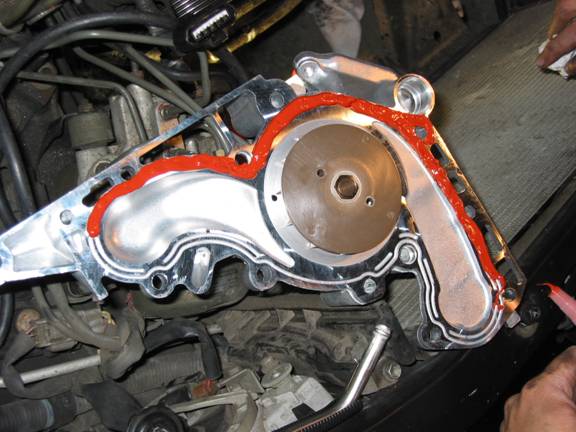
28. carefully install new water pump into place and put all the bolts and nuts back but apply force equally from both sides.
29.put the thermostat back.
30. install new left and right timing belt pulleys.
31. now we are ready for the most important part – installing new timing belt.
Clean all the pulleys and gears from the dirt, oil and dust before putting new belt. Now find a special marking on the crankshaft gear.
32. align the installation mark on the timing belt with the mark on the crankshaft timing pulley.
33. install the belt on the crankshaft timing pulley and Left and right timing pulleys.
34. INSTALL TIMING BELT GUIDE. Install the belt guide, facing the cup side outward.
35. install the timing belt cover. (the one shown on the picture)
36. install crankshaft pulley. Align the pulley set key with the key groove of the crankshaft pulley.
37. install the drive belt tensioner with the bolt and 2 nuts.
38. Check that the timing mark of the crankshaft pulley is aligned with the centers of the crankshaft pulley and the idler pulley bolt.
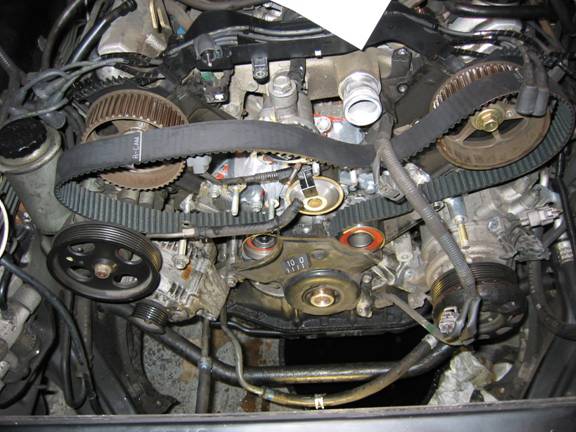
39. align marks on the camshaft pulleys with the marks on the belt (on the belt is says R-Cam and L-cam). You can rotate pulleys a lil bit to align. I didn’t do it by the book because I rotated left pulley a lot by accident so I just had to set the crankshaft pulley to 0 and then set left and right camshaft pulley markers to match the marks on the engine. It was really hard to do since I installed new tensioner already. I had to loosen tensioner bolts and remove the belt from one pulley in order to rotate it. It was really hard to put the belt back on the pulley. Once you are done doing it tighten up bolts for the tensioner and rotate whole system couple of times to make sure that all the marks are in correct positions.
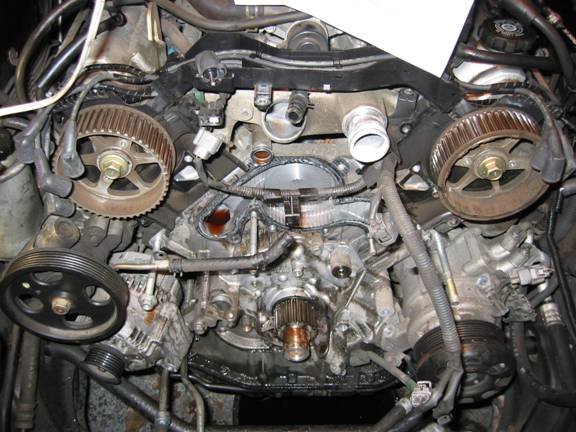
when the crankshaft is pointing to zero make sure that marks on the camshaft pulleys are aligned with the marks on the engine.

you can see on this pic that crankshaft is on 0 and camshaft marker is aligned with the mark on the engine.
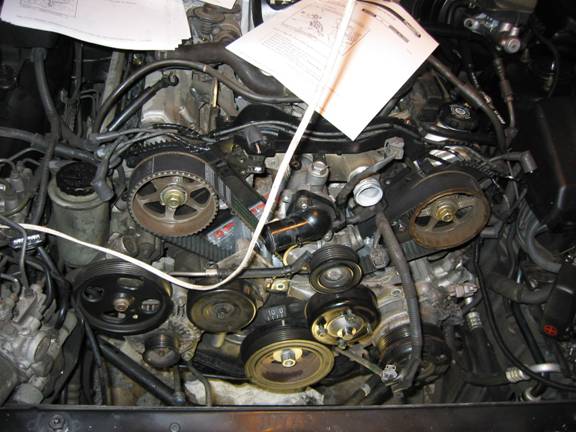
41. put all the covers sensors and bolts in the reverse order.
42. unscrew the filler bolt and add the required amount of coolant. Fill it to the top, shake the car and continue filling until the level is stable. Add more coolant to the reservoir.
43. Check ATF and oil levels.
44. start the car and let it heat up, monitor the engine sound and the cooling fluid level. Let the car idle for 10 minutes while you are adding the fluid. Rev the car up to 4-5k rpms to make sure there are no interrupts or misfires in the engine. If there are….. you will have to do most of it again.:(
if you are lucky and everything is fine then just monitor the level of coolant for couple of days on the cold engine and add it if necessary.
That looks really really good for having 240k on it, definitely needs changed though. We had a display one handing around the shop for a while that was split in half (like down the middle so it was 2 belts now,) that was a fun one to show the customer.
If I could upload a picture to this it would show the 2 piece timing belt on my 250k 1995 LS400. 1 piece being around 5/16” (8mm for the rest of the world) wide.
This helped more than I know how to express! Thank u very very much for taking the time to write this, it made all the difference for me.