DIY Cast Polyurethane Mold

The 1UZFE EGR Delete Kit is available for sale here.
One thing that may help with both releasing of the mold and with shrinkage is using a little draft in the mold. about 1/2 to 1 degree of taper on the walls. You will want to try to figure out the swet spot where the very bottom of your bushing starts into the hole and then the bushing will install very nicely and will have a good snug fit when fully pressed in. This will also alow youe bushing to release from the mold much more easily. I've done dozens of molds over the years for a lot of industrial applications and it has allowed me to figure out a many of the annoying little details. It also helps having a couple engineers around to ask.
 
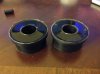
Thanks for input guys! 4U2QUIK, are you doing injection molding or cast? We have a product line at my work that I am the only engineer responsible for so I have been talking a lot to the plastics place we use to inject a urethane seal on our valve, and you can see some of the shrinkage, but I understand this to be a bigger problem with injection molding and not casting.


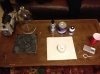
Okay, so today my new vacuum bell jar came in! The glass was not quite as smooth on the surfaces as I hoped, making it hard to see through a little bit. Anyway, went down to autozone and rented an A/C vacuum pump and used that to power my chamber. It worked GREAT! Now this was a rinky dink rental model and it still performed very well. I put it in the chamber and turned on the pump and bubbles slowly started to rise, but the whole liquid seemed to expand, all the way to the brim of the cup! (Cup about 5" tall half filled) All the bubbles started to pop and the resin started to fall so I kept the pump on a bit after it fell too. Turned off the pump, slowly released air pressure back into the chamber, and marveled at the process and how jet black and clear the resin was. As I was releasing the air back in, you could see the resin becoming more and more smooth on the surface. After that I slowly poured it into my mold. After I poured it I put the mold back into the chamber for a few extra minutes and pulled it back out. Wow is all I have to say, it came out so much better this time. I shot a video of it, but next time a will shoot a few stills to upload here so you can see what it looks like.

When I was doing my research I read that after you pull a vacuum on it you can actually pressurize it in a chamber to further decrease bubble size and let it cure in the chamber. I don't think I will go that far, but its a great idea.
 

Attachments

  • IMG_2217.jpg
    IMG_2217.jpg
    191.6 KB · Views: 11
Havent had the chance to do injection, just cast because most of the parts we do are 1-5 pieces a year.
and, you can pick up a decent 2 stage pump from harbor freight for about 160$ If you start getting into doing multiple molds at once you may want to look at a vacuum oven or a large vacuum desiccator.
 
Last edited:
I was thinking a cheap 2 stage as well, and then I found some lab grade Welch 2 stage pumps on ebay, one is for 150 shipped and they are 2500 new so I figure it may be a little old, but it will probably perform just fine. Here is a picture of the new pour and its clarity!
 

Attachments

  • IMG_2222[1].jpg
    IMG_2222[1].jpg
    181.6 KB · Views: 9
Pulled the second one out of the mold today, here are the two side by side. Quite amazing. I think I may actually go with that vacuum pump on harbor freight, it has great reviews and for the price of that pump with as low as it goes, it seems hard to beat.
 

Attachments

  • IMG_2226.jpg
    IMG_2226.jpg
    192.3 KB · Views: 13
The one from harbor freight is what a lot of people use as lab pumps believe it or not. It pulls a good solid 28-29 pounds of vacuum. Which brings me to another point, I think a two stage might implode a bell jar setup like yours. I highly reccomend a lab grade vacuum desiccator made from borosilicate glass. plus you can shut off the vacuum pump and just leave the batch under vacuum as long as you need without overheating the pump, because they do get quite hot.
 
Some freshly made bushings for the freshly painted mount! I decided to make a top for the mold before i made the final four, after the first two, turning that face on the lathe was just too much of a pain in the butt. So i made a little funnel, drilled a hole into the mold, and poured in from there to have the bushings come out without any machining required.

I still haven't bought a pump. Not sure if I want to continue using the resin for making urethane, the injection molded pellets are just soooooooo much cheaper....
 

Attachments

  • IMG_2386.jpg
    IMG_2386.jpg
    191.1 KB · Views: 5
And here are the front subframe bushings! The center piece had to be sunk in a little, a washer worked perfect!
 

Attachments

  • IMG_2717.jpg
    IMG_2717.jpg
    193.1 KB · Views: 5
  • IMG_2721.jpg
    IMG_2721.jpg
    182.7 KB · Views: 5
  • IMG_2722.jpg
    IMG_2722.jpg
    185.2 KB · Views: 4
  • IMG_2723.jpg
    IMG_2723.jpg
    191.2 KB · Views: 4
  • IMG_2729.jpg
    IMG_2729.jpg
    187.3 KB · Views: 5


Top