the fight

The 1UZFE EGR Delete Kit is available for sale here.

toyotasrfun

New Member
Messages
153
Location
ontario, Canada
hey!
I've started a new build thread because the other one sucked.

I started this project in about 2005-6 can't remember.

It began with a pretty torn up 1972 te27 corolla.

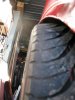
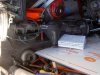
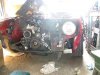
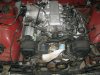
When I got the car it came as pictured, 13"rims, 2tg, roll cage, lowered, gutted.

The price was great so I accepted what I was getting. Little did I know, I should have settled for more.. I was young, naive.. and full of gusto...

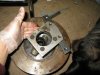
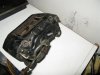
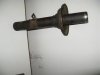
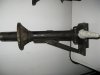
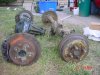
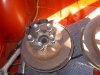
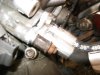
Upon further inspection I realized a few things. The 2tg felt weak, the roll cage welded in poorly, lowered in a fashion I would grow to hate (cut front coils and de-arched leafs) interior cut dangerously to shreds, steering sloppy and overall un-satisfactory.

Still, I did then and still do love the car, so a decision was made to re-do everything...
 

Attachments

  • corolla picture.jpg
    corolla picture.jpg
    4.9 KB · Views: 59
Originally I had thought to rebuild what was there, but realizing the car was never going to be a show piece, I decided it was worth modifying from 1972 while still staying Toyota true.

I had decided that I wanted power every single time I tapped the gas.. whether at low rpm, or high. I wanted reliability of not fussing with carbs, I wanted a car that would be able to handle this power in every way possible. I wanted a fun daily driver that would NOT have me working on it every single weekend once running.

I proceeded to over build everything.

I started with a 1uz.. then mated a r154 from a turbo mk3 supra using a dellows kit.

I realized that I would need some rear end action to handle this.

Having researched and owned a mk3 supra I knew that it had lsd.. which convieniently bolts into the 4runner housing..

With this it was off to the machine shop..

I had a rear end made a touch longer on each end to suit the corolla and any new wheel fitment that is readily available these days.

It allows me to use a 15 x 8 rear rim with zero offset and not stick out too much or rub the tub on the inside tire wall.

I also had the rear made to fit the mk3 supra rear brakes.

This was notably done for the supra's large size vented disks, which I could NOT find on any other rear end choices (ford, chevy blah blah blah).

AND for the fact that the parking brake did not exist on the caliper but inside the drum of the disk as a completely separate entity.

This was EXTREMELY important to me as I wanted to have emergency equipment separate from the rest.
 

Attachments

  • rearendcorolla (Large).jpg
    rearendcorolla (Large).jpg
    110.2 KB · Views: 11
  • rearendsupra (Large).jpg
    rearendsupra (Large).jpg
    110 KB · Views: 9
  • rearbrakessupra (Large).jpg
    rearbrakessupra (Large).jpg
    109.5 KB · Views: 8
  • rearendcompariosn.jpg
    rearendcompariosn.jpg
    46.9 KB · Views: 8
  • rearendcomparison2.jpg
    rearendcomparison2.jpg
    40.9 KB · Views: 9
It's time I posted some photos of the engine.

It's sat in the car forever now, and changes have indeed been made here and there in order for it to sit correctly.

I learned that I did not have to cut out the trans tunnel AFTER doing it.. so a note to others.. don't do what others do.. check your stuff and do it yourself based on what YOU find!!

I'de mucked around with a few things, placement of the brake master, mounts for the steering rack.. which I used out of a toyota starlet.. and steering column from an ae86.. still have to adapt the turn signals etc to the body harness.. the u joint came from.. believe it or not.. a tercel! It was the only thing that would mate the two.. odd but interesting.. and most importantly.. TOYOTA!:)

all that jazz.. it's all got to do with the engine bay so I thought I'de mention it..

I should probably mention that I'm running a stock ecu.
The idea here's reliable power that I can start every single day of the week:)
 

Attachments

  • engine (Large).jpg
    engine (Large).jpg
    112.3 KB · Views: 13
  • tempfuelcell (Large).jpg
    tempfuelcell (Large).jpg
    94.9 KB · Views: 10
  • oilfilterrelocation4 (Large).jpg
    oilfilterrelocation4 (Large).jpg
    100.4 KB · Views: 11
  • oilfilterrelocation (Large).jpg
    oilfilterrelocation (Large).jpg
    70.7 KB · Views: 11
  • engineonstand.jpg
    engineonstand.jpg
    69.3 KB · Views: 12
  • enginegoingin.jpg
    enginegoingin.jpg
    69.6 KB · Views: 11
  • engineincorolla.jpg
    engineincorolla.jpg
    197.5 KB · Views: 13
  • ecuincorolla (Large).jpg
    ecuincorolla (Large).jpg
    104 KB · Views: 12
  • brakemastercorolla (Large).jpg
    brakemastercorolla (Large).jpg
    103.2 KB · Views: 11
  • brakemastercorolla2 (Large).jpg
    brakemastercorolla2 (Large).jpg
    114.8 KB · Views: 14
Fast forward some years and I'm still not done.
I'm working on the front suspension and brakes at the moment, because I strongly believe it's VERY important to stop.. lol

I've also been working on the steering, but no pics for now as I don't have anything worth showing..

the car's gone through some transformation and so have i.
she's still not done, but nearing driveability daily..

here's what i've got so far

now to explain...
the common practice with this type of front suspension is to change the strut insert to a something with a shorter stroke, when lowering of course..

i purchased a pair of struts.. that cost way too much.. and learned that they would not fit into the strut housings.. something nobody was able to tell me..
i proceeded to do the only thing i could have..

i cut off the strut tube and began the process to change the tube..

i'll be using the gland nuts that came with the new inserts, because they will be what come with whatever i order from now on..

i started to bore out the inside of the spindle base where the old tube belonged in order to place in the new tube and weld..

before all of this however; i made some jigs, one for the welding, one for machining the bore on the part.

you'll notice my sleeve.. it needs to be held onto the strut housing with something.. i'll be cutting a small piece of that tube and welding it on the longer tube that will house the strut insert..

i'm using rx7 4 piston calipers (almost ashamed of this.. they're not toyota parts:( )
aside from the rims, the bell housing kit, and the custom hub conversion and steering outer tie rods, they will be the only non toyota parts used on my car.. oh and the front rotors.. they're off an rx7 too..

i built my front brakes in a way that would allow for easy removal when the need for a rotor and pad change arose..

my rear tires are toyo t1s's they're actually some tires my neighbour was throwing away.. i'm using a 15 x 8 " rim

i like the way they fit.. the car needs to be raised though.. i can't have them sit that low.... i may be using some kind of flare.. or raising the car.. don't know yet.. once i sort out the front suspension and steering i will sort out the rear suspension height

i don't yet have a driveshaft, i can't tempt myself in any way to drive before she's ready.. lol

that's just an update.. hope i'm driveable soon:)

I tried to add some more pictures, but because I have them open in a soon to be deleted thread, they won't post here.. wierd..
 

Attachments

  • frtcoilovrhub&brkmarch13,2011 010 (Large).jpg
    frtcoilovrhub&brkmarch13,2011 010 (Large).jpg
    43.4 KB · Views: 8
  • rx74pstnbrkfeb252011 007 (Large).jpg
    rx74pstnbrkfeb252011 007 (Large).jpg
    95.1 KB · Views: 8
  • frtcoilovrhub&brkmarch13,2011 019 (Large).jpg
    frtcoilovrhub&brkmarch13,2011 019 (Large).jpg
    111.2 KB · Views: 7
I've got some pictures that didn't work last time.
You're looking at the front brake and coilover conversion.
The only reason I'm chopping the strut tube is because the strut I was told would fit, did not fit.. lesson.. research as much as possible before doing ANYTHING!

The pictures of the rest are the rear wheel fitment using a 205 50 15 tire and a 15 x 8 rim zero offset.

The car will be raised a touch and I will most likely use some kind of flare.

You can also see that in the build of the rear end, I had the bolt pattern of the supra used (5 x 114.3 also known as 5 x 4.5)

Reason for the rear end again was simply that if ever I want big power, I can go as high as 1000horses.. though I'll never.. also.. lsd is da bomb yO

I did not then and at the moment do not have the machinery or experience to attempt the rear end shortening etc.. To this day I feel it was best left to the professional:)
 

Attachments

  • frtcoilovrhub&brkmarch13,2011 001 (Large).jpg
    frtcoilovrhub&brkmarch13,2011 001 (Large).jpg
    50.9 KB · Views: 7
  • frtcoilovrhub&brkmarch13,2011 006 (Large).jpg
    frtcoilovrhub&brkmarch13,2011 006 (Large).jpg
    41.7 KB · Views: 4
  • frtcoilovrhub&brkmarch13,2011 014 (Large).jpg
    frtcoilovrhub&brkmarch13,2011 014 (Large).jpg
    75.3 KB · Views: 5
  • frtcoilovrhub&brkmarch13,2011 015 (Large).jpg
    frtcoilovrhub&brkmarch13,2011 015 (Large).jpg
    114.8 KB · Views: 4
  • frtcoilovrhub&brkmarch13,2011 020 (Large).jpg
    frtcoilovrhub&brkmarch13,2011 020 (Large).jpg
    90.3 KB · Views: 4
  • frtcoilovrhub&brkmarch13,2011 024 (Large).jpg
    frtcoilovrhub&brkmarch13,2011 024 (Large).jpg
    79.1 KB · Views: 4
  • frtcoilovrhub&brkmarch13,2011 026 (Large).jpg
    frtcoilovrhub&brkmarch13,2011 026 (Large).jpg
    67.5 KB · Views: 4
  • frtcoilovrhub&brkmarch13,2011 027 (Large).jpg
    frtcoilovrhub&brkmarch13,2011 027 (Large).jpg
    66.9 KB · Views: 5
  • rear wheels 001 (Large).jpg
    rear wheels 001 (Large).jpg
    105.7 KB · Views: 5
  • rear wheels 004 (Large).jpg
    rear wheels 004 (Large).jpg
    58.9 KB · Views: 6
  • rear wheels 003 (Large).jpg
    rear wheels 003 (Large).jpg
    51.3 KB · Views: 5
  • rear wheels 007 (Large).jpg
    rear wheels 007 (Large).jpg
    72.9 KB · Views: 5
  • rear wheels 008 (Large).jpg
    rear wheels 008 (Large).jpg
    91.2 KB · Views: 4
Mark!
Your car is unbelievable!
You're doing things that I want to do so badly but can't because of circumstances.
Honestly, I've admired your build since the day you started it.
I remember when you bought the car, when you tore it apart, and when you posted the first vid of you driving the chassis around.
Absolutely awesome!
I'm hoping to drive mine this year.
She's a long way from completion, but as long as the major safety things are done I'll be happy enough to drive.
Fantastic build man!
Would be somethin awesome to see it in person..
May have to make the trip to cali one day!
Keep going man!


Top