Project Thread Supercharged Supra

The 1UZFE EGR Delete Kit is available for sale here.
Day 5 at the Dyno: An excellent day; Murphy must have taken the day off.

Started off by running a compression test, and HOLY MOTHER OF GOD - all cylinders were at 235-240 PSI!! Coming from Supraland, this figure is astronomical, and it's even 35% higher than the recommended 178 PSI shown in the 1UZ service manual. I've got to check that compression gauge.....

What was also surprising was that difference between cylinders was only 5 PSI. Not bad for a motor that hasn't done any hard pulls....yet.

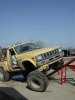
Next, I put on the ghetto plug extenders that I purchased from McMaster Carr a couple months ago. I knew those little standoffs were going to come in handy someday. With the plug torqued in the well, its top is 95.5mm from the top of the plug well. The Mustang boots were 85mm tall, so I needed a 10.5mm extension just to touch the plug, with another 10mm minimum for good electrode engagement, so I needed a 21mm minimum standoff. In a flash of brilliance two months ago, I bought two sizes of these standoffs, a 16mm and a 5mm. Screwed together, and mounted on top of the plugs, they yielded exactly the 21mm extension that I needed. Spooky when things work out like that......

Here's a pic showing my ghetto extensions:

IMG_1001Medium.jpg

And wrapped with tape to keep from arcing over, since part of the electrode is now exposed in the spark plug tube:

IMG_1010Medium.jpg

After this, I hooked up the MegaJolt Lite Jr. box and adjusted the map since I was starting with a Ford 4.6 motor's map, and it had way too much timing in the upper regions (46 degrees). Our 4 valve motors with pentroof chambers shouldn't require anywhere near that kind of advance (we rarely run over 35 with the Supras).

I really enjoy working with simple intuitive software like this. I'd never even cracked the manual for this thing, and just fired it up and waded into the map, and it was so simple to adjust. This is the way all software ought to be.

IMG_1017Medium.jpg

Cranked the motor without plugs but with the MJLJ controlling timing based on RPM and manifold vacuum, and watched the timing mark jump around, confirming everything was working.

Put the plugs back in and the leads fit fine this time and were well seated on my ghetto extenders. Next I asked Dan DaVinci to work his magic on the 750 double pumper, so he came around and adjusted the idle mix & jetting so that we had a 12.5 to 14:1 AFR.

Time to play Truth or Consequences. We fired the engine up and made a couple of quick power pulls to ensure everything was holding together and the motor was sealing OK, then we let 'er rip :yikes:
th_MVI_1019.jpg

This run produced 244 lb-ft of torque @ 3100 RPM and 211 BHP @ 4900 RPM, corrected to 29.92 in Hg & 60 degrees F. Not the most impressive power to be sure, but I think several factors are affecting this:

1) the carburetor by its nature is an intake restrictor, so some power is being lost across its venturis.

2) The supercharger manifold isn't the most efficient design for handling air AND fuel, and it certainly wasn't designed to have a carburetor sitting on top.

3) The stock exhaust manifold is a real POS.

Other than the forged Wiseco's, some fancy (but not oversize) stainless valves, SiBr guides and BeCu seats, and some head porting, the motor is essentially stock. I'm sure some cams would probably wake this puppy up.

Thought it interesting the torque peak has now dropped from the stock peak @ 4400 to 3100, and I can only attribute this to the SC manifold and carburetor, unless the head porting has worked in reverse ;-) But keep in mind, the purpose of this test and this setup was not to make power - it was only intended to break the motor in.

Here's the torque & HP curves (note we only measured from 3000 to 5000 RPM):
HPTorqueMedium.jpg

And the VE% and AFR curves:
VEAFRMedium.jpg

After this, I let the motor cool off, then pulled the Ford coilpacks off and put my Supra COP's back on and wired up the 2nd EDIS in parallel with the first. Surprisingly that whole operation only took an hour or so, then we fired it up again and did a couple more pulls. The COP's seemed to work just fine this time with the 2nd EDIS.

Plan for today is to put my original 390 CFM Holley back on and see if we can get it to run, as I'd intended to resell this carby once the session was finished, and if it doesn't run, then I'll just have to junk it.
 
John,

Good stuff.

Have you got the supercharger to bolt on the top while it's on the dyno?

Keep us informed.

Cheers
 
Sorry David, but Dennis needs his dyno back for Monday. He has 1-2 BBC's and a race motor that are waiting for me to get off.

Maybe when the SC goes on along with the EMS we can try them?

Andy, no I have to take the motor off, and bring it back home to put the SC, EFI and the EMS on. It's a lot of work, so it needs to be done slowly and methodically, and on my turf. Dennis has been great, letting me work out of his toolboxes, but it's just not the same as working in my own shop.
 
John,
At least you know it all works now and is all timed up correctly, looking forward to the next chapter of this build story.
 
David, I'm thinking in order to get the ignition working the way I want, there'll need to be some form of extension on these plugs, so yes, these insulating boots will probably be permanent. I don't know that I'll need the full 21mm extension in the final version though. I envision the coils sitting up on either flatbar or possibly finned extruded aluminum heat sinks that'll replace those flat plastic covers that say 4 Cam 32 Valve, etc. Some people think COP's are ugly; me, I think 8mm plug wires and dizzies are ugly. Different strokes.

Cheers Trev, yeah when that motor finally fired, Dennis & I both sorta froze and looked at each other like "WTF's that noise?!" After that, it was all good.

Andy, as David said, it's been quite a journey over the last week, but fortunately it's had a happy ending.

I know a number of people here probably thought I was off my rocker putting a carb and standalone ignition on this motor for breakin, but I'm very pleased with the way it's turned out. The last motor I built, we put a new turbocharger, new fuel system, new ignition system, new EMS, new WB AFR controller, and new fuel delivery system on it and tried to get all that new stuff to work together for the first crankup. It was like we had 6-7 individual musicians come together and formed a band and decided to do a concert without ever practicing. That last experience was a catastrophe that cost me an additional $3500 to $4000 and the motor never has been completely right since. This has cost less than half that, and the motor is now completely sorted and broken in, and it's been a great experience.

I think it's really important for that critical first firing to minimise the number of unknowns. I deviated from that with my hybrid COP EDIS ignition and it bit me, but the carb idea was solid. In hindsight, I should have gone with the full EDIS ignition with Ford coilpacks from the get-go, and tried the COP's later. Also, I tried to make the wiring and loom as tidy as possible for the dyno, and that was completely unnecessary. I should have left it all exposed to make it easier to troubleshoot and change. Live & learn.

Yesterday, I put my little 390 CFM Holley on and tried to get it to run. After turning out the idle screws 3-4 turns, it would finally idle OK, but it just wouldn't transition smoothly from the idle circuits into the mains. So after a couple of pulls we gave it up and it's going into the dumpster. Dan DaVinci's initial 5 minute diagnosis was spot on - it's a POS rebuild. Moral of that story, don't buy rebuilt carburetors from eBay, even if the seller does have over 1400 positive feedbacks and a 100% rating.

After pulling the motor off the dyno, Dennis & I had a little chat about the next step, and as much as I'd like to finish it, I've decided to let him mount & align the SC and build/mount the fuel injection system. Since I'm leaving soon to go back to work for a month, the motor will be finished when I get back, and we'll dyno again with the EDIS ignition system because that's working well. Once the SC and fuel injection are working OK, then we'll switch over to the permanent ignition system driven from the EMS and run it again.

Then it'll be time to build a permanent harness and install the motor in the car. Sound like a plan? Comments and ideas are welcome.
 
Let the seller know that you are dissatisfied with the carb and that you'd like to send it back to him for at least a partial refund. He might bite and you'd have a little money in your pocket.
 
Cleaning up the wiring on the ignition is just the engineer in you. I know I would have done the same and then cursed my OCD while I was trying to troubleshoot. It looks good all in all and with the limited number of people doing these it would be very difficult to get an EMS set up from someone else. Are you sticking with the AEM for engine control? This thread is great as their are very few that have documented things as you have.
 
John,

I have friends in Texas can write u a medical note so you dont have to go back to work in North Africa. That way you can finish your FI dyno...LOL....
 
Well, I found one reason the engine was down on power; I'd forgotten to connect the control wires (SAW and PIP) between the EDIS8's and the MJLJ. So I was running the whole time in limp mode with only 10 degrees advance!

When I was home last time (in September), I'd pulled an all nighter, trying to get this harness finished, and I remember thinking then I'd better connect those two signals, but I didn't have a 2 conductor WeatherPack kit, only a 4 conductor, and I'd already used one of those and didn't want to run the risk of getting them confused. So I just tucked the loose ends in my black plastic loom and promptly forgot about them

So the MJLJ "thought" it was controlling the timing, but it wasn't until I put an analog timing light on the motor yesterday that I realised the timing wasn't changing at all, and it proved to Dennis that you can't use a dialback type timing light on these DIS ignitions. We had seen the timing mark moving around when we used his timing light (which is the dialback type), but in reality, the circuits in the light were doing false calculations of the timing, which were made more false by the RPM changing. Another lesson learned.....

The two pics below show how I hacked up the harness to get the twin EDIS8's to work. Looks more like a house wiring nightmare than an engine harness. The loose conductor I'm holding is the SAW signal wire that was never connected. :twak:

David, I'm sorely tempted to take you up on your offer, but the Algerians might not think too highly about me calling in sick ;-) But do get those cams on their way to me, and I'll ask Dennis to put them in the motor and they'll be ready for next time.

Thermactor, thanks for the suggestion, but the seller already has his positive feedback from me, and I'm sure he'd think I've used it, am finished now, and just want my money back.

Benji & Chris, thanks and yes, stay tuned; the fun has just begun. We're really gonna rock next time (or break something trying) :fing02:
 

Attachments

  • MYTOY~2.jpg
    MYTOY~2.jpg
    100.4 KB · Views: 102
Throttle Body: I was originally thinking of just reusing the stock 1UZ TB, but it has a TRAC butterfly, which must be removed, plus it has no provision for an IACV, so this has to be mounted and plumbed separately, plus it's a bit undersized for a boosted application.

Andrew at Richwood suggested using a GM throttle body, which has provisions for an integral IACV.

So after searching around a bit, I bought an upgraded GM Vortec TB, which normally has a 75mm butterfly, but this one has been bored to accept a 78mm butterfly. It arrived today and I took a few measurements for comparison with the stock 1UZ TB.

First, here's a measurement of the stock 1UZ TB, upstream of the butterfly. It measures 76mm and a bit:

IMG_1075Medium.jpg

And here's behind the butterfly, measuring 70mm:

IMG_1076Medium.jpg

Here's the bored GM TB, measuring 87mm, upstream of the butterfly. That's 11mm (15%)larger in diameter than the stock inlet:

IMG_1077Medium.jpg

And behind the butterfly, measuring 77.5mm, which is 7.5mm, or 11% larger diameter than stock, but nearly a 23% increase in the square area of the bore:

IMG_1078Medium.jpg

Here's a side shot of the bored out GM TB, showing the (upper) flange for the IACV. A stepper motor type IACV mounts to this flange, so I'll be acquiring one of these in the next few days.

The lower flange is for the TPS, which is also on the shopping list.

Also note the hacked up inlet flange, courtesy of the PO, no doubt. (Note: these bored out TB's start out as used cores, not new cores, so I really can't b*tch too much.)

IMG_1079Medium.jpg

And here's a rear shot, showing the idle air passage in the upper left corner:

IMG_1080Medium.jpg

And a frontal shot, showing the idle air passage in the upper portion, just ahead of the butterfly:

IMG_1081Medium.jpg

These TB's are sold on eBay for $179 by an outfit called XtremeFI, and they seem to be a cost effective alternative to the aftermarket TB's offered by FAST and others for around double the price. I'll know how cost effective it really is in a few months.
 
Vacuum Actuator: Here's some pics of the vacuum actuator from the bypass valve for my SC. You put vacuum on the nipple, the rod pulls back, and opens the butterfly of the bypass and unloads the compressor when the throttle valve is closed and/or you're decelerating, or cruising under vacuum.

What I'd like to figure out now, is whether anyone has seen one of these with a nipple under the diaphragm as well as above it. That way you could stroke the actuator with boost pressure as well as with manifold vacuum (with some switching valves, etc.) And voila, then we'd have the supercharger "wastegate" we've been talking about.

Anyone seen one of these things with two ports on it? Above & below the diaphragm?
 
John,

I purchased a 90mm FAST t/b and yes they are a heap more expensive than the re-worked GM product.

I think 90mm is a bit big but Andrew was in favour of 100mm but the inlet into the Opcon isn't much over 80mm. !00's are hard to find and 90's are quite common on eBay or from Summit.

At least it won't be a restriction on airflow and yu get an integrated IAC which has great appeal.


Top